StepFile.com Help
How to open, view, model, measure, document and share a part, one page at a time. The same pages are in the viewer under Help.
No page matches that.
Popular with fabricators
Browse by topic
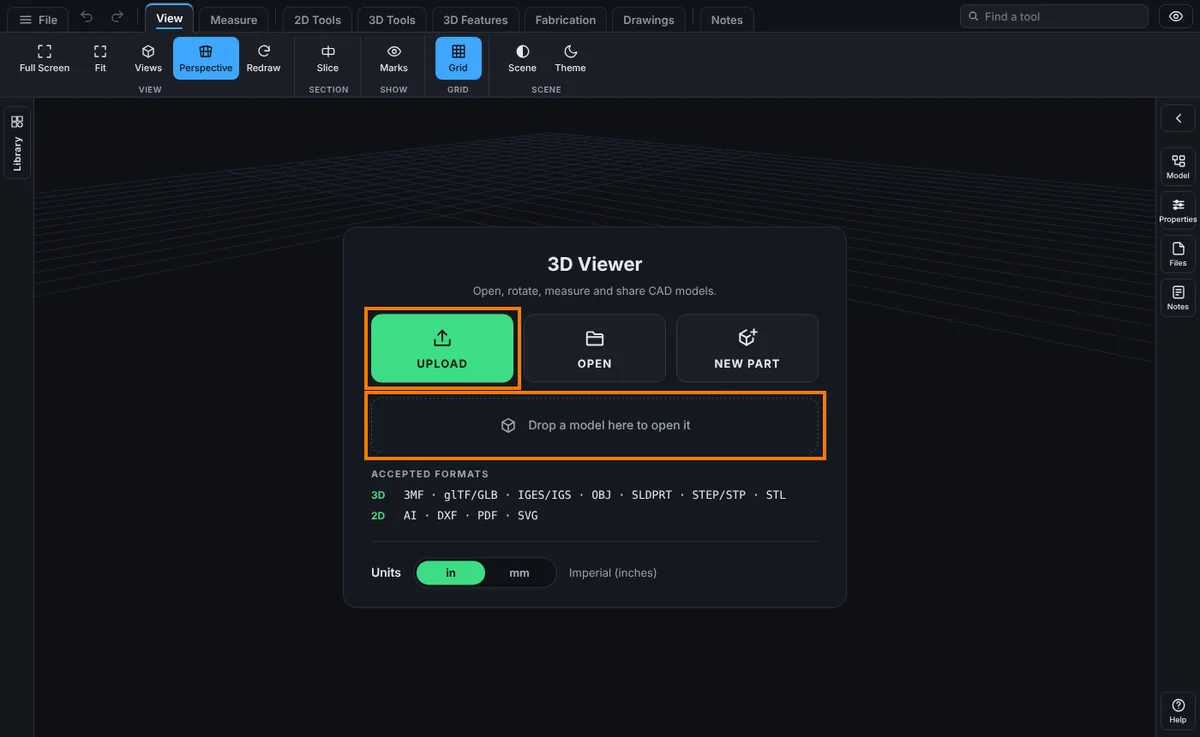 Getting StartedOpen a file, find your way around the screen, and set up the mouse.8 pages
 ViewingTurn, fit, slice and mark up a model; views, themes and units.11 pages
 MeasuringDistances, angles, mass and weight of a part.13 pages
 Notes and SharingNotes, comments, share links and the models shared with you.14 pages
 FilesSave, export, cut files, quotes, purchase orders and drawings.39 pages
 SketchingLines, shapes, dimensions, text and relations on a sketch.76 pagesRelationsRules that keep sketch parts where you put them.1 page
 FeaturesExtrude, cut, hole, fillet, sheet metal, cut lists and nesting.69 pages
 Model TreeHide, isolate, rename and give materials to parts and bodies.5 pagesMaterials and WeightPick a material and read the weight of a part.1 pageKeyboard ShortcutsThe keys that run the tools.1 pageUndo and RedoStep back and forward through your changes.1 pagePhone and TabletUsing the viewer on a touch screen.1 page
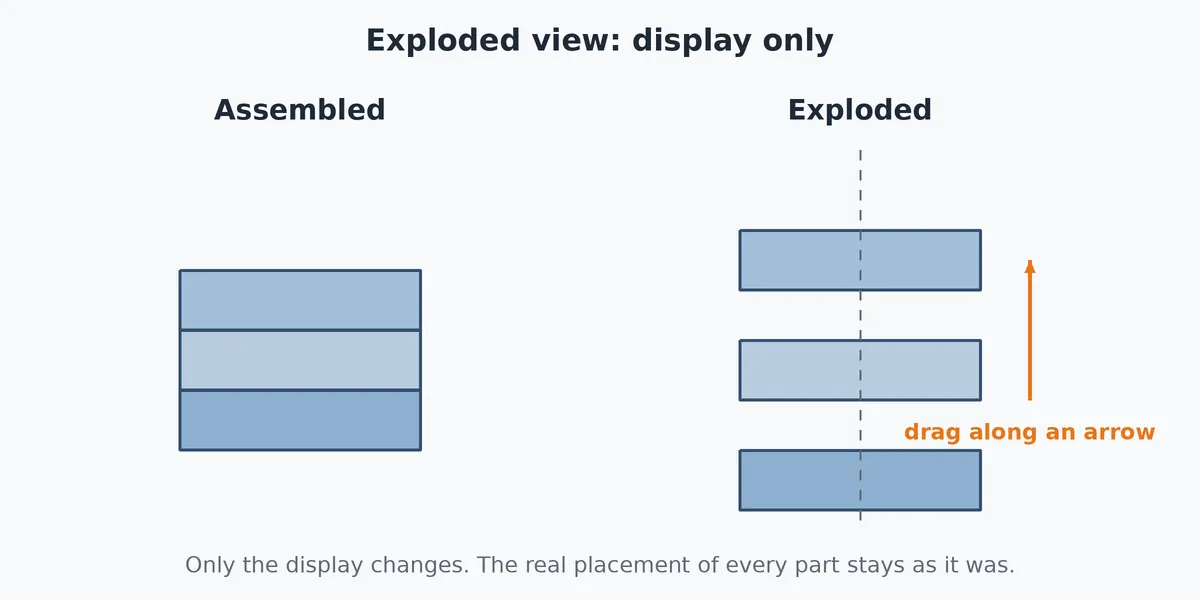 AssembliesPut parts together, patterns, exploded views and checks.28 pages
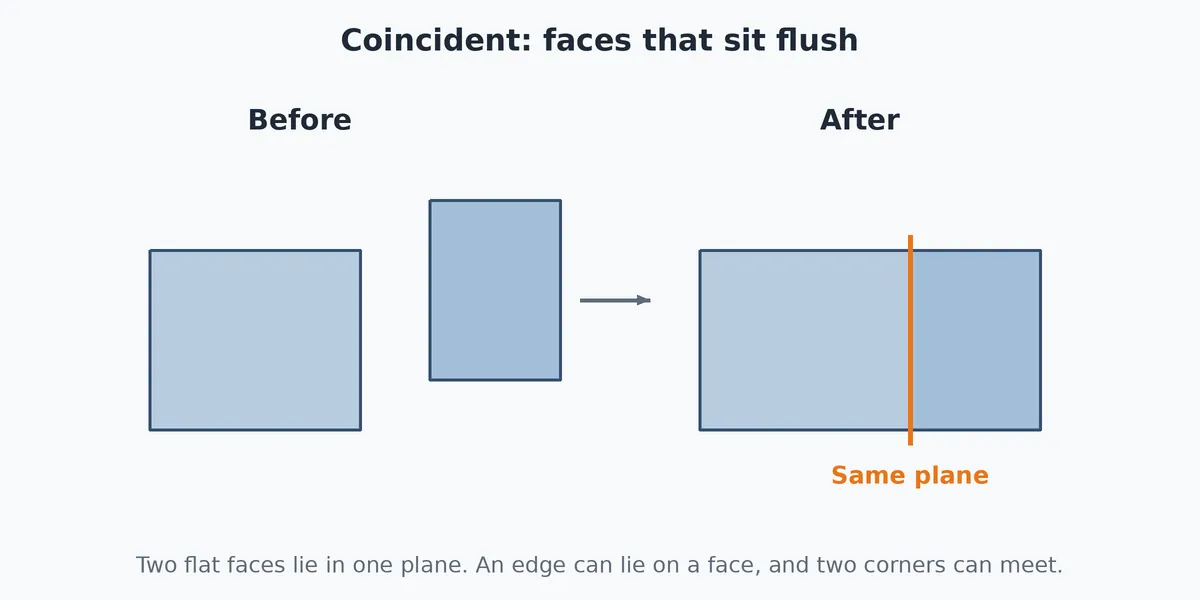 MatesFix parts to each other: coincident, distance, angle and more.26 pages
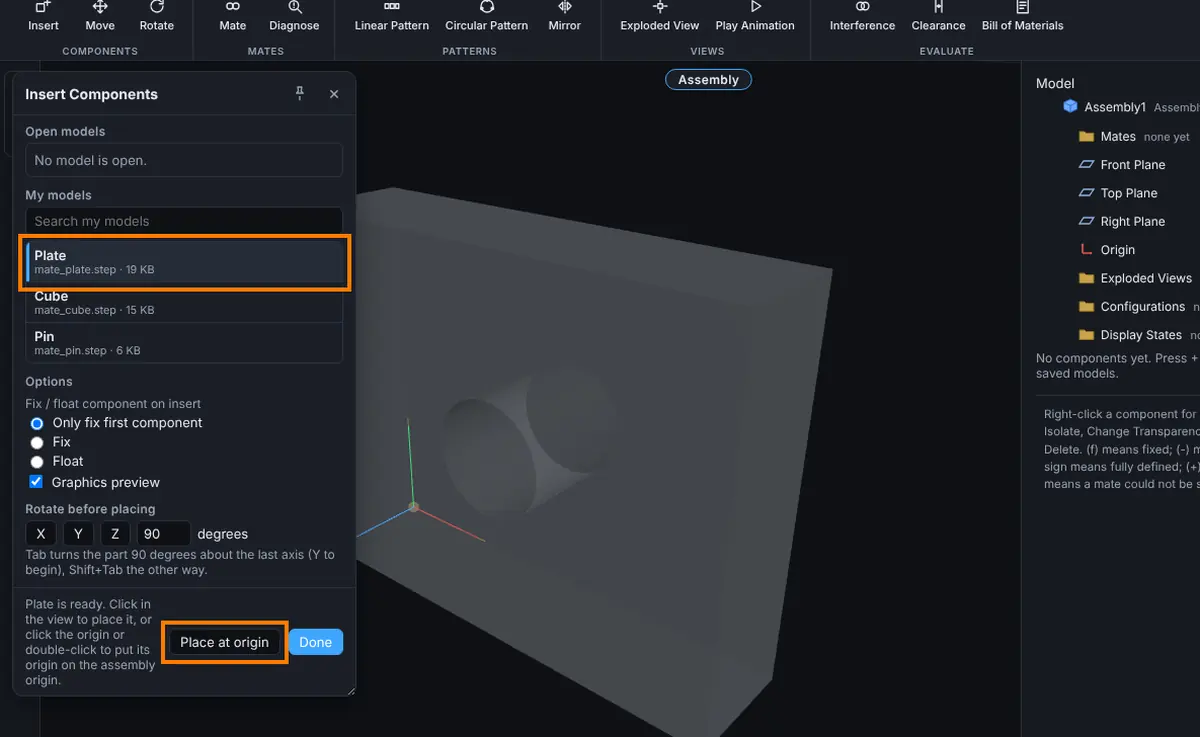 Assembly ToolsBill of materials, interference and the tools for a whole assembly.6 pages
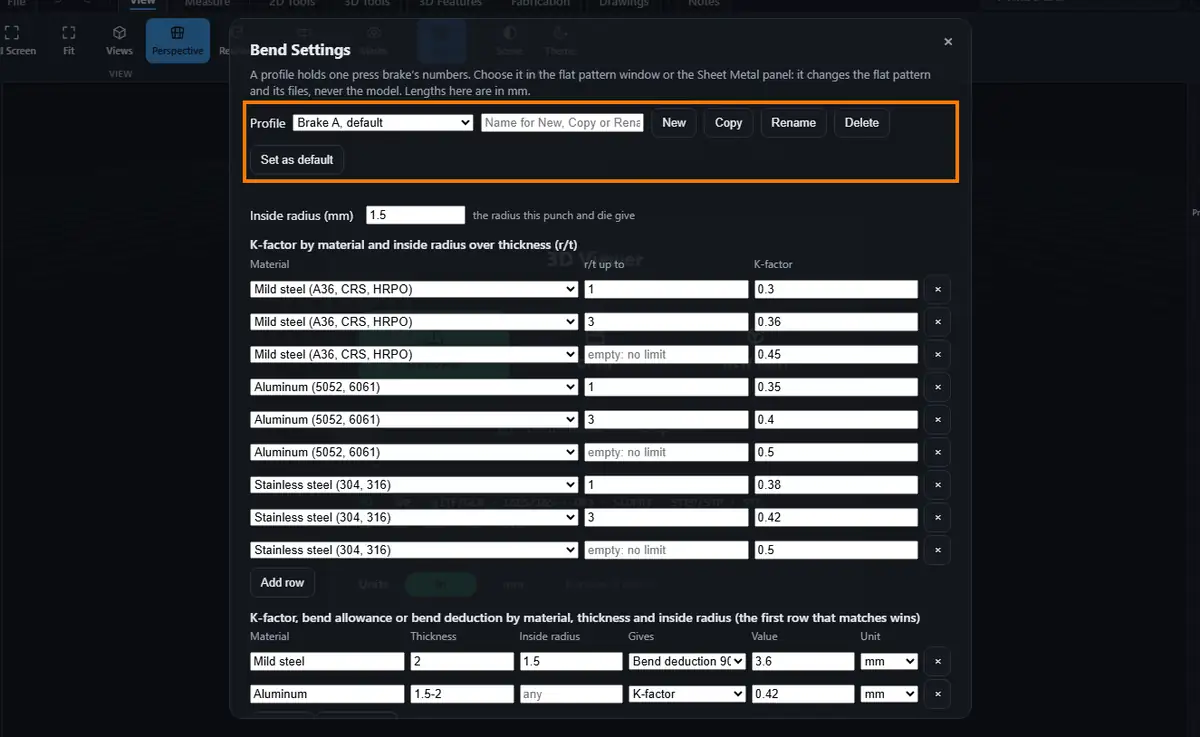 Your AccountYour plan, settings, connected apps and bend profiles.12 pagesPlans and BillingPlans, cards, changing plan and invoices.5 pagesAI AssistantConnect Claude, ChatGPT or another assistant to your account.2 pages
Getting Started
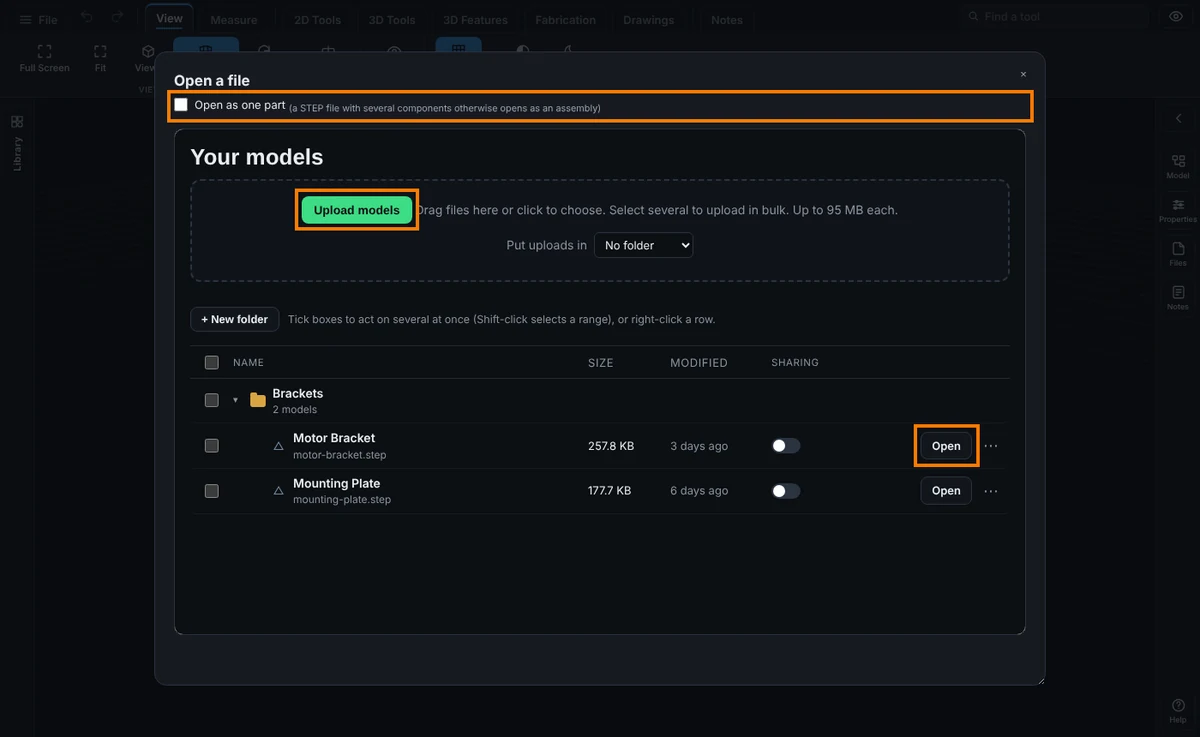
- Opening a FileSTEPFILE.com opens a model straight in the browser. No install, no plugin.
- Opening SolidWorks PartsSTEPFILE.com opens SolidWorks parts (.sldprt) straight in the browser.
- The ScreenA permanent row of tabs, in this order: View, Measure, Sketch, Features, Fabrication, and Documents.
- Using HelpHelp is a list of pages, one for each tool, window and button.
- Mouse, Touch, and 3D MouseHow to move the view with each kind of device. None of this changes the model.
- SettingsSettings holds the choices for the mouse, a 3D mouse, exploded view animation and the keyboard.
- The Toolbar TabsThe toolbar across the top of the viewer puts the tools in the order the job goes: look at the...
- Sample Model PagesSome pages on STEPFILE.com show a small sample part you can turn, zoom and measure, with no account...
Viewing
- Full Screen, Fit, and ViewsThe first group on the View tab of the ribbon holds five buttons that change how you look at the...
- Arrow Keys Turn the ViewThe four arrow keys turn the view without the mouse.
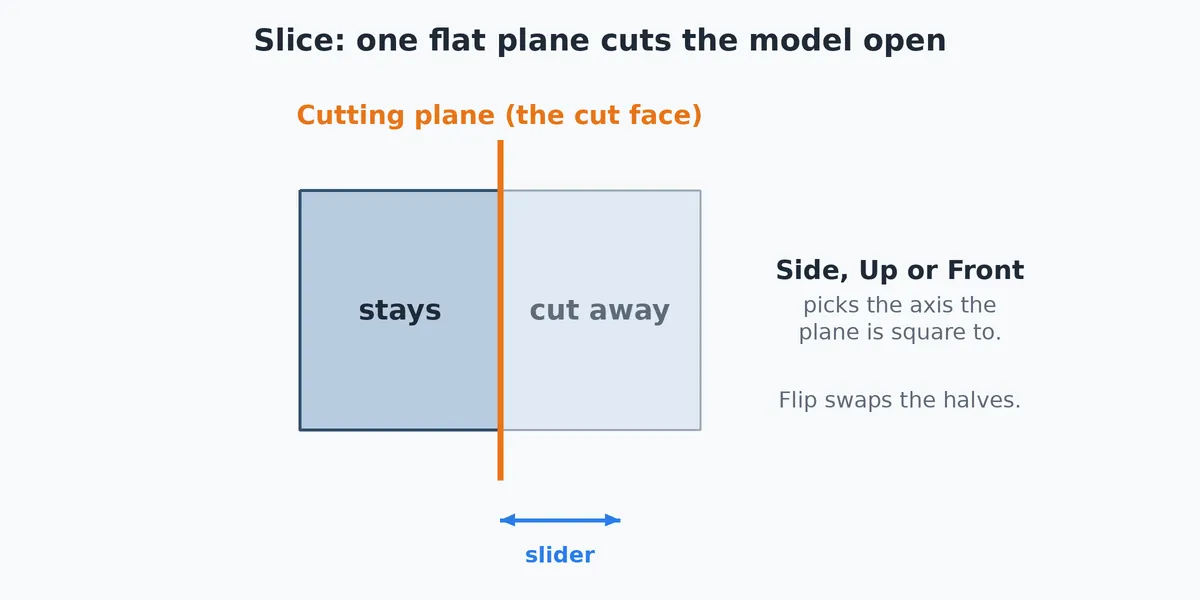
- SliceOn the View tab of the ribbon, the X-ray view button (older names: Section View, Slice).
- MarksMarks are the things you put on top of the model that are not part of the model: kept measurements...
- SceneScene is the look of the model: the background, the part color, how it is shaded and how its edges...
- Grid and RedrawTwo buttons on the View tab of the ribbon: Grid, in the Grid group, and Redraw, in the View group.
- The View Cube and Lock ViewThe cube at the top center of the 3D view shows which way you are looking.
- PerspectivePerspective switches between two ways of drawing the model.
- ThemeTheme sets whether the whole viewer, its ribbon, panels and 3D background, is light or dark.
- Units, Decimals, and Text SizeThe Display group on the Measure tab of the ribbon sets how every length is shown: in measurements,...
- Right-Click MenusRight-click on the 3D view for a short menu that depends on what is under the pointer.
Measuring
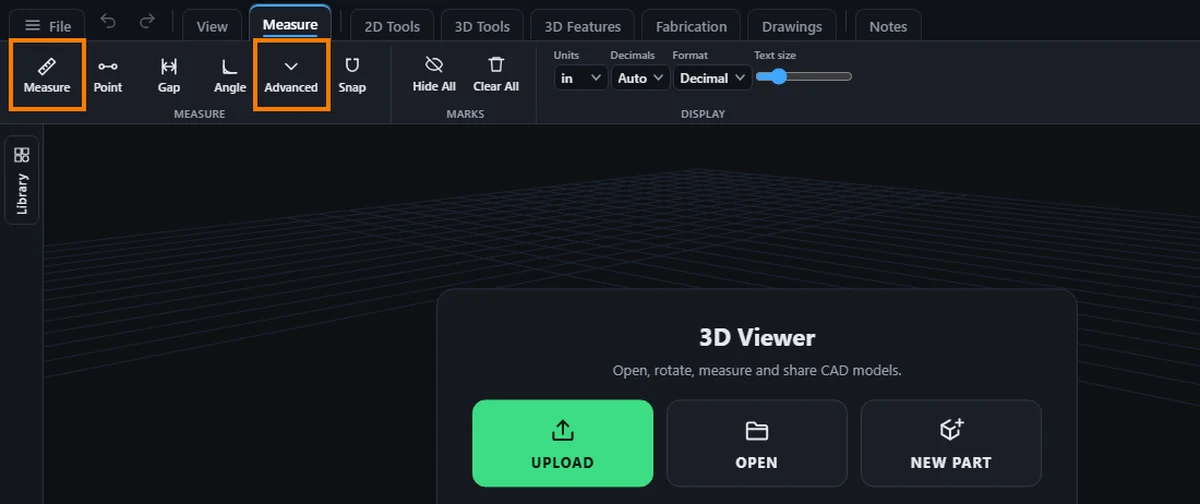
- MeasuringOn the Measure tab of the ribbon, a left-hand rail of tools measures the model without changing it.
- Measure PointPoint measures the straight-line distance between two spots you pick on the model.
- Measure GapGap measures the distance between two surfaces, like the thickness of a plate or the space between...
- Measure EdgeEdge gives the length of one edge with a single click. It does not change the model.
- Measure HoleHole Size reads the diameter of a round hole or any round edge.
- Measure AngleAngle measures the angle between two faces (or, on a flat drawing, two lines).
- Measure AreaArea gives the area of a flat face, a circle or, on a drawing, a closed outline.
- Measure VolumeVol gives the volume of the material in the model.
- Measure MassMass gives the weight of the model, worked out from its volume and its material.
- Mass PropertiesMass Properties opens the Mass Properties window: the mass, volume and surface area of the model,...
- Measure SnapSnap on the Measure tab chooses which exact points a Point pick jumps to. It is the measuring Snap.
- Kept MeasurementsEvery finished measurement stays on the model by itself, so you can take the next one without...
- Measure This FaceMeasure this face is a quick way to get the area of one flat face without going to the Measure tab.
Notes and Sharing
- Notes and SharingOpen it from the right rail (Notes) or the Documents tab of the ribbon (Notes). It has three tabs:
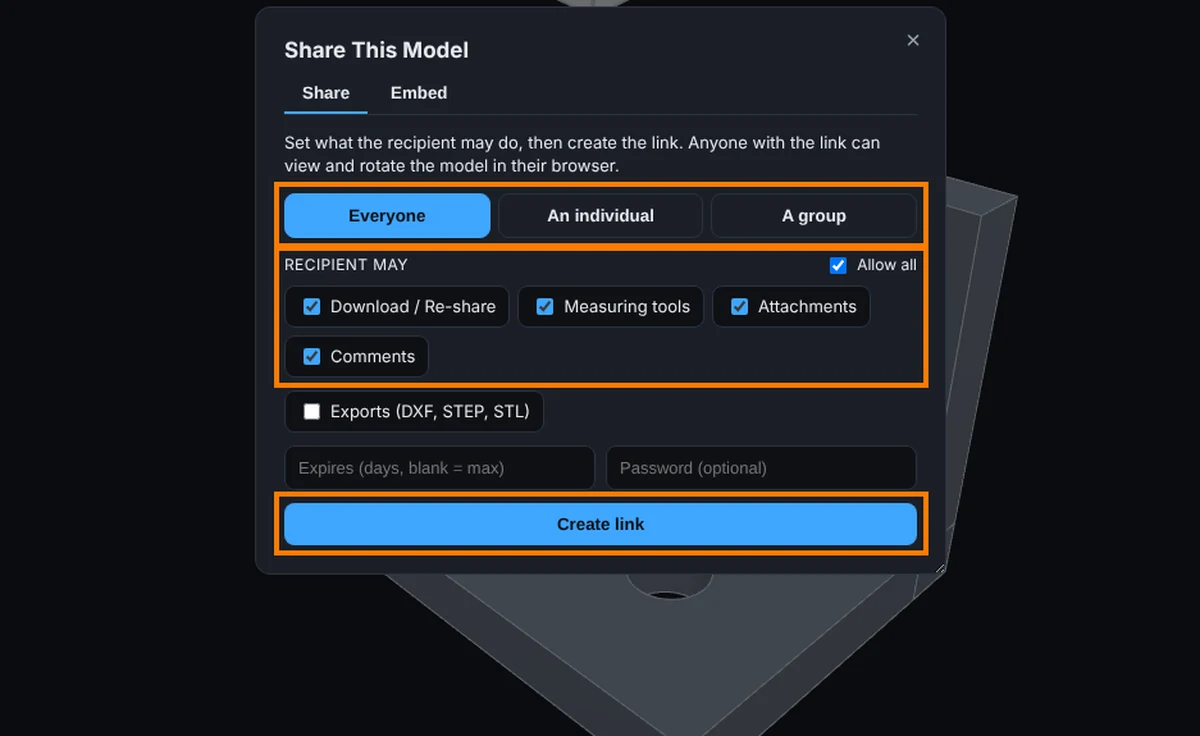
- Sharing a ModelSave the model first. Then click Share (or choose File, Share, Share this model).
- Sharing a FolderRight-click a folder in your list and choose Share.... You can also use the folder's sharing switch.
- Share This Model (Window)Click Share on the strip, or choose File, Share, Share this model. Save the model first.
- Share Expiry and PasswordTwo boxes in the Share window control how long a link lives and who can open it.
- Shared WithClick Share on a saved model and the menu shows Shared with: every live link for this model, one...
- Embedding a Model on Your WebsiteEmbedding is on Pro, Pro Plus and Pro Max.
- The Embed TabThe Embed tab of the Share window puts your model on your own website. Embedding is a Pro feature.
- Note (Pin a Note on the Model)Note drops a text note on an exact spot of the model.
- DiscussionDiscussion is one shared thread for a model.
- Copy Face InfoCopy face info copies a short line of text about a face (the part name, the face size and the area)...
- Private NotesPrivate notes are a block of text saved with your model that only you can read.
- Models Shared With YouWhen someone shares a model with you, you can look at it for free on any plan.
- The Embedded Player (What Visitors See)The embedded player is the small 3D view that shows on your own website after you publish a model...
Files
- FilesWhile you model, your edits autosave into the current version about every 2.5 seconds whenever...
- Tabs: Several Files at OncePaid plans (Advanced and Pro) can keep several files open together, each in its own tab.
- File, OpenFile, Open is the one door for getting a model into the viewer. It opens the Open a file window.
- File, SaveFile, Save saves your work into the model you have open, in your account.
- File, Upload a new versionFile, Versions, Upload a new version replaces a saved model's geometry with a new file and keeps...
- File, VersionsThe Versions submenu in the File menu shows every version of the model you have open, and lets you...
- File, Approvals and RevisionsThe status chip at the top of the screen, beside the save state, tells you where a saved model...
- File, RecentFile, Recent lists the models you opened lately so you can open one again in one click.
- File, CloseFile, Close closes the model you are looking at and returns to the start screen.
- File, New PartFile, New, Part starts a part from nothing.
- File, Create New VersionCreate new version (keep the old one) saves your modeling as a new numbered version of the model...
- File, Download Edited STEPDownload edited STEP gives you a STEP file of the part as you have modeled it, saved on your own...
- File, Export, HistoryHistory (File, Export, History) saves the steps you modeled as a zip file on your own computer: the...
- File, Download All My RecordsSaves everything you keep on the business side of StepFile.com as one zip file on your own...
- File, Discard All ChangesDiscard all changes ends your modeling session and throws away the edits you made, so the model...
- Exporting Parts, Faces and FilesSave a face, one part, or the whole model as a file you can take to another program: DXF for a flat...
- Export This Face as DXFTurns one flat face of the model into a 2D DXF file a shop can cut from.
- Shop Bend TableYour shop's own bend numbers for the flat pattern.
- Export This Part as STEPSaves one part of the model as its own STEP solid.
- Export This Part as STLSaves the model, or one part of it, as an STL mesh for 3D printing or other programs.
- Export as IGESSaves the whole part as one IGES file (.igs) with its exact surfaces, for CAD and CAM programs,...
- Make Drawing (Views, Sections and Center Marks)Puts the part on a drawing sheet: a border, a title block you fill in, and the three standard views...
- Make Drawing: Detail, Auxiliary and Broken ViewsThree more views for a drawing made with Make Drawing (on the Documents tab): a detail view (a...
- Drawing Notes, Balloons and Parts TableMake Drawing can put notes, balloons and a parts table on the sheet.
- Drawing Weld SymbolsMake Drawing can put weld symbols on the sheet, drawn the AWS way: an arrow to the edge to be...
- Drawing Surface Finish and GD&T SymbolsMake Drawing can put surface finish symbols and GD&T tolerance frames on the sheet.
- Make Drawing: Save as PDF and Projected ViewTwo more things in the window that Make Drawing (on the Documents tab) opens: Save as PDF saves the...
- Make Drawing: Model ItemsModel items in the Make Drawing window puts the part's own sizes on the drawing for you: the...
- Make Drawing: Move and Resize the ViewsIn the Make Drawing window each view sits on the sheet by itself.
- Make Drawing: Add a DimensionAdd a dimension in the Make Drawing window puts a size on the drawing where you want it: click two...
- Export Faces as DXFSaves several flat faces of the part in one DXF file.
- Export Cut FilesMakes the cut files a shop needs for every flat part of the model or assembly, in one ZIP.
- File, Download FileFile, Download saves the model's file to your computer.
- The Save Status Word (Saved, Saving, Not saved)A small word in the top strip, just to the right of Undo and Redo, tells you whether your modeling...
- File, PropertiesKeeps a list of your own properties on the part, such as Customer, Job number, Finish, Ship date or...
- File, QuoteTurns a part into a price for a customer.
- File, Purchase OrdersTurns what a job needs into purchase orders, one for each supplier, ready to print, email and tick...
- Save a Bill of Materials or Cut List as PDF or ExcelSaves the bill of materials of an assembly or the cut list of a part as a PDF, or sends it to a...
- File, DocumentsShows everything you have made from one saved model in a single list: its quotes and purchase...
Sketching
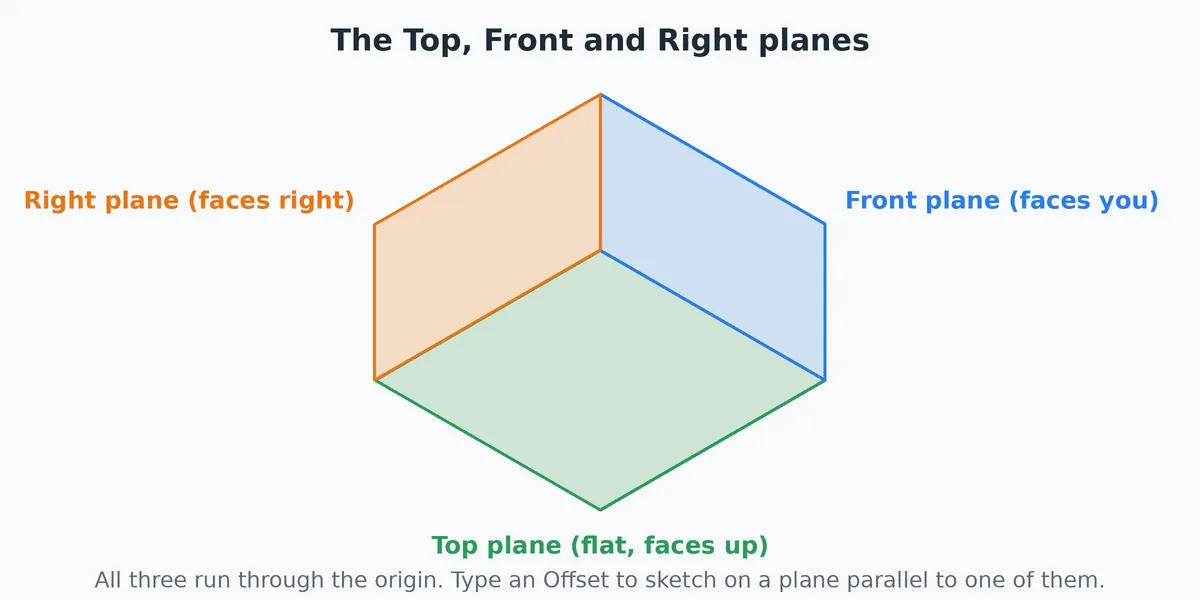
- Planes and FacesA sketch starts on one of three planes through the origin, or on a flat face of the model.
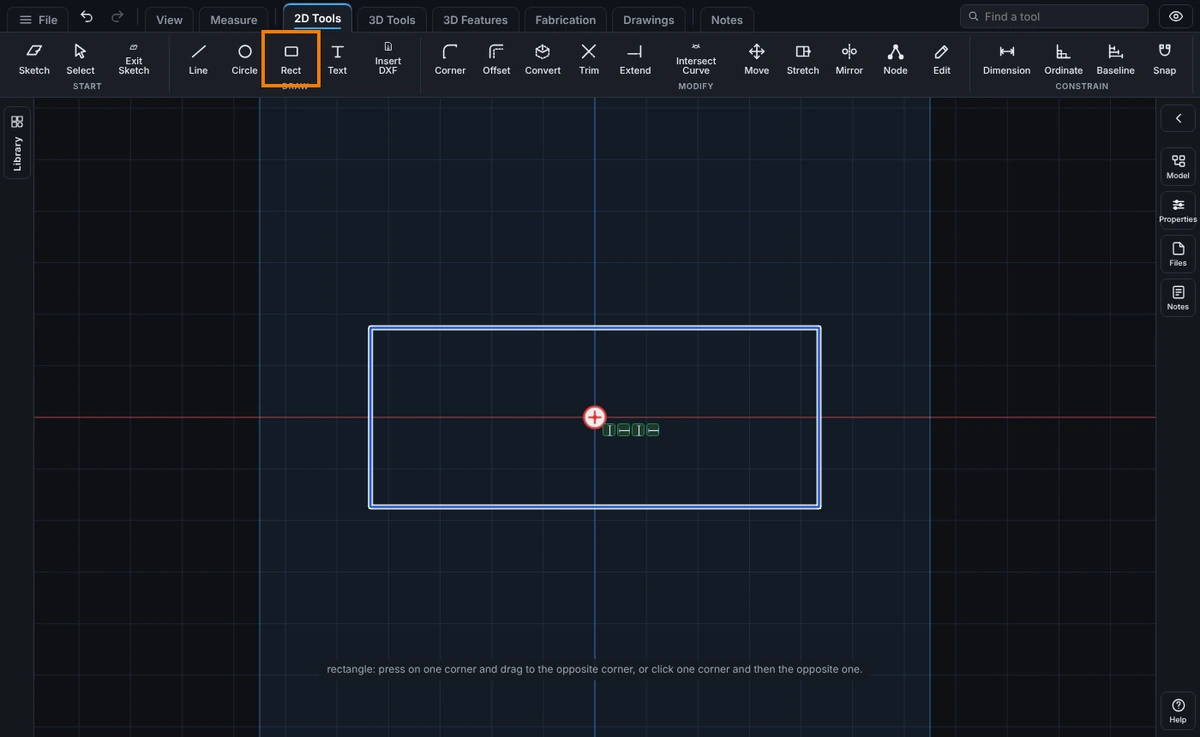
- Line, Circle, Rectangle, Arc, and ConstructionAll on the Sketch tab, once a sketch is open.
- Midpoint LineDraws a straight line from its middle outward.
- Centerpoint ArcDraws an arc around a center you click. You click the center, then the start (which sets the...
- Tangent ArcDraws an arc that starts at the end of a line or an arc and leaves it smoothly, with no kink.
- PointPlaces a point in the sketch. A point is a marker only: it is construction geometry, so it never...
- Perimeter CircleDraws the circle that passes through three points you click.
- PolygonDraws a regular polygon with 3 to 40 equal sides, sized by a circle.
- Center RectangleDraws a rectangle outward from its center.
- 3 Point Corner RectangleDraws a rectangle at any angle. You click two corners for the first side, then click once more to...
- 3 Point Center RectangleDraws a rectangle at any angle, from its center.
- Straight SlotDraws a slot: two straight sides joined by a half circle at each end.
- Arc SlotDraws a slot that follows an arc: a curved outer side and a curved inner side, joined by a half...
- EllipseDraws a whole ellipse. You click the center, the end of the major axis, then a point that sets the...
- Partial EllipseDraws part of an ellipse, like an arc of a circle.
- ParabolaDraws a piece of a parabola. You click the focus, the apex, then the two ends of the piece.
- SplineDraws a smooth curve through points you click.
- ParallelogramDraws a four sided shape whose opposite sides are parallel, with no right angle needed.
- Power TrimPress and drag across sketch pieces to cut each one away at its crossings.
- Trim to ClosestClick a piece and the stretch you clicked goes: from the nearest crossing on one side to the...
- ExtendClick near the end of a line or an arc and that end runs on, along the same line or the same...
- Sketch TextClick a point in a sketch, type some words, and they become closed outlines in the sketch.
- Sketch Text WalkthroughA step by step example of Sketch Text: raised letters on a plate, then the same letters cut through...
- Move, Rotate and ScaleMove, turn or resize pieces of the sketch by a typed amount.
- Copy Sketch PiecesMake copies of pieces of the sketch while the originals stay where they are.
- Circular Sketch PatternRepeats pieces of a sketch around a point of the sketch: a ring of holes, a set of slots, or spokes.
- StretchMake part of a sketch longer, wider or shorter in one go.
- Insert DXFBring a DXF drawing into the sketch you are working in.
- Offset EntitiesMakes a copy of sketch pieces a set distance away, like the line you would draw along the outside...
- Convert EntitiesBrings the edges of the part into the sketch.
- Intersection CurveMakes sketch curves where the sketch plane cuts the part.
- Sketch FilletRounds a corner in the sketch. Where two lines, a line and an arc, or two arcs meet, the corner is...
- Sketch ChamferCuts a corner in the sketch with a straight line.
- Sketch Corner and Sketch MirrorBoth are on the Sketch tab and both work on the flat 2D sketch, not on the solid part.
- Smart DimensionSmart Dimension puts a size on the sketch and keeps it true.
- Radius and DiameterA circle can be sized by its diameter or by its radius. Use whichever your drawing calls for.
- Angle DimensionsThere are three ways to put an angle on a sketch. Pick two lines for the angle between them.
- Reference DimensionsA reference dimension shows a size in the sketch without controlling it.
- Ordinate DimensionsMeasure many points from one point. An ordinate dimension is the distance across, or up, from a...
- Baseline DimensionsMeasure many points from one baseline, with the dimensions stacked neatly one above the next.
- EquationsAn equation makes one dimension follow others.
- Equations WalkthroughA step by step example of making one dimension follow another, from the first number to the...
- Global VariablesA global variable is a named value that belongs to the whole part, not to one sketch.
- Design TableA design table is a table of configurations for one part, such as Small, Medium and Large.
- Dimensions and UnitsA dimension is a size you type that the sketch then keeps true.
- SelectSelect is the sketch's pointer. Use it to pick pieces and points, move them, delete them, group...
- NodeNode edits individual points. Drag a point to move it, click a straight side to add a point there,...
- Mirror EntitiesMirror Entities flips sketch pieces over a line.
- Dynamic MirrorDynamic Mirror draws the other half for you.
- Snap OptionsSnap makes the pointer jump to useful places while you draw or drag: ends, middles, centers,...
- Edit MenuThe Edit button on the Sketch tab opens a panel of undo, delete and clear commands, the list of...
- PropertiesProperties shows what is selected in the sketch: its name, its sizes, its position and the...
- Exit SketchExit Sketch finishes the sketch you are in without making a feature.
- Horizontal RelationThe Horizontal relation keeps a line level, running straight across the screen.
- Vertical RelationThe Vertical relation keeps a line upright, running straight up and down the screen.
- Parallel RelationThe Parallel relation makes two or more lines run the same direction, so they stay parallel as the...
- Perpendicular RelationThe Perpendicular relation makes two lines meet at a right angle, and keeps them that way as the...
- Collinear RelationThe Collinear relation puts two or more lines on the same infinite line, so they stay lined up end...
- Equal RelationThe Equal relation makes two or more lines the same length, or two or more circles and arcs the...
- Concentric RelationThe Concentric relation gives two or more circles or arcs the same center, and keeps them that way.
- Tangent RelationThe Tangent relation makes a line and a circle or arc, or two circles or arcs, just touch with no...
- Coincident RelationThe Coincident relation makes two pieces meet at their ends, or makes points sit exactly on top of...
- Horizontal Points RelationPicked on points, the Horizontal relation puts two or more points at the same height, side by side...
- Vertical Points RelationPicked on points, the Vertical relation puts two or more points straight above one another on the...
- Point on Line RelationPicked on a point and a line, the Coincident relation puts the point on the line and keeps it there.
- Midpoint RelationThe Midpoint relation holds a point at the exact middle of a line, and keeps it there when the line...
- Point on Circle RelationPicked on a point and a circle or arc, the Coincident relation puts the point on the edge of the...
- Symmetric Points RelationPicked on two points and a line, the Symmetric relation makes the points mirror images of each...
- Symmetric RelationThe Symmetric relation makes two lines, circles or arcs mirror images of each other across a...
- Symmetric Between Lines RelationPicked on three straight lines, two of them parallel, the Symmetric relation holds the third line...
- Fix / Unfix RelationFix pins a piece or a point exactly where it is now, so it never moves. Unfix lets it go again.
- Coradial RelationThe Coradial relation puts two circles or arcs on the same center with the same radius, so they lie...
- Intersection RelationThe Intersection relation puts a point exactly where two pieces cross, and keeps it there as they...
- Merge RelationThe Merge relation makes two points one point: the second point moves onto the first, and from then...
- Pierce RelationThe Pierce relation holds a sketch point at the place where an edge of the part, or a reference...
- Construction GeometryConstruction geometry is a guide line, circle, arc or rectangle that helps you build the sketch but...
Relations
- RelationsA relation ties two sketch pieces (or points on them) together so they stay that way as the sketch...
Features
- Extrude and CutExtrude and Cut are both on the Features tab.
- Up To NextAn end condition for Extrude and Cut. Instead of typing a depth, you tell the feature to stop at...
- Up To Next WalkthroughA step by step example of Up To Next: two plates with a gap between them, and a block that fills...
- Up To SurfaceAn end condition for Extrude and Cut. Click a face, and the feature ends on it, as if that face...
- Up To Surface WalkthroughA step by step example of Up To Surface: a block that ends on a face you click, stops short of it...
- Direction 2An option for Extrude and Cut. It adds a second direction, opposite to the first, with its own end...
- Direction 2 WalkthroughA step by step example of Direction 2: a block that grows 1 in up from the sketch and runs down to...
- Thin FeatureAn option for Extrude and Cut. It makes a wall of a set thickness from a profile, instead of a...
- Thin Feature WalkthroughA step by step example of Thin Feature: a bent wall made from two drawn lines, then a box made from...
- Flip side to cutAn option for Cut only. A normal Cut removes the material inside the profile.
- Flip side to cut WalkthroughA step by step example of Flip side to cut: a square bar turned into a round post by one cut.
- Up To Vertex and Up To BodyTwo more end conditions for Extrude and Cut.
- Offset From SurfaceAn end condition for Extrude and Cut. Click a face, type a distance, and the feature ends that far...
- RevolveRevolve turns a closed profile around a line in the same sketch and makes a round solid from it: a...
- BoundaryBoundary makes a solid from two or more closed shapes, each drawn in its own sketch on its own...
- SweepSweep moves a profile along a path to make a solid.
- Swept CutSwept Cut takes material away along a path.
- 3D SketchA 3D sketch is a run of straight lines through points anywhere in space.
- Cut ListLists the bars of a welded frame the way a fabricator needs them: how many of each, what profile,...
- Tube CopingMake the cut of every tube end of a frame: a wrap-around template you print at true size and wrap...
- NestLays the flat parts of your model out on sheets of plate or sheet metal, so you know how many...
- Bend SheetMakes the press brake bend sheet for each bent sheet metal part: the order to bend in and, for each...
- Cut Paths and G-CodeTurns the sheets of your Nest into cut paths for a plasma or laser table: a G-code program for...
- Customer Drawings (DXF)Nest the DXF files your customers send you, with no 3D model.
- LoftLoft blends two or more closed shapes into one smooth solid.
- Lofted CutLofted Cut takes material away in the shape of a loft.
- Round and Chamfer (Edges)On the Features tab, Round works on the solid part's own edges (compare Sketch Corner, on the...
- ShellShell hollows a solid out and leaves a wall of the thickness you choose.
- HoleHole drills holes sized for a screw or a pipe thread.
- Cosmetic ThreadCosmetic Thread draws a thread symbol on a round edge and records its callout, such as 1/4-20 UNC.
- Modeled ThreadModeled Thread cuts a real helical thread into a round face of the part: on the outside of a shaft,...
- PatternRepeats sketch pieces or a feature in a row, a grid, or around an axis: linear and circular...
- Pattern at Sketch Points and Fill PatternTwo more ways to repeat a feature with Pattern: put a copy at every point of a sketch, or fill a...
- Pattern from a TableA third way to repeat a feature with Pattern, beside a row and a circle: type where each copy goes.
- Mirror (Bodies)Mirrors whole solid bodies, or chosen features, across a plane.
- Reference GeometryMakes planes and axes that are not part of the model, to sketch on or to use as a guide.
- Reference Geometry WalkthroughA step by step example: a plane at 30 degrees along the edge of a plate, a sketch on that plane, a...
- Reference Points and Coordinate SystemsReference Geometry can also make a Point and a Coordinate System.
- ScaleScale makes bodies larger or smaller. By default every dimension changes by the same factor, and...
- CombineJoins bodies into one, takes bodies away from another, or keeps only the material bodies share.
- SplitCuts bodies with a plane into separate bodies and keeps every piece.
- IntersectKeeps only the material that lies inside a region and removes the rest.
- Move/Copy BodiesMoves whole solid bodies, or makes copies of them, by a typed distance, from one picked point to...
- Parts LibraryStandard stock you can drop straight into your part: square and rectangular tube, round tube,...
- My Profiles in the Parts LibraryAdd your own profiles to the Parts Library, beside the shapes that come with it: a rectangular tube...
- DraftDraft tilts faces of a part by a small angle.
- RibRib builds a thin web or gusset from a line you draw.
- DomeDome puts a rounded cap on a flat face of the part, like the top of a button, a knob or a rivet...
- WrapWrap lays a sketch round a round face of the part, the way a label goes round a can.
- Direct EditDirect Edit changes a solid by its faces, with no sketch and no feature to edit.
- GussetGusset puts a flat plate across the inside corner where two flat faces meet, like the brace between...
- End CapEnd Cap closes the open end of a tube or pipe with a flat plate.
- Weld BeadWeld Bead puts a fillet weld in the inside corner where two flat faces meet, like the weld where a...
- Trim/ExtendTrim/Extend cuts a structural member back, or runs it on, so its end meets another face or body,...
- IndentIndent presses one body (the tool) into another body (the target).
- Half-LapWhere two bodies cross, Half-Lap cuts a notch in each one so they slot together: square or...
- Tab and SlotTab and Slot joins two parts that meet at a square corner: the edge of a plate, or the end of a...
- Structural MemberStructural Member builds a welded frame from a sketch.
- Sheet MetalSheet Metal makes bent sheet parts the way a press brake shop thinks about them: a flat sheet of...
- Sheet Metal Unfold and FoldUnfold lays bends of a sheet metal part flat, as a step in History, so you can sketch cuts and...
- Reference PlanesAn offset plane is a plane parallel to Top, Front, Right or a flat face, at a distance you type.
- Model PanelThe Model panel is the list of your part: its bodies, the three planes, the origin and every step...
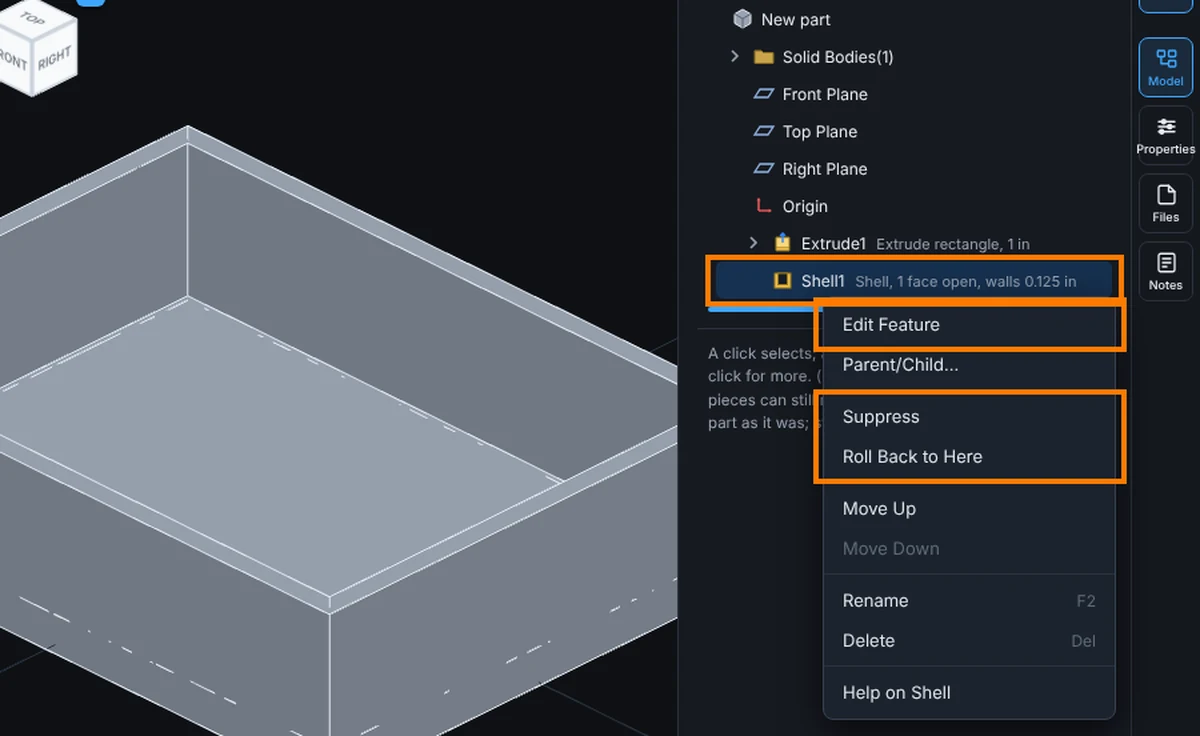
- Model Tree: Edit Feature and Edit SketchEdit Feature reopens a step you already made so you can change its numbers, without picking the...
- Model Tree: Suppress, Roll Back and ReorderRight-click a step in the Model panel to turn it off for a while, see the part as it was earlier,...
- Model Tree: Planes, Origin and SketchesThe Model panel shows the three planes through the origin, the origin itself, the sketch behind...
- Model Tree: Solid BodiesSolid Bodies in the Model panel lists every body of the part. A body is one solid piece.
- Model Tree: MaterialMaterial... gives one body its own material, so the weight you read in Mass is right even when a...
- Assemblies: The Component MenuRight-click a component in the Model panel to work on it.
- Mate ReferencesA Mate Reference marks the faces, edges or points of a part that it is usually mated by, and gives...
Model Tree
- Model TreeOpen it from the right rail (Model). It lists every plane, sketch, and feature step in build order,...
- Parent/ChildParent/Child shows what a step in the History is built on (its parents) and what is built on it...
- Part ConfigurationsA configuration is a named state of the part you are modeling, such as Short and Long, or With...
- Model Tree: Hide and Isolate PartsOpen the Model tree from the right rail and open Solid Bodies. Each part has a row.
- Model Tree: RenameRename a body, a feature step or a sketch right in its row.
Materials and Weight
- Materials and WeightWeight comes from the volume of each body and the density of its material.
Keyboard Shortcuts
- Keyboard ShortcutsOne key per tool, as CAD programs do. Every key is listed below and can be changed.
Undo and Redo
- Undo and RedoUndo and Redo sit beside File on the ribbon, available from any tab, not only while modeling.
Phone and Tablet
- Phone and TabletSTEPFILE.com runs in the browser on a phone or tablet. Every tool is there.
Assemblies
- Assemblies: Start and Insert PartsAn assembly puts several saved models together in one scene.
- Assemblies: The Tree and Moving PartsThe Model tree lists every part of the assembly and shows what its mates still leave free.
- Assemblies: Saving, Updates and SharingAn assembly points at your saved models, so it needs to be saved to your account to keep.
- Assemblies: Subassemblies and PatternsAn assembly can hold other saved assemblies.
- Assemblies: Exploded ViewsAn exploded view spreads the parts apart so you can see how they fit.
- Animation ControllerThe Animation Controller plays an exploded view as one smooth animation.
- Animation SettingsAnimation Settings chooses how an exploded view plays in the Animation Controller: which part turns...
- Section: Components Not to CutWith an assembly open, Slice cuts every component with one flat plane.
- Animate Explode and CollapseAnimate Explode and Animate Collapse play the steps of an exploded view as a moving picture: the...
- Play Animation: Choose a ViewPlay Animation on the Features tab plays an exploded view in the Animation Controller.
- Assemblies: Bill of Materials and ChecksOn the Features tab, these tools sit in the Evaluate group while an assembly is open.
- Assemblies: Edit Part, New Part and ReplaceRight-click a component and choose Assembly tools, Edit Part, or click Edit Part on the Assembly...
- Assemblies: STEP AssembliesA STEP file with several components opens with its own tree, with names like Name<1> and Name<2>.
- Export VideoExport Video makes an MP4 video of an exploded view's animation, right in your browser.
- New Assembly and Make Assembly from This ModelThese two items under File, New start an assembly. New Assembly begins with nothing in it.
- Linear Component PatternMakes copies of one or more components in a straight line, or in a grid, with an even gap between...
- Circular Component PatternMakes copies of one or more components around an axis, like bolts on a bolt circle or spokes on a...
- Assembly ConfigurationsA configuration is a named state of the open assembly.
- Assembly Display StatesA display state is a named look of the open assembly.
- SubassembliesA subassembly is a saved assembly used as one component inside another assembly.
- Edit Part (Edit Component)Opens one component of the assembly in the modeling tools, right where it sits, so you can change...
- New Part in AssemblyMakes a brand new part while you're inside an assembly, placed on a plane or a flat face you choose.
- Replace ComponentsSwaps one part in the assembly for a different saved model, keeping the place it sits.
- Export Assembly as STEPWrites the whole assembly as one STEP file that keeps the structure: every part is a component with...
- Used PartsLists every saved model your assembly depends on, once each, with its version, its state and how...
- Mirror ComponentsPlaces mirrored copies of components on the other side of a plane, like a left hand bracket made...
- Assembly CutCuts one profile, a rectangle, a circle or a polygon on a sketch plane, through the components you...
- Isolate and Show All ComponentsIsolate hides every other component so you can look at one part.
Mates
- Mates: Standard MatesMates tie components together so they stay put.
- Mates: Advanced MatesOpen the Advanced tab of the Mate window. The tab has five mates. Click a name for its own page.
- Mates: Mechanical MatesThe Mechanical tab of the Mate window holds mates that act like a machine part: Hinge, Slot, Gear,...
- Mates: Fixing Mate ProblemsAll mates live in the Mates folder of the tree. Right-click one for:
- Coincident MateMakes two entities touch or line up. It is the mate you will use most: flat faces that sit flush,...
- Parallel MateKeeps two entities parallel without making them touch. The parts can still slide along each other.
- Perpendicular MateKeeps two entities at a right angle (90 degrees) to each other.
- Tangent MateKeeps a round face touching a flat face or another round face along a line, the way a roller sits...
- Concentric MatePuts two round things on one shared center line.
- Distance MateKeeps two entities a set distance apart.
- Angle MateKeeps a set angle, in degrees, between two entities.
- Lock MateHolds two components together as one. They keep the position and turn they have to each other at...
- Width MateCenters a tab between the two faces of a slot.
- Symmetric MateMakes two entities mirror images of each other across a plane.
- Profile Center MateLines up the centers of the outer outlines of two flat faces and makes the faces touch.
- Distance Limit MateLets a part move freely within a range of distances and stops it at either end.
- Angle Limit MateLets a part turn freely within a range of angles and stops it at either end.
- Hinge MateA Concentric plus a Coincident in one step. It leaves one turn free, like a door on its pin.
- Slot MateKeeps a pin inside a straight slot, on its center line, or at a set place along it.
- Gear MateTies the turns of two round parts together by a ratio, the way two meshing gears turn.
- Rack and Pinion MateMakes a round part turn as a straight part slides, like a pinion on a rack.
- Screw MateMakes a part advance along its axis as it turns, by the distance for one turn.
- Linear Coupler MateMakes one part slide along its line as another slides along its own, by a ratio of the two...
- Universal Joint MateMakes one shaft turn another through a cross joint, where the two shafts meet at an angle.
- Cam MateKeeps a follower touching the outline of a cam, as the cam turns or as the follower moves.
- Path MateMakes a point of one part follow a path on another part.
Assembly Tools
- Insert ComponentsPuts saved models into the assembly, as many copies as you like.
- Move ComponentMoves a part of the assembly by dragging it or by typing how far.
- Rotate ComponentTurns a part of the assembly by dragging it or by typing the angles.
- Interference DetectionFinds parts of the assembly that overlap, and tells you how much. Assemblies need the Pro plan.
- Clearance VerificationFinds pairs of parts that sit closer than a gap you choose. Assemblies need the Pro plan.
- Bill of MaterialsLists the parts of the assembly with a quantity for each, ready to copy or save as a spreadsheet.
Your Account
- Your Account: Models and FoldersYour saved models are listed in the Your models card on your account page.
- Your Account: The Recycle BinDeleting a model or folder from your list does not erase it.
- Your Account: Versions and AttachmentsA model can keep older versions so you can go back. The number kept depends on your plan.
- Your Account: GroupsA group is a named list of people you share with.
- Your Account: SettingsThe Settings tab on your account page holds your details, your public handle, how the site looks,...
- Your Account: SupportThe Support tab on your account page is where you send us a message, a feature request or a bug...
- Plans and BillingThere are five plans: Free, Advanced, Pro, Pro Plus and Pro Max.
- Connecting an AI AssistantAn AI assistant can work with your models: list and organize them, upload files, read measurements...
- The Desktop Add-InThe desktop add-in is a separate Windows program.
- ReferralsYour referral link looks like stepfile.com/@name.
- Your Account: Upload ModelsThe Your models card on your account page has an upload zone at the top.
- Bend Settings and Machine ProfilesA bend profile holds the numbers of one press brake: its K-factors by material, its own bend rows...
Plans and Billing
- Billing: History and InvoicesEvery charge on your account is listed under Billing history on the Billing tab, with an invoice...
- Billing: CardsThe Billing tab shows the card your plan is charged to, an optional backup card, and every card you...
- Billing: Cancel or Keep Your PlanYou can stop your subscription from the Billing tab at any time.
- Billing: Subscribe to a PlanUse the Billing tab to move from Free to a paid plan.
- Billing: Change Your PlanWhen you already have a paid plan, the Plan button on the Billing tab moves you to another one.
AI Assistant
- Connect Your AI to StepFile.comConnect the AI assistant you already use to your StepFile.com account.
- Your Account: Connected AppsThe Connected Apps tab on your account page lists everything that can work with your account for...