Make Drawing: Add a Dimension
Add a dimension in the Make Drawing window puts a size on the drawing where you want it: click two points of a view, then click where the dimension line goes. The sheet draws the extension lines, the dimension line with its arrows and the size in words, in the same green as Model items.
What you get: a level, an upright or an along-the-line size on the Front, Top or Right view, always the part's true size (even when you made the view bigger or smaller), saved in the DXF (on the MODELDIM layer), the PDF and the print like the rest of the sheet. A dimension stays with its view when you move or resize the view.
Step by Step
- Open a 3D part. Click the Documents tab, then Make Drawing (see Make Drawing). Under the preview, next to the view boxes, is the Add a dimension button.
- Click Add a dimension. The button changes to Stop adding and the words beside it say what to click.
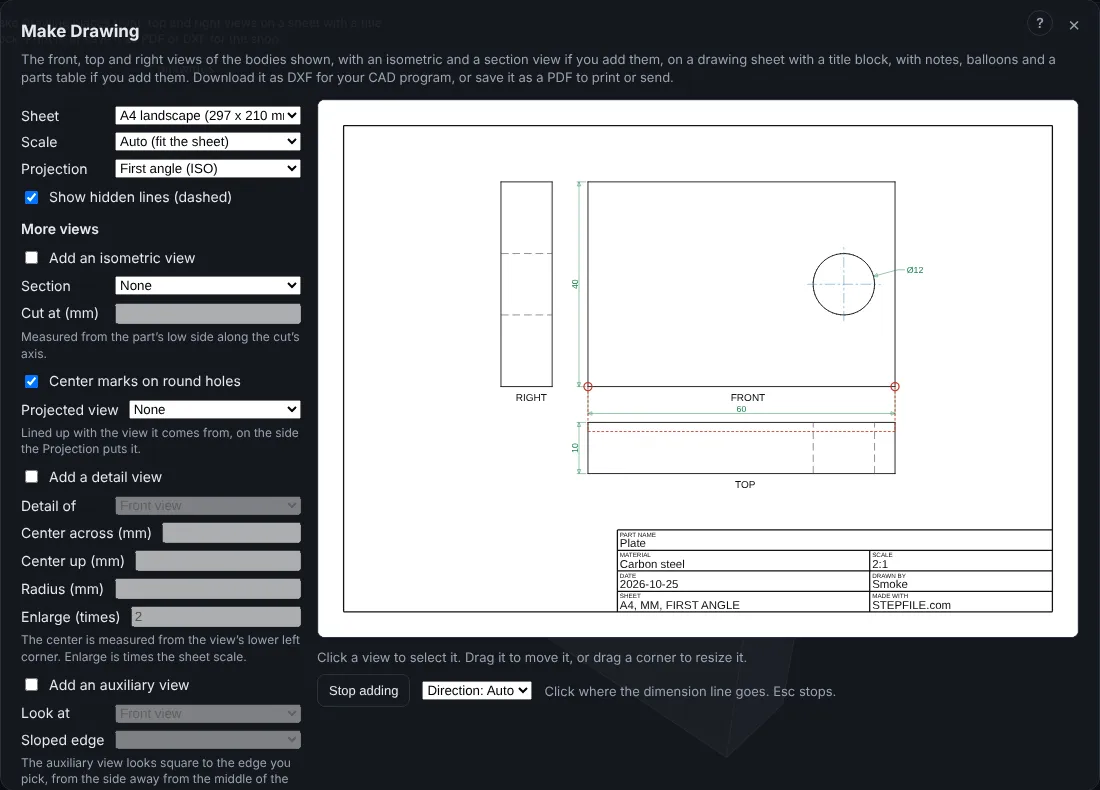
- Move the pointer over a view. A small blue ring jumps to the nearest corner, end of a line or hole center. Click it. It turns red.
- Click a second point on the same view. Both are red now.
- Move the pointer to where the dimension line should go. A dashed red picture shows the lines. With Direction: Auto, a click above or below the two points makes a level size, a click to the left or right makes an upright size. Click to place it.
- The size is drawn and counted under the picture: Dimensions placed by hand: 1. It is listed under the buttons, for example 1. Front: 100, with a Remove button.
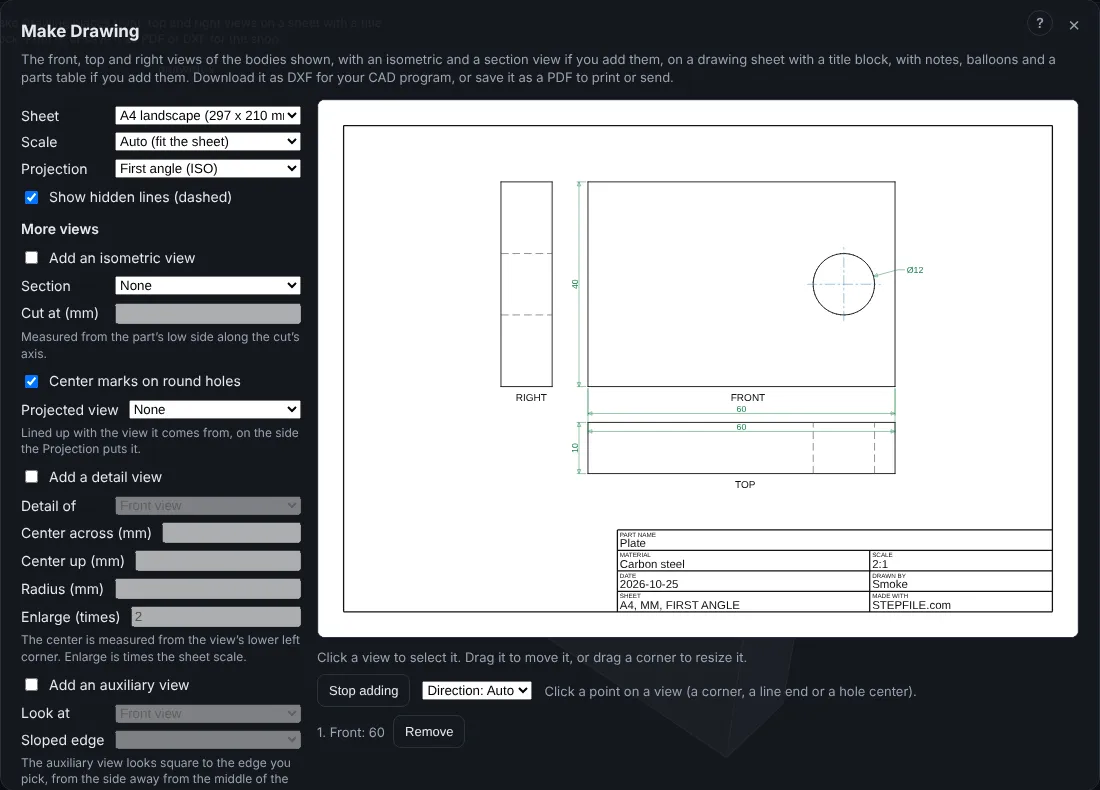
- Add more the same way, or press Esc (or click Stop adding) to stop. Press Esc again to close the window.
- Click Download DXF or Save as PDF. The dimensions are saved with the sheet.
Options
- Direction: Auto: level or upright, from where you click.
- Horizontal, Vertical: always a level or an upright size. Two points that are level cannot be sized upright, and the other way round.
- Along the line: the size of the line between the two points, placed beside it at the distance you click.
- Remove: takes that dimension off. Dimensions are numbered in the order you added them.
Common Mistakes and Messages
- No point there. Click nearer a corner, a line end or a hole center. Only those are offered.
- That is the first point. Pick another point for the second click.
- Those two points are level for that direction, so there is nothing to measure. Pick another direction or other points.
- A view dragged by mistake. While the tool is on, a press does not move a view. Click Stop adding first to move or resize a view.
- Dimensions placed by hand and a broken view cannot be on one sheet yet. Set Break to None, or remove the dimensions.
- A dimension says it is not on the sheet. Its view is not there now (for example you took away the view). Remove it, or put the view back.
Limits
- Dimensions go on the Front, Top and Right views, up to 60 on a sheet.
- A dimension is not moved out of the way of other sizes: place it where you want it, clear of Model items.