Assembly Display States
A display state is a named look of the open assembly. It remembers which components are shown or hidden, which are see-through (75 percent transparent) and the colour each one wears. Keep several (for example Painted, Frame Only and X-Ray) and switch between them in one click. A display state never moves anything: where components stand belongs to Assembly Configurations. Assemblies need the Pro plan.
What you get: named looks of one assembly (which components are shown, see-through and coloured) that you switch between in one click, saved with the assembly.
When to Use It
- Show a customer the frame alone, then the whole build
- Colour the parts by supplier, by material or by who welds them
- Make the guards see-through to show what is inside, then solid again
Step by Step: Open the Window
- Open an assembly (see Assemblies: Start and Insert Parts).
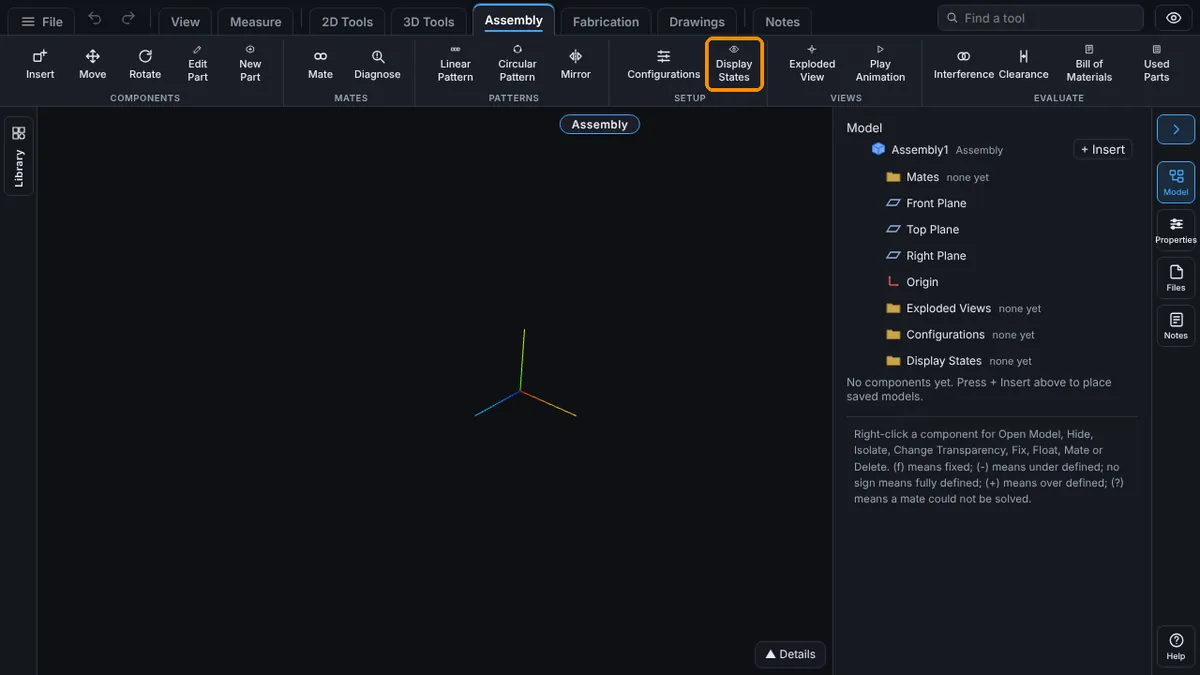
- Click the Assembly tab, then Display States (Setup group). The Features tab is named Assembly only while an assembly is open.
- Or right-click the assembly row at the top of the Model tree and choose Display States..., or double-click the Display States folder in the Model tree.
Step by Step: Add a Display State
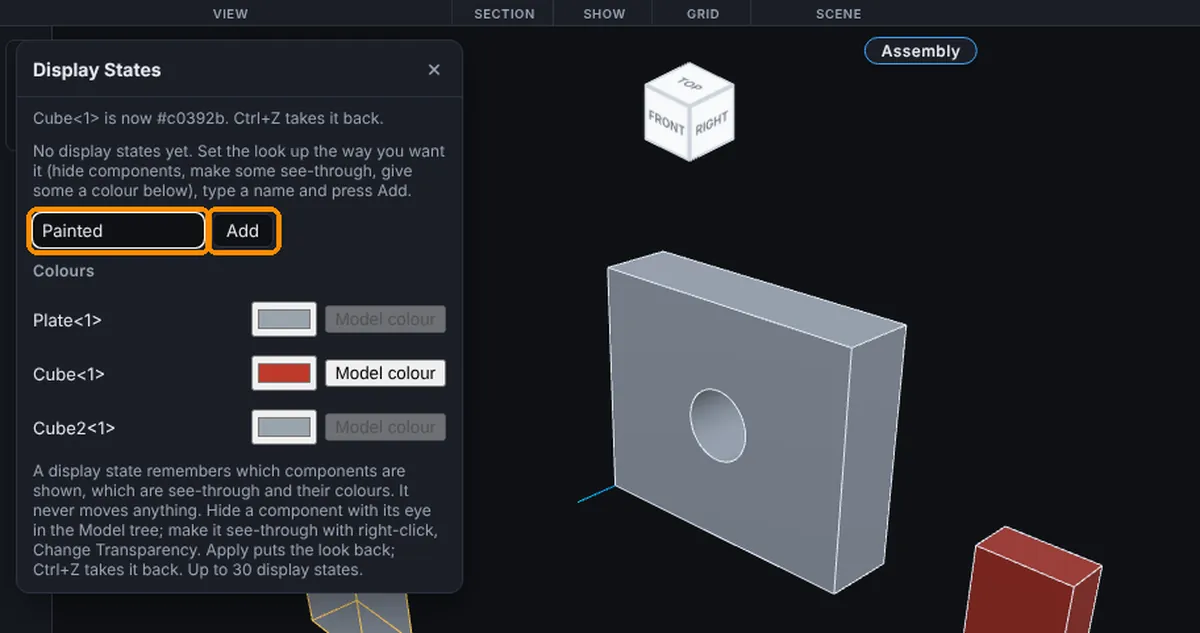
- Set up the look first. Hide a component with the eye on its row in the Model tree. Make one see-through: right-click it in the Model tree and choose Change Transparency. Give one a colour in the Colours list of the window.
- Type a name in the box beside Add, for example Painted.
- Click Add (or press Enter). The message line says "Display state Painted added" and what it holds. Add never changes what you see.
- Change the look again (show, hide, colour) and add a second display state, for example Frame Only.
Step by Step: Apply and Update
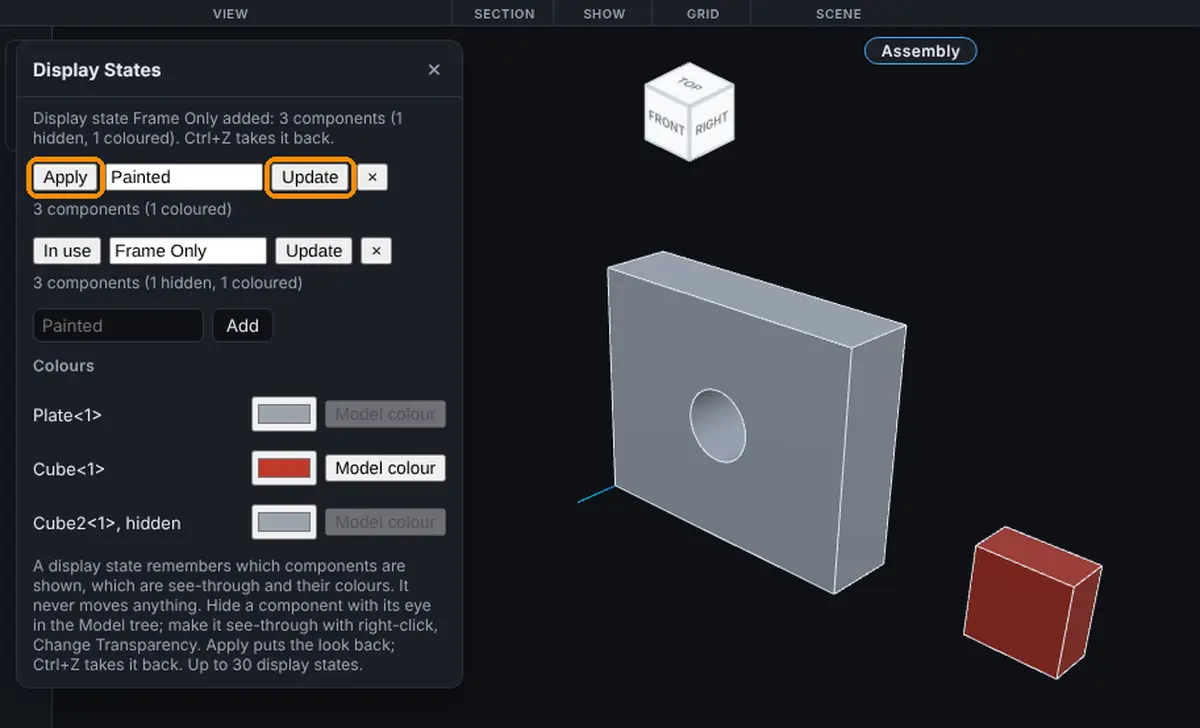
- Click Apply beside a display state to put the look back that way. Each component is shown or hidden, made see-through or solid, and coloured as the display state holds.
- The button of the display state the assembly looks like now reads In use.
- To keep a changed look in a display state you already have, click its Update. It then holds the look as it is now.
- Press Ctrl+Z to take an Apply or an Update back.
Step by Step: Colours
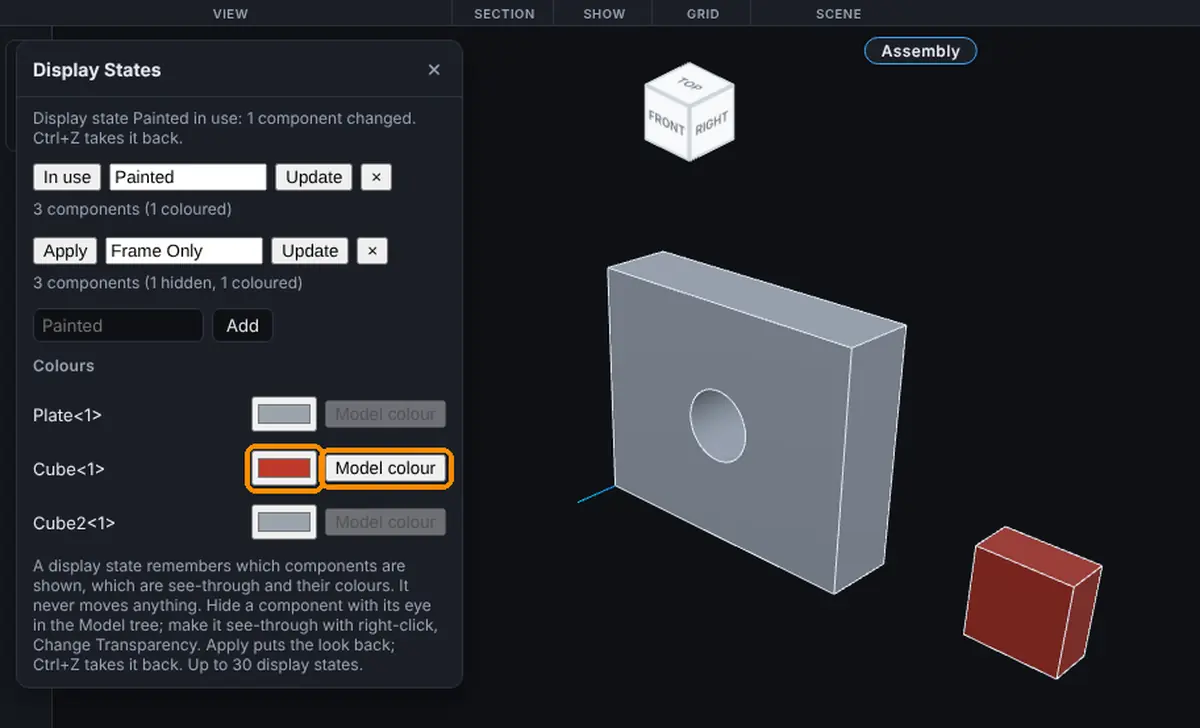
- In the Colours list, find the component. There is one row for each component at the top of the assembly.
- Click its colour box and pick a colour. The component wears it at once, and Ctrl+Z takes it back.
- Click Model colour to take the colour off, so the component wears the colour its model has.
- Click Update on a display state (or Add a new one) to keep the colours in it.
The Window
| Control | What it does |
|---|---|
| Apply | Shows or hides each component, makes it see-through or solid, and gives it the colour the display state holds. Reads In use when the assembly already looks that way. |
| Name box | The display state's name. Change it and press Enter to rename it. |
| Update | Keeps the look as it is now in this display state, in place of what it held. |
| x | Deletes the display state. The look itself stays as it is. |
| Add | Adds a new display state holding the look as it is now, under the name typed beside it. |
| Colours list | One row for each component at the top of the assembly (a part or a subassembly). The colour box gives it a colour; Model colour takes the colour off so it wears the colour its model has. |
| x at the top | Closes the window. Esc closes it too. |
The line under each name says what the display state holds, for example "4 components (1 hidden, 1 see-through, 2 coloured)".
The Model Tree
The Display States folder sits under Configurations. Its hint names the display state in use. Open the folder to see every display state:
- Double-click a display state to apply it.
- Right-click one for Apply, Update, Display States... and Delete.
- Rename one in the tree the same way as other rows.
Undo
Add, Apply, Update, Rename, Delete and each colour you pick or take off are one step each, and Ctrl+Y does a step again after Ctrl+Z.
- Undoing Add, Update, Rename or Delete changes only the list of display states. A component you hid or coloured since then stays as it is.
- Only Apply and the colour boxes change the look, so Ctrl+Z after them puts every component back the way it looked.
Saving
The display states are saved with the assembly, and so are the colours the components wear now. They come back when you open it again. An assembly can have up to 30 display states.
Names
- 1 to 40 letters. An accented letter or an emoji counts as one. Spaces inside a name are fine; spaces at the start or end are taken off.
- No quotes, no < or >, no tabs, line breaks or hidden marks (such as direction marks, zero width spaces or soft hyphens).
- Each name is used once, whatever its capitals: Painted and PAINTED are the same name.
Common Mistakes and Messages
Each message shows in the message line at the top of the window and as a note at the bottom of the screen. When it ends in "Nothing changed." nothing was changed.
- "Type a name for the display state, like Painted. Nothing changed." The name box was empty, or held only spaces.
- "A display state name can be up to 40 letters; that one has 41. Nothing changed." Shorten the name. An accented letter or an emoji counts as one.
- "A display state name cannot hold quotes, < or >, tabs, line breaks or hidden marks. Nothing changed." Hidden marks are direction marks, zero width spaces, soft hyphens and the like, often brought in by copy and paste. Type the name again by hand.
- "That name is taken: another display state is already called Painted. Pick another name. Nothing changed." Names are compared without capitals, so PAINTED is the same as Painted.
- "An assembly can have 30 display states. Delete one first. Nothing changed." Click x beside one you no longer need, then Add again.
- "There is no display state called Paint. Nothing changed." The name asked for (from the page API or an old link) is not in the list. Hidden marks in the name are left out of the message.
- "The assembly has no components yet, so a display state would hold nothing. Insert components first. Nothing changed." Insert components, then Add.
- "Display state Painted is already in use. Nothing changed." Apply did nothing because the assembly already looks that way.
- "A colour is written as # and six letters or digits from 0 to 9 and a to f, like #c0392b. Nothing changed." Pick the colour with the colour box rather than typing it.
- "That component is not at the top of the assembly, so it has no colour of its own here. Pick its subassembly. Nothing changed." A part inside a subassembly is coloured with its subassembly. Colour the subassembly row instead.
- "This assembly is shared with you to view only. Display states cannot be added, renamed, updated or deleted. Nothing changed." Apply and the colours still work on a view only assembly, but nothing is saved.
- "The assembly is still loading or updating. Try again in a moment. Nothing changed." Wait for the parts to finish loading, then try again.
- "Display states are on the Pro plan, like every change to an assembly. Upgrade from your account page to use them." Assemblies need the Pro plan.
- "This assembly would be too large to save (2612 KB with its display states, the most is 2500 KB). Delete some display states first. Nothing changed." The numbers are those of your assembly. Delete display states you no longer need.
- "Open an assembly first: display states belong to an assembly. Use File, New, Assembly, or open a saved one." Display States was asked for with no assembly open.
Tips
- Set up the look first, then Add. Add never changes what you see.
- After you insert a component, Update each display state that should know about it. Until then, applying leaves that component as it is.
- A display state that names a component you deleted skips it and says how many were skipped.
- Use a configuration for where things stand and a display state for how they look. Switching one never changes the other's list.
Limits
- A display state holds the components at the top of the assembly. A subassembly is one whole: it is shown, see-through and coloured all together.
- Pattern copies are made from their seed, so they are not listed on their own. A copy takes the seed's colour when the pattern is made again.
- When Model colours is turned off in Settings, every part wears the one part colour, so the colours of a display state do not show until it is on again.
- A link shared from the assembly shows it as saved.
- The saved assembly, display states included, can be up to 2500 KB. Add and Update say so when it would be larger; delete some display states to make room.