Reference Geometry
Makes planes and axes that are not part of the model, to sketch on or to use as a guide. It can also make points and coordinate systems: see Reference Points and Coordinate Systems. To mark faces, edges and points a part is mated by, see Mate References. For a guided example with pictures, see the Reference Geometry Walkthrough. They are drawn faintly in the view, and each one is a step in the History tree (Plane1, Axis1, and so on) that does not change the part. You do not need a solid first: a new part can begin with planes and axes made from Top, Front, Right, the Origin and the points and lines of a sketch.
How to Start It
Click Advanced on the Features tab, then Reference Geometry, then choose Plane or Axis and how to make it.
Step by Step
- On the Features tab, click Advanced, then Reference Geometry. The panel opens.
- Choose Plane or Axis, then pick how to make it (the lists below).
- Pick what the panel asks for, in the order its text says: faces, edges, corners, or the Top, Front and Right buttons. The words under the buttons show what you have picked so far.
- For a plane at an angle, type the angle in degrees. Tick Flip to lean the other way. For Parallel through point, Square to curve and Tangent to round face, Flip turns the plane round. For Square to curve, choose Where the plane goes along the curve, and for Distance along or Percent along type how far. For Tangent to round face on a cylinder, type a Turn in degrees to move it round the face.
- The new plane or axis shows in orange. Press OK to keep it, or Clear to start over.
What You Can Pick
- A line: a straight edge of the part, a sketch line (or one side of a rectangle or polyline), a reference axis, or the X axis, Y axis or Z axis buttons in the panel.
- A curve (for Square to curve): any line above, an arc or a circle (a curved edge of the part, or an arc or circle of the open sketch), any other curved edge of the part (such as a spline or an ellipse), or a spline of the open sketch.
- A point: a corner of the part, a sketch point or the end, centre or midpoint of any sketch piece, or the Origin button.
- A plane: a flat face, a reference plane, or the Top plane, Front plane or Right plane buttons.
- A round face: a cylinder or a cone (for an axis). For Tangent to round face: a cylinder (a shaft or a hole) or a sphere.
Sketch points and lines can be picked while a sketch is open: leave the sketch open, click Reference Geometry, and click the pieces you drew. The plane or axis is worked out in 3D from where they are on the sketch plane.
Plane
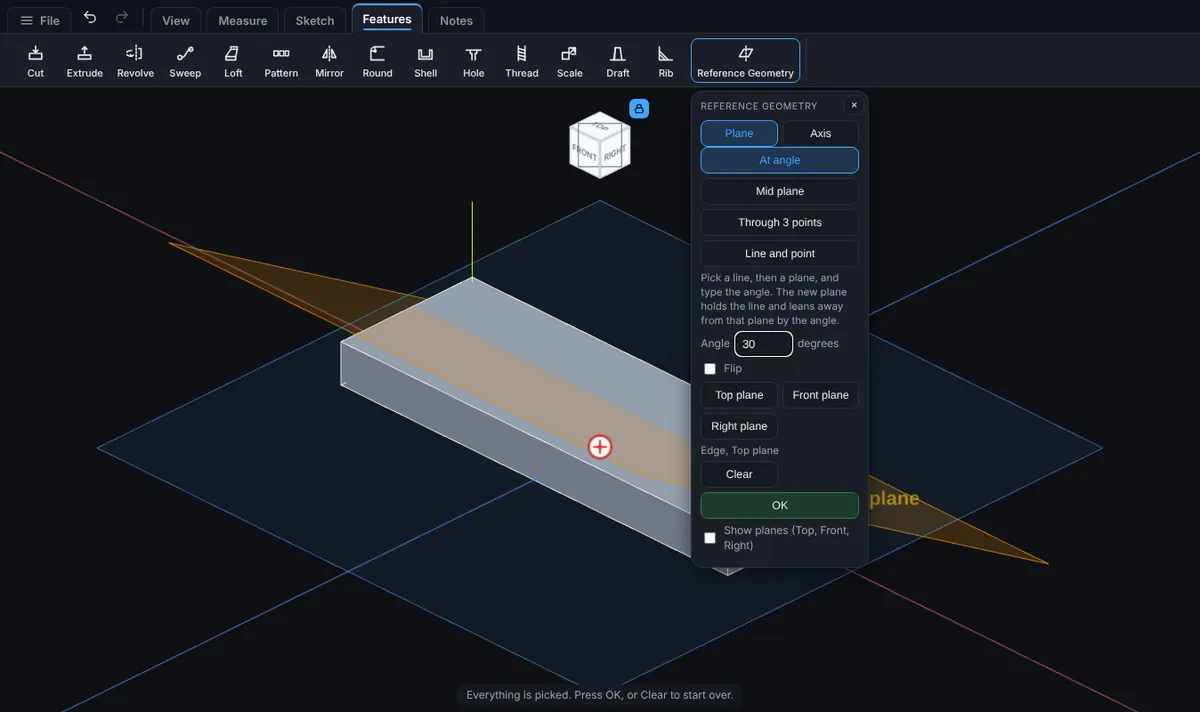
- At angle: pick a line (a straight edge, a sketch line, a reference axis or the X, Y or Z axis), then a plane (Top, Front, Right, a flat face or a reference plane), and type the angle in degrees. The new plane holds the line and leans away from that plane by the angle. Flip leans it the other way.
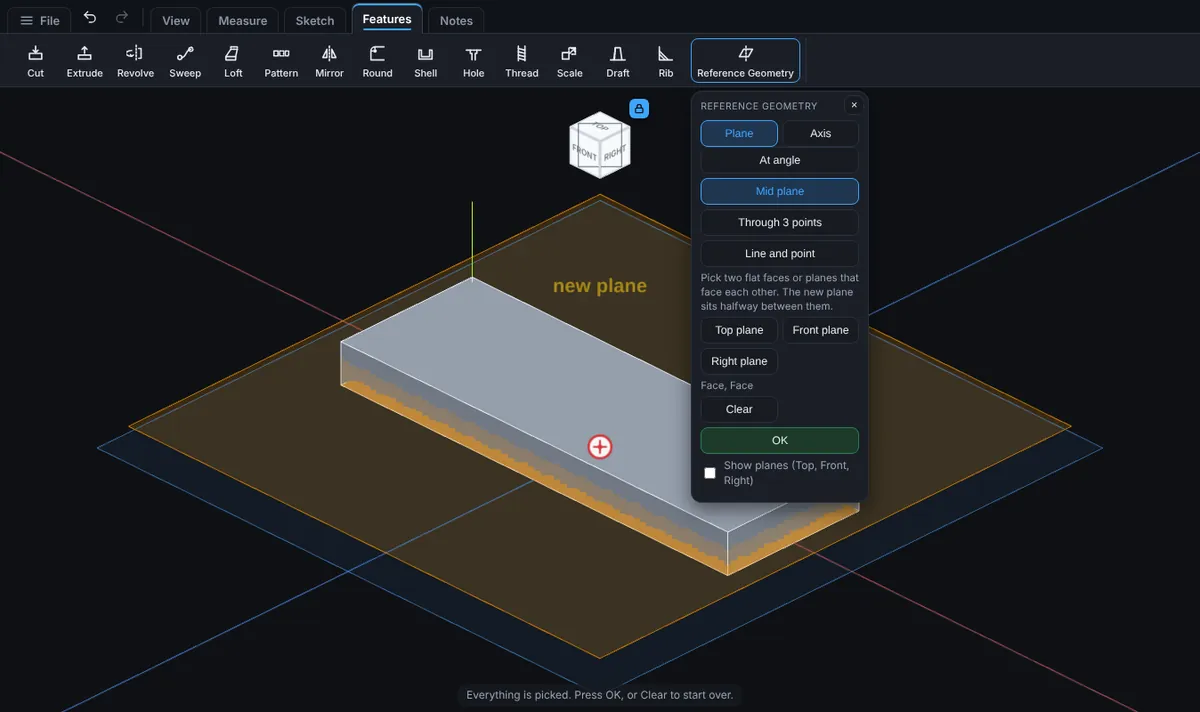
- Mid plane: pick two flat faces or planes that face each other. The new plane sits halfway between them. Faces that are not parallel are refused.
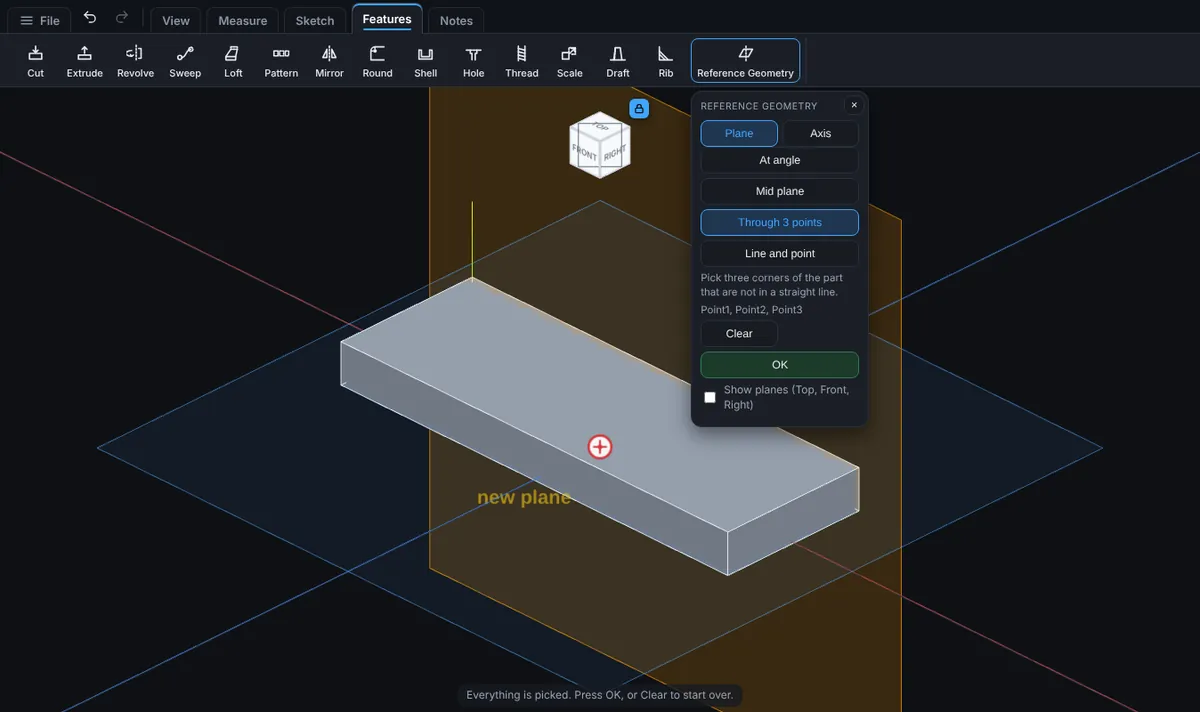
- Through 3 points: pick three points (corners, sketch points or the Origin). Three points in a straight line are refused.
- Line and point: pick a line (an edge, a sketch line or an axis) and a point that is not on it.
- Parallel through point: pick a plane or a flat face, then a point (a corner, a sketch point, the Origin). The new plane faces the same way as the first and passes through the point. A point that is already on the plane is refused, because the new plane would sit exactly on top of it. Flip turns the new plane round (its front becomes its back).
- Square to curve: pick a straight edge, a sketch line, a reference axis, an arc or a circle (an edge of the part or a piece of the open sketch). The new plane stands square to the curve at its start: the first end you drew or the first end of the edge. On an arc or a circle it is square to the tangent there, so the curve runs straight through the plane. To put the plane somewhere else along the curve, also pick a point on it (a corner, a sketch point or the Origin). A point that is not on the curve, or is past its end, is refused. A circle has no ends, so the plane goes where you clicked on it, rounded to the nearest of the points the circle is drawn with; pick a point on it when you need an exact spot. Flip turns the plane round.
- Where says where along the curve the plane goes. At its start or a picked point works as above. Distance along: type how far from one end of the curve, measured along the curve itself (a bare number is in the units the model is shown in; type a unit such as 40 mm or 1.5 in to use another). Percent along: type how far as a percent of the curve's length, from 0 to 100; 50 is the middle. 0 percent is one end of the curve and 100 the other: on a sketch piece it is the end you drew first, on an edge of the part it is the end the part counts from, which you cannot see beforehand. Use From the other end to swap ends if the plane shows up at the wrong one.
- Tick From the other end to measure from the far end instead. On a circle, which has no ends, the distance runs round from where you clicked, the way the circle was drawn; From the other end goes round the other way.
- A curved edge that is not an arc or a circle, and a sketch spline, take no point: the plane goes at the start, or where you type with Distance along or Percent along. The place on them is worked out by the modeling engine on the curve itself, so it takes a moment and the words under the panel say so.
- To sweep a profile along a curve, make this plane at the end of the path where the sweep starts (0 percent, or 0 percent with From the other end), sketch the profile on it, then use Sweep with the curve as the path. The profile is then square to the path, as Sweep wants it.
- Tangent to round face: click a cylinder (a shaft or a hole) or a sphere (a ball) at the spot where the plane should touch it. The new plane lies flat against the face there, with its front facing away from the middle line of the cylinder or the centre of the sphere.
- On a cylinder the plane touches along the whole straight line of the face through the spot you clicked. Type a Turn in degrees (from -360 to 360) to move the plane round the face from that spot: 90 is a quarter of the way round, 180 the far side. A plus number turns counterclockwise and a minus number clockwise, as seen from the plus end of the cylinder looking back along it. The plus end is its +X, +Y or +Z end, whichever direction the cylinder runs most along: for a cylinder standing along Z, plus turns counterclockwise as seen from above the +Z end. It is the same for a shaft and a hole. The Turn starts at 0.
- On a sphere the plane touches exactly where you clicked. The Turn is not used (the box is greyed out).
- To touch the face somewhere other than where you clicked, also pick a point (a corner, a sketch point or the Origin). The plane then touches the face at the spot nearest that point, and the Turn is not used (the box is greyed out). A point on the middle line of the cylinder, or at the centre of the sphere, is refused, because it does not say which side to touch.
- Flip turns the plane round so its front faces the middle line or the centre.
Axis
- Two planes: the line where two planes meet. Parallel planes are refused.
- Two points: a line through two points (corners, sketch points or the Origin).
- Line or edge: a line along a straight edge, a sketch line or another axis.
- Round face: the line down the middle of a cylinder face or a cone face.
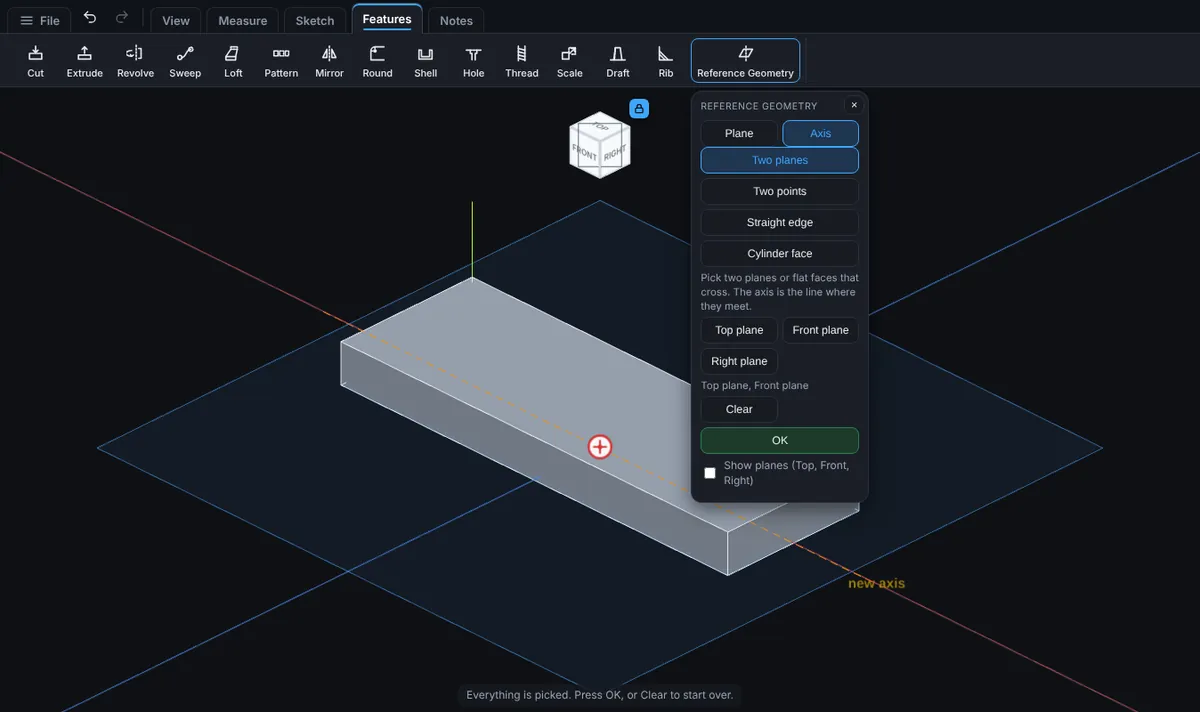
The new plane or axis is shown in orange while you pick. Press OK to keep it.
Good to Know
- With no solid yet, picking a corner or an edge of the part says so in plain words. Pick a sketch point, a sketch line, the Origin or X, Y, Z instead.
- Square to curve and Tangent to round face are ready to keep as soon as the first thing is picked (the point is optional). With Distance along or Percent along no point is taken at all. Parallel through point needs both picks.
- Tangent to round face works on cylinders and spheres only. A cone, a doughnut shaped face (a torus), a flat face or any other curved face is refused in plain words: for a cone, use Through 3 points or Line and point instead; for a flat face, use Parallel through point or sketch on the face itself.
- A click on the face lands on the shape as it is drawn on screen, which is very slightly off the true round face. The tangent plane is worked out from the true face, so it touches exactly; only the spot round the face can differ by a hair. Pick a point (a corner or a sketch point) when you need an exact spot.
- Square to curve refuses, in plain words: a distance past the end of the curve (the words say how long it is), a percent below 0 or above 100, a percent of an axis or From the other end on an axis (an axis has no ends), a box that is empty, holds words, a comma, a negative number or a hidden character (such as a direction mark or a zero width space), more than 24 letters, and a distance over a kilometre. A spline with more than 1,024 points, and a curve that takes more than 4 seconds to measure, are refused too.
- The History tree names the step with where it is, for example "Plane2: square to Curve edge, 25 mm along from its start" or "Plane3: square to Spline 1, 40% along from its end".
- A plane or axis is frozen where it was made. It does not follow later changes to the faces or edges it came from.
- The eye beside it in the History tree shows or hides it. Hiding does not change the part.
- Click a shown plane in the view, or right-click it in the tree and choose Sketch on Plane1, to draw on it.
- Show planes draws the Top, Front and Right planes faintly. It is off until you turn it on.