File, Quote
Turns a part into a price for a customer. Type how many sheets you need and what one sheet costs, add the items you sell, and the window gives you a total you can print, save as a PDF, or send to the customer to approve.
What you get: a quote with a number (Q-00001, Q-00002 and so on) saved against the part, a total worked out to the cent, a printable quote page, and on the paid plans a link the customer opens to approve or decline.
Step by Step: A Quick Estimate and a Saved Quote
- Sign in and open a saved part. The Quote... item is on the File menu only for a saved part.
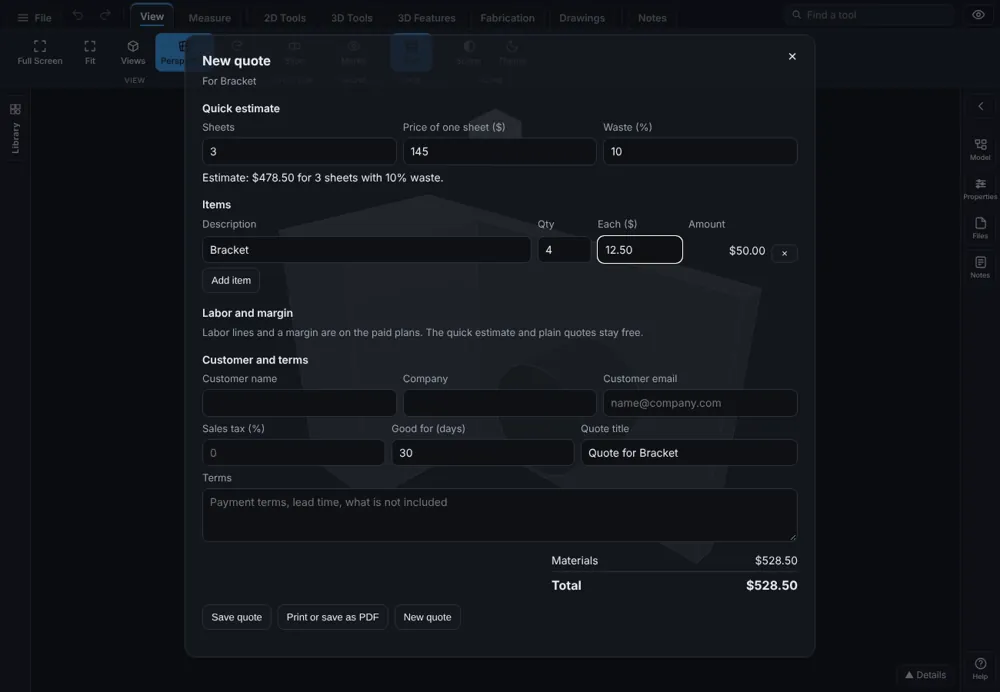
- Click File, then Quote.... The quote window opens with the part's name as the title.
- Under Quick estimate, type the number of Sheets, the Price of one sheet ($) and the Waste (%). The line under them reads like Estimate: $478.50 for 3 sheets with 10% waste.
- Under Items, click Add item. Type a Description, a Qty and the price in Each ($). The Amount and the Total at the bottom of the window change as you type.
- Under Customer and terms, type the customer name, company and email, a Sales tax (%), how many days the quote is good for, and your Terms.
- Click Save quote. The line under the buttons reads Saved as Q-00001, version 1. Total $528.50.
Step by Step: Save It as a PDF
- Click Save as PDF. The quote is saved first, then the PDF comes down to your downloads and the window says Saved with its file name.
- Open the file from your downloads to print it or to send it by email. It has the quote number, version, date and valid-until date, your items, the totals and "Page 1 of 1" at the foot.
- Click the button again for a new copy any time.
The free plan puts a small Made with StepFile.com line at the foot of each page and allows a few quote PDFs each month. Saving the same version again does not use up another one. The paid plans print your own letterhead at the top, and the plans that remove the StepFile.com line leave it off.
Step by Step: Labor, Margin and Your Letterhead (Paid Plans)
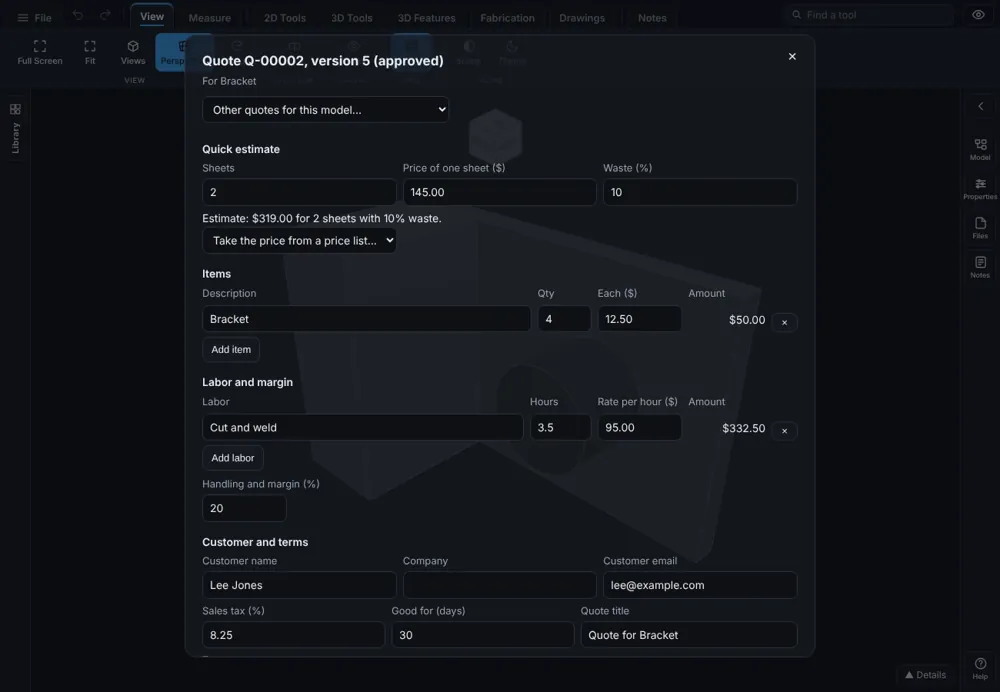
- Under Labor and margin, click Add labor. Type a description, the Hours and the Hourly rate.
- Type a Handling and margin (%). It is added on top of materials and labor, and the totals list it as Handling and margin. Tax is worked out on the total with the markup in it.
- Under Price lists, click Add sheet, name each sheet (for example 4x8 11ga) with its price, give the list a name and click Save price list. Pick the list in Quick estimate to fill the sheet price for you. Click Add stock item for things you buy by the piece, the inch or the foot (a tube, an angle, a bracket): type the name, pick piece, inch or foot, and type the price. Each row also has a Supplier and an Item number; type them if you want purchase orders made from the quote.
- Under Your letterhead, type your business name, phone, address, email and footer line, then click Save letterhead. Printed quotes carry it.
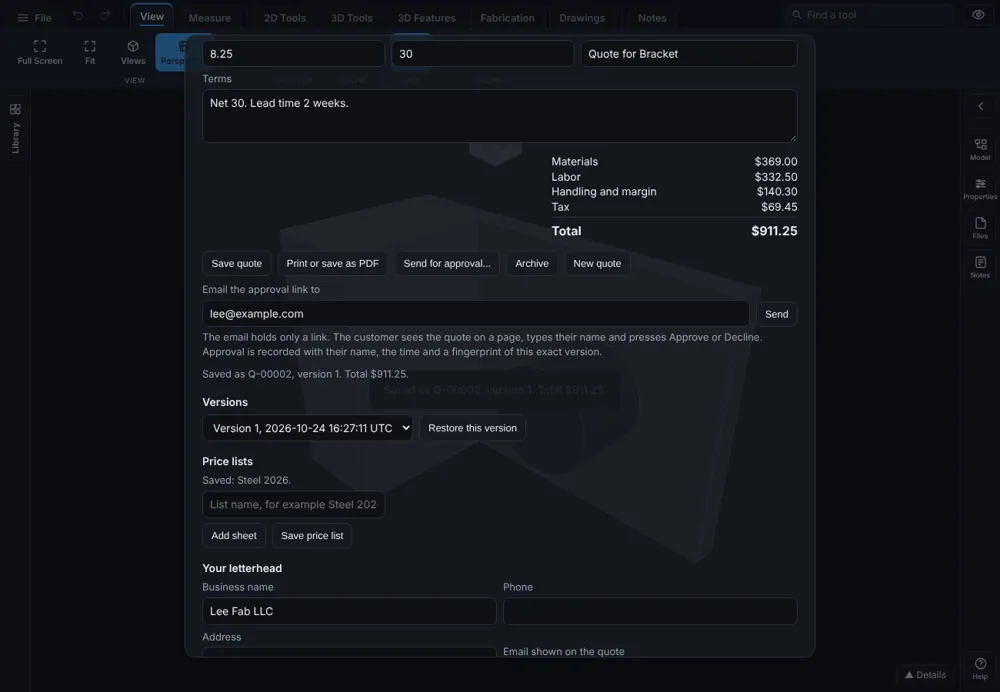
- Click Save quote. Every save is a new version. Pick an older one under Versions and click Restore this version to bring it back as the newest. The older ones are kept.
Step by Step: Send It to the Customer to Approve (Paid Plans)
- Save the quote, then click Send for approval....
- Type the customer's email and click Send. The line under it reads Sent to [email protected]. A copy went to you. The link works once for 14 days.
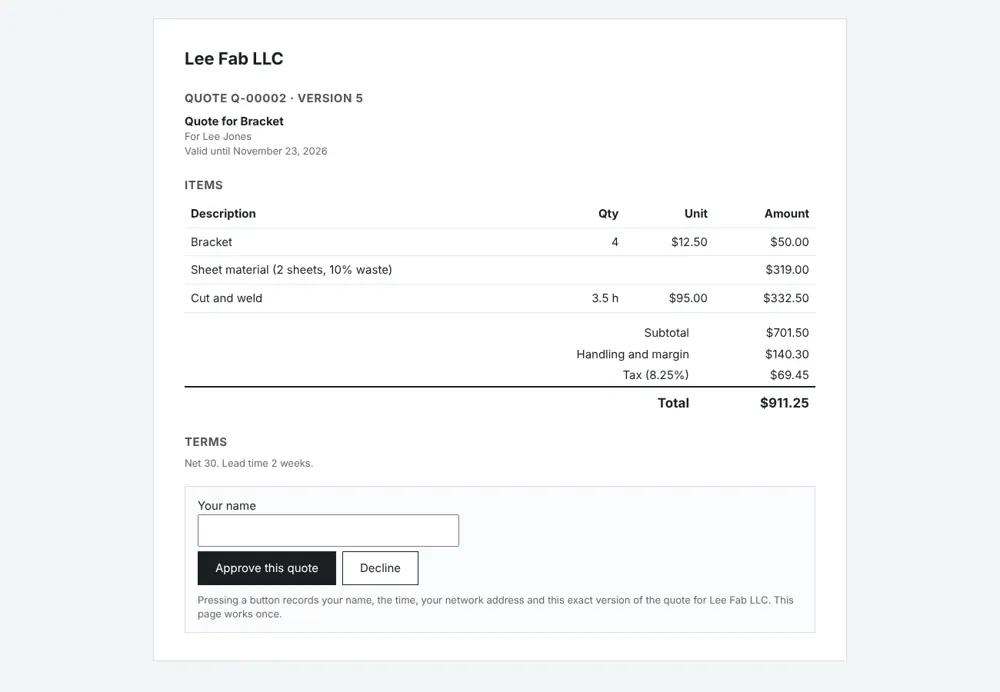
- The customer opens the link, reads the quote, types their name and presses Approve or Decline. They do not need an account.
- The status line under the buttons shows who approved, and when.
Step by Step: Put the Model's Cut List or Bill of Materials Into a Quote
- Open a saved part, or a saved assembly, and click File, then Quote....
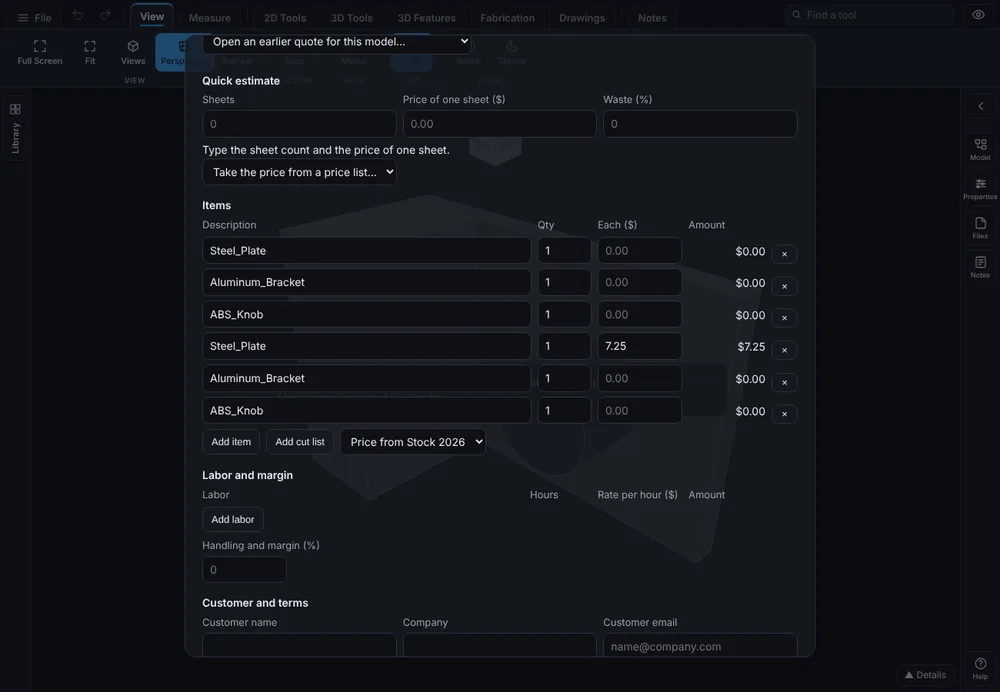
- Under Items, click Add cut list. Every bar and plate of the part becomes an item with its name and a quantity. In an assembly the button reads Add bill of materials and each part number becomes an item. The line under the buttons says how many were added.
- To have the prices filled in, first save a price list that has a stock item named the same as the part (capitals, spaces and dashes do not matter), then pick it in the list next to the button before you click. The line under the buttons reads Added 3 lines from the cut list. 1 priced from the list; 2 need a price (Aluminum_Bracket, ABS_Knob).
- Type the price of any line that stayed blank. Each added line can be changed or removed like any other item.
How the price list is read: a stock item priced per piece gives that price for each; per inch or foot it is multiplied by the cut length of the bar; a sheet gives the plate its share of the sheet, by area. Names that match nothing are left blank on purpose, so no price is ever made up. Your AI assistant can do the same without the window: it reads the part's cut list or the assembly's bill of materials itself and adds the lines, and it needs the Measure permission on its connection to do that.
Order the Material
Once a quote holds the cut list or bill of materials, click Make purchase orders under the buttons. One purchase order is made for each supplier named in the price list, ready to print or email. See File, Purchase Orders.
How to Start It
Click File, then Quote... with a saved part open. If the part has quotes already, the newest opens first, and the list at the top of the window opens the others. New quote starts a blank one. Archive moves a quote out of the list. Open it again from Archived quotes (N)... at the top of the window and click Unarchive; your AI assistant can do the same with the unarchive tool. X or Esc closes the window.
What the Customer Sees and What Is Recorded
- The email holds only a link, never the price. Your copy is sent to you too.
- The link works once. A newer save, a newer link, an archive makes the old link stop working.
- Approval records the name the customer typed, the time, and a fingerprint of the exact version they saw. It says Approval recorded. It is a record for your shop, not a legal signature.
- Each quote can be sent three times an hour, and your plan sets a daily limit.
Tips
- Save the quote before you send it, so the customer sees the version you meant.
- Use one price list per supplier, so the sheet price is one pick away.
- Your plan's limits (PDFs this month, saved quotes, price lists) are shown at the bottom of the window.
Common Mistakes and Messages
- There is no Quote... on the File menu. Quotes belong to a saved part. Sign in, save the part, then open the File menu again.
- A labor, margin or letterhead field is missing, and the window says these are on the paid plans. The free plan keeps the quick estimate and plain quotes. Choose a paid plan under Plans to use them.
- The quote page says it expired. The link works for 15 minutes. Click Print or save as PDF again.
- The customer says the link no longer works. It works once, and a newer save or a newer link replaces it. Send a new one.
- The cut list or bill of materials lines have no price. Only a stock item or sheet with the same name as the part is used. Check the spelling in the stock item, pick the list next to Add cut list, and add them again.
- The total does not match your calculator. Each line is rounded to the cent first. Tax is worked out on the total with markup in it, not on materials alone.