Coincident Mate
Makes two entities touch or line up. It is the mate you will use most: flat faces that sit flush, an edge that lies on a face, two corners that meet.
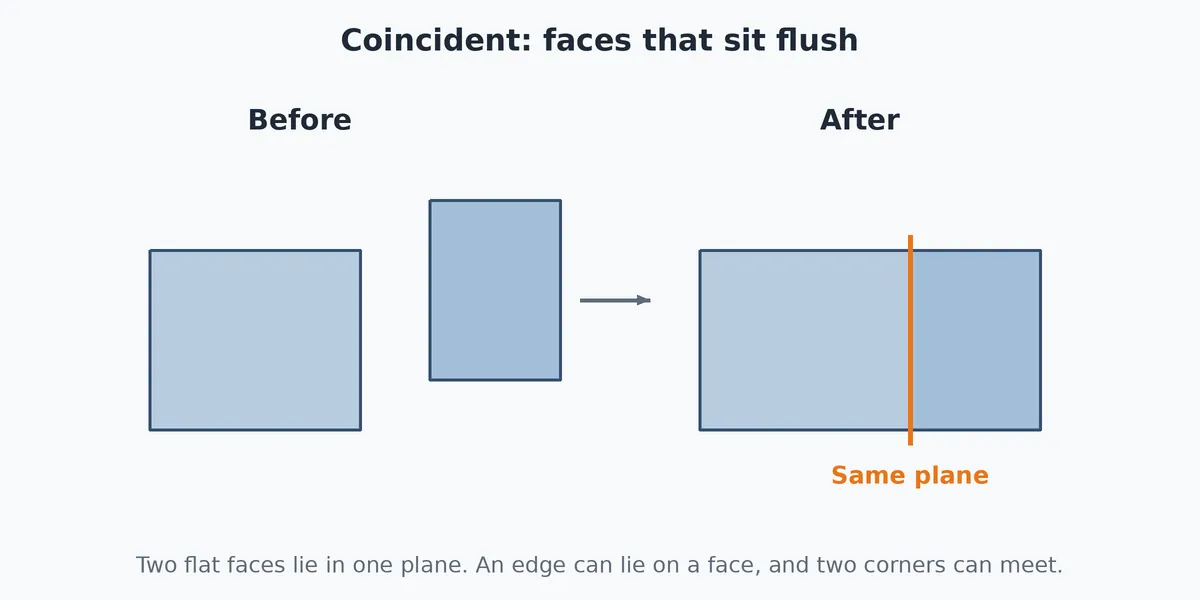
What you get: the two picked faces lie in one plane (or the edge, corner or circle sits where you picked), one mate named Coincident1 in the Mates folder, and the moving part's tree row says what is still free.
When to Use It
- Set a plate flat against another plate
- Put an edge or a corner on a face
- Line up two straight edges so they lie on one line
- Join two corners
What It Does With Each Pair
The Coincident button is lit for these pairs of picks:
- Two flat faces
- Straight edge with flat face
- Two corners
- Flat face with corner
- Two circular edges
- Two straight edges
- Round face with straight edge
- Round face with corner
- Straight edge with corner
- Circular edge with flat face
- Two flat faces: the faces lie in the same plane (touching, with the normals set by the alignment).
- A flat face and a corner: the corner sits on the face. A flat face and a straight edge: the edge lies in the face.
- Two straight edges: they lie on one line. Two corners: they meet.
- A round face and a corner: the corner sits on the surface. An axis and a corner: the corner sits on the axis.
- Two circular edges: the circles lie in the same plane. They do not have to share a center; add Concentric for that.
Step by Step
- Open an assembly (assemblies need the Pro plan) with at least two components in it. See Assemblies: Start and Insert Parts.
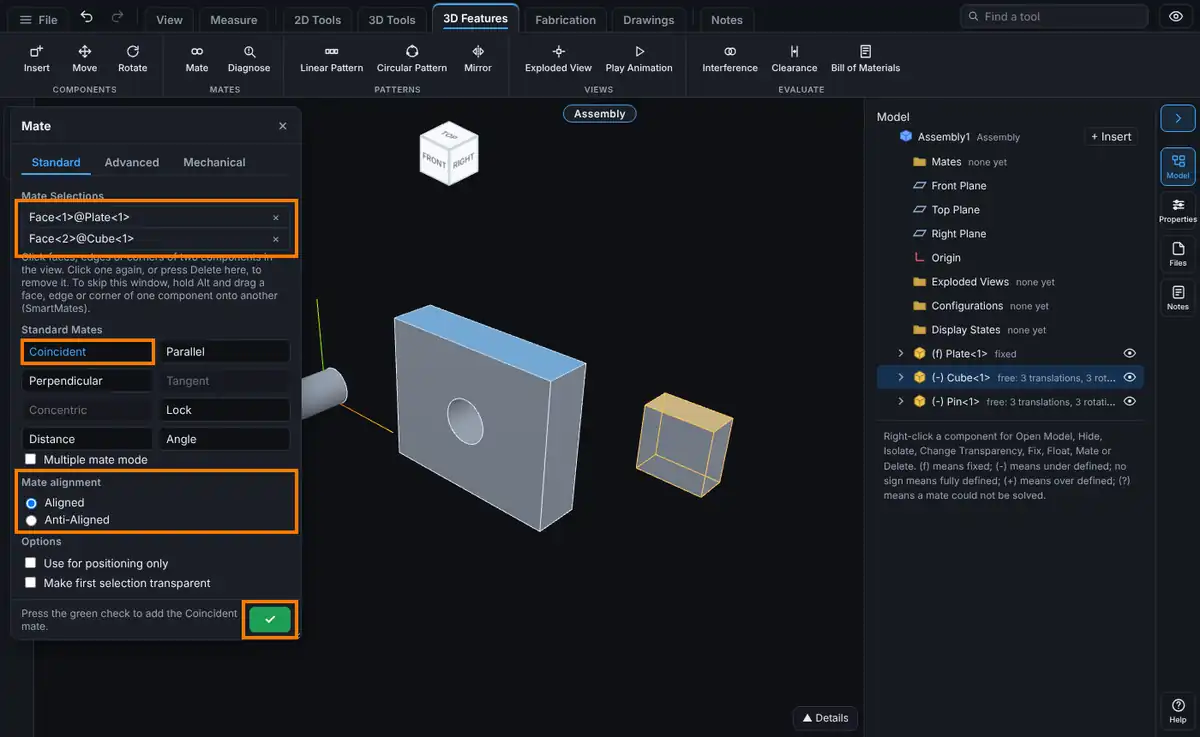
- Click Mate on the Assembly tab (or right-click a component and choose Assembly tools, Mate...). The Mate window opens on the Standard tab.
- Click the first entity on one component in the view. It appears in Mate Selections. You can also click the Front Plane, Top Plane, Right Plane or Origin row of a component or of the assembly in the Model tree.
- Click the second entity on a different component. After the second pick the parts move to show the result, and a small Quick Mate pop-up by the pointer lists the mates that fit. Leave it, or press Esc to close it; your two picks stay.
- Click Coincident in the Standard Mates list of the Mate window. Click the other buttons in the list to compare; only the mates that fit your two picks are lit. (A click on a button in the Quick Mate pop-up adds that mate straight away, as it stands, with no further steps.)
- If the faces ended up the wrong way round (for example back to back instead of face to face), change Mate alignment to the other choice. The parts turn over at once.
- Click the green check (or press Enter) to add the mate. The message reads "Coincident1 added." and the window stays open for the next pair.
Options
- Mate alignment: Aligned points the two faces' normals (or the two axes) the same way. Anti-Aligned points them opposite ways. The choice shows only when both picks have a direction (a face, an edge or an axis), not when one is a corner. For two flat faces that touch face to face, Anti-Aligned is the usual one. The window picks the one closest to where the parts are now. You can also press Tab during a SmartMate drag, or right-click the mate in the tree and choose Flip Mate Alignment later.
- Use for positioning only: moves the parts as the mate would, but no mate is kept. The message reads "Positioned. No mate was added."
- Make first selection transparent: the component you picked first turns see-through so you can reach what is behind it.
- Multiple mate mode: the first pick is the Common reference, every further pick is a Component reference on its own component, and one mate is made for each. Create multi-mate folder groups them (MultiMate1, MultiMate2 and so on).
Tips and What to Expect
- Two Coincident mates on faces at right angles hold a part in a corner. A third one finishes it.
- Hold Alt and drag a flat face onto another component's flat face to make a Coincident mate without opening the window (a SmartMate). Press Tab to flip it. See Mates: Standard Mates.
- After the mate is added the part's tree row shows what is still free, for example "free: 1 rotation" or "fully defined".
- The mate is named Coincident1, Coincident2 and so on. Right-click it in the Mates folder to edit, suppress or delete it.
Common Mistakes and Messages
- The mate you want is grey. The two picks do not fit it. Remove one pick (click it again, or press Delete in Mate Selections) and pick a different entity.
- "Those entities have no mate in common." Every mate button is grey because no mate fits the two picks, for example two corners for Parallel. Remove one pick (click it again, or press Delete in Mate Selections) and pick a different face or edge.
- "Pick the second entity on a different component." Both picks were on the same component. A mate always joins two components, or a component and the assembly's own planes or origin.
- "Collapse the exploded view to add mates." Mates cannot be added while the assembly is exploded. Collapse it from its row in the Exploded Views folder. See Exploded Views.
- "This mate over defines the assembly. Force it to solve? Yes breaks the conflicting mate. No keeps it unsolved." The new mate fights the ones already there. Click No to keep it unsolved and look at it, then delete or change one of the two. See Mates: Fixing Mate Problems.
- Nothing moves. A fixed component does not move. Right-click it and choose Assembly tools, Float, or fix the other component's side on purpose.