Smart Dimension
Smart Dimension puts a size on the sketch and keeps it true. Click what you want to size, type the number, press Enter, and the sketch moves to match. This page covers the length of a line and the distance between two points, across, up or along. See Radius and Diameter for circles and arcs, and Angle Dimensions for angles.
What you get: a line or a distance held at the exact size you typed, with its number on the sketch and a name such as D1@Sketch1.
When to Use It
- Make a line exactly 3 in long
- Put one corner 2 in to the right of another, whatever the height between them
- Put one circle center 1 1/2 in above another
- Set the distance between two circle centers, along the line between them or across or up the screen
- Hold a size you typed so that later edits cannot quietly change it
Step by Step
- Open a sketch on a plane or a face (see Planes and Faces). Sketching is part of modeling, which comes with the Pro plans.
- Draw the pieces you want to size.
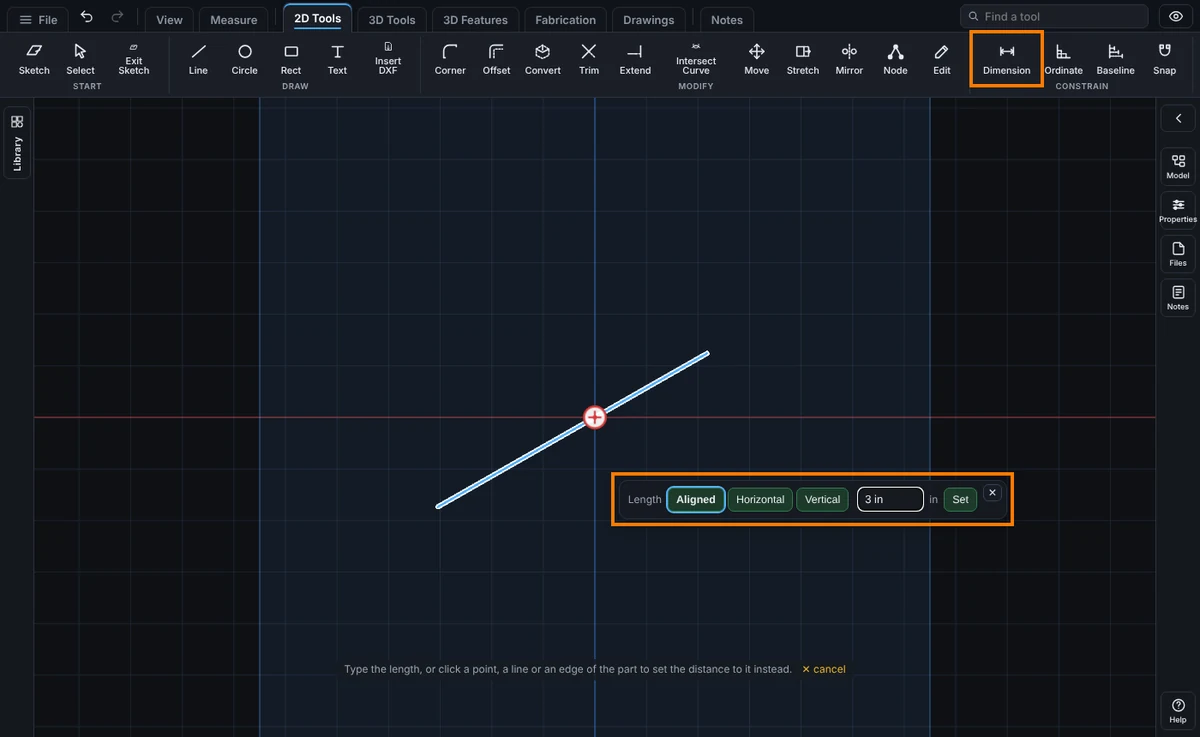
- On the Sketch tab, click Dimension. The prompt at the bottom of the view says what to click.
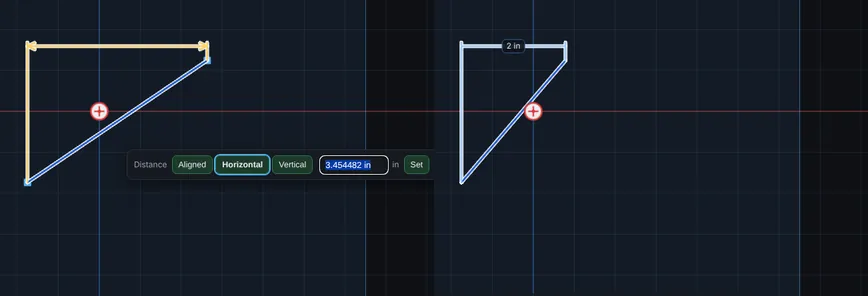
- Click the first point, such as the end of a line, a corner, or the center of a circle. Then click the second point. A box opens with the distance and three buttons: Aligned, Horizontal and Vertical.
- Click Horizontal for the distance across the screen only, or Vertical for the distance up the screen only. Leave Aligned for the straight distance between the two points. The number in the box changes to match, and a preview of the dimension is drawn.
- Type the size, such as
2 inor1 3/8, and press Enter. The second point moves and the dimension is kept.
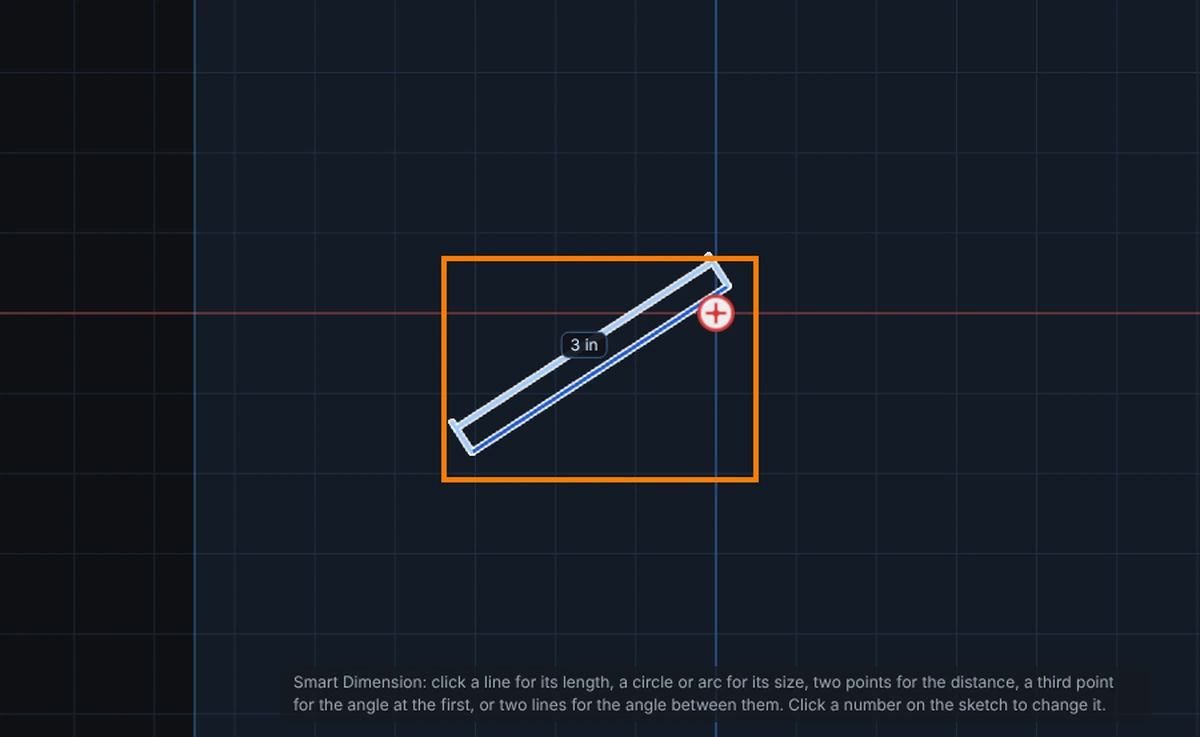
To size a line by itself, click the line instead of two points. The box says Length and offers the same three buttons for the line's two ends.
Options
- Aligned: the straight distance between the two points, along the line that joins them.
- Horizontal: only the part of the distance that runs across the screen. The height between the points is left alone.
- Vertical: only the part that runs up the screen. The width between the points is left alone.
- A point and a line: click a point, then a line. The distance is square to the line, so only the aligned choice is offered.
- Two lines: click both. Parallel lines give the distance between them. Lines that are not parallel give an angle, see Angle Dimensions.
Across and up mean across and up the way you see the sketch, even when the sketch plane is turned on screen.
Change or Switch a Dimension
- Click the number on the sketch. The box opens again with its buttons.
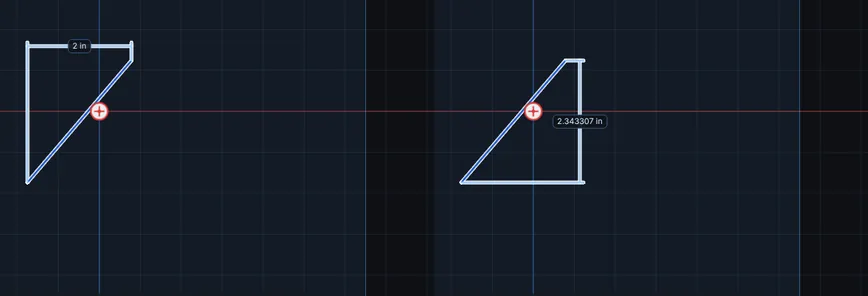
- Type a new size and press Enter. Or click Aligned, Horizontal or Vertical to switch the same dimension to another kind.
- Switching never moves anything. The dimension is remade from the sketch as it is, with the number you now see. Then type a new size if you want one.
- Press Ctrl+Z once to take a switch back.
Names and Formulas
Every dimension gets a name when you place it, such as D1@Sketch1, and the box can hold a formula instead of a number.
- Place a dimension, type
3 inand press Enter. It is namedD1@Sketch1. - Click the number on the sketch. The box opens with the name after the number. To rename it, type a new name and press Enter.
- Place another dimension and, instead of a number, type a formula such as
D1@Sketch1 * 2. Press Enter. The second dimension follows the first, and its number on the sketch starts with Σ. - Change the first one later and the second follows it, in the same Undo step.
The formula can use numbers with units, + - * /, brackets, other dimensions by name, and sin, cos, tan, sqrt, abs and pi. A formula that would make a circle, or uses a name that is not there, is refused with a message and nothing changes. See Equations, and the Equations Walkthrough for a step by step example with pictures. Edit, Equations... lists every equation of the sketch.
Reference Dimensions
A dimension normally drives the sketch. A reference dimension only shows a size: it is drawn in grey, in brackets, follows the sketch as you change it, and controls nothing.
- When a new dimension would over define the sketch (the sketch already sets that size, or the two cannot hold together), the box asks Make it a reference dimension? Click Make it a reference dimension to keep the size as a reference, or Cancel to add nothing.
- Click any number on the sketch, or right-click it, and the box has a Make reference button. On a reference dimension the same button reads Make driving.
- A reference dimension cannot be typed into. Its number box is read only and Set is off.
See Reference Dimensions for the steps and what to expect.
Tips and What to Expect
- A dimension you set is held by the sketch solver. Dragging or editing other pieces will not change it, and a change that would break it is refused with a message and nothing moves.
- The side you drew on is kept. If the second point is left of the first, Horizontal keeps it on the left.
- If the two points are level one way, that choice would be a distance of zero. It is refused, and nothing changes.
- A dimension that cannot hold together with the others, or that would over define the sketch, is not added until you choose: the box offers a reference dimension instead, and Cancel adds nothing. A change to a dimension already there that cannot hold is refused with a message and nothing moves. See Relations and Reference Dimensions.
- Each dimension is listed under Constraints in Edit on the Sketch tab as Distance, Horizontal distance or Vertical distance, with its name. It is saved with the sketch and comes back when you open it again.
- One Undo takes back a dimension, and Redo puts it back.
- Type a unit to use a different unit for one entry, such as
25mmwhile working in inches. - Press Help while Smart Dimension is armed to open this page.
Common Mistakes and Messages
- "Length added and kept true as D1@Sketch1. Click its number to change it; Edit, Constraints lists it. Ctrl+Z takes it back." The dimension is in. The name (D1@Sketch1 here) is what a formula uses.
- "... would over define the sketch. Make it a reference dimension?" The sketch already sets that size. Click Make it a reference dimension to show the size without controlling it, or Cancel and remove the dimension or relation that already sets it.
- "That change cannot hold with the relations and dimensions on it. Nothing changed." The new size fights another dimension or relation. Change that one first, or pick a size that fits.
- "That pair makes no dimension. Pick a point, a circle or a line of the sketch, then the part." The two things clicked cannot be measured against each other. Press Esc and click again, starting with a piece of the sketch.
- "The sketch solver could not load, so the dimension was not added. Try again, or reload the page." The page could not start the part that keeps sizes true. Reload the page and try again.