Ellipse
Draws a whole ellipse. You click the center, the end of the major axis, then a point that sets the minor radius. Or you type both radii. The ellipse is a closed outline that Extrude and Cut use like a circle.
When to Use It
- An oval hole, boss or window
- A cylinder cut at an angle, seen from the side
- Any rounded shape that is longer one way than the other
Step by Step
- Open a sketch on a plane or a face (see Planes and Faces). Sketching is part of modeling, which comes with the Pro plans.
- On the Sketch tab, click Circle. In the flyout, click Ellipse. This flyout stays open so the radius boxes are in reach.
- Click the center of the ellipse.
- Click the end of the major axis. The line from the center to your click sets the direction and the length of the major radius. A dashed line shows it while you move.
- Move the mouse and watch the preview. The distance from the major axis to your mouse is the minor radius. Click to place the ellipse.
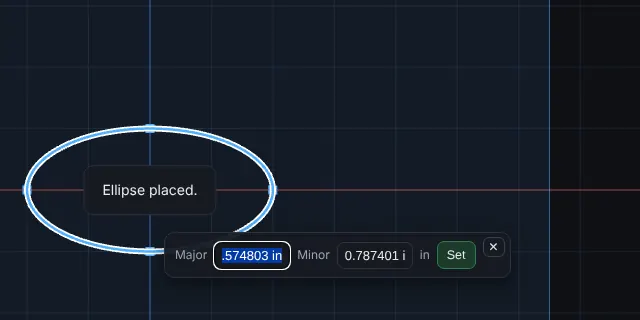
- The ellipse is placed and selected, and a box shows Major and Minor. A message says Ellipse placed. The tool stays armed for another one.
Options
- Major radius and Minor radius (on the flyout): type a size in any unit, like 12, 1 3/8 or 25 mm. A typed value is used instead of the click. A typed major radius keeps the direction you click. Leave a box blank and the click decides. Something that is not a number above zero shows Type a radius more than zero, like 0.5 or 1 3/8, or leave it blank. and the box is cleared.
- Construction Geometry: tick the box at the bottom of the flyout first and the ellipse is drawn dashed as construction geometry. It never cuts or extrudes.
Changing an Ellipse
- Click the ellipse. The Major and Minor boxes appear; type new radii and press Enter or click Set. Each radius stays along its own axis and the center stays put. One Undo takes it back.
- Drag it with the Select tool, or choose it and use Move, Rotate and Scale on the Sketch tab. It stays an ellipse when it is moved, turned or scaled.
- Trim, Extend, Offset Entities, Convert Entities and Sketch Fillet do not work on an ellipse yet.
Tips and What to Expect
- The outline is cut into 512 short steps, so the area is within 0.003 percent of the exact area (pi times the two radii) and an extrusion has the right volume. This is the same for a fat ellipse and a thin one.
- An ellipse has no relations of its own and cannot take a Smart Dimension yet. Use the Major and Minor boxes, or type the radii before you place it.
- Clicking the end of the major axis on the center, or a minor radius of nothing, shows Click away from the center and off the major axis, or type both radii.
- If the minor radius is longer than the major one, you still get the ellipse; it is simply longer the other way.
- Esc after the first or second click cancels the ellipse. One Undo takes back the whole ellipse.
- To cut an oval hole, place the ellipse in a sketch on the face and use Cut (see Features: Extrude and Cut).