Starting a Sketch: Planes and Faces
A sketch starts on one of three planes through the origin, or on a flat face of the model.
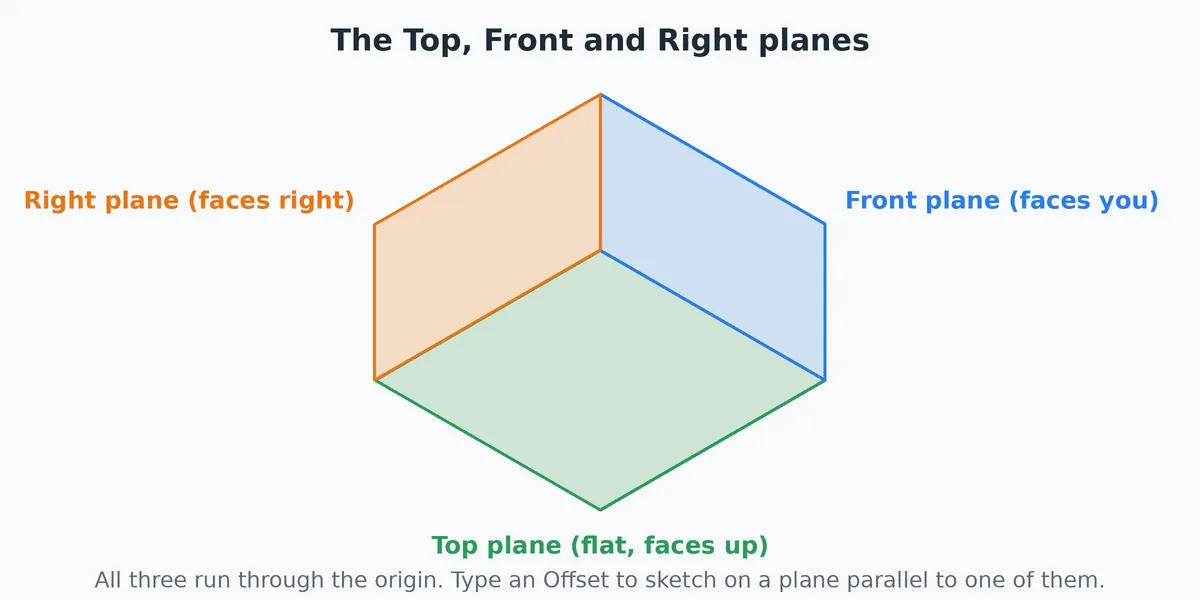
What you get: a sketch open on the plane or face you picked, seen square on with its grid, and the drawing tools (Line, Circle, Rect and the rest) ready to use.
Step by Step: Sketch on a Plane
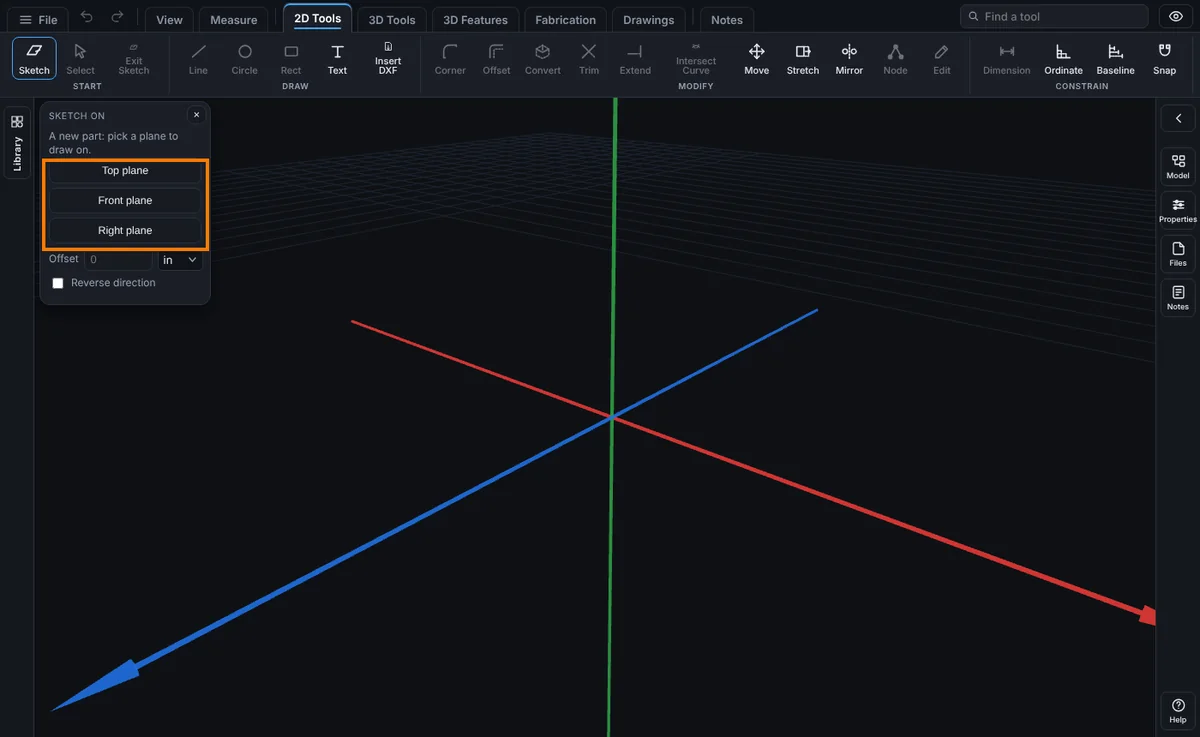
- On a brand new part the Sketch on panel is already open and says "A new part: pick a plane to draw on." Otherwise click the Sketch tab, then Sketch at its left end (or press the tool's key while modeling). Click Sketch only if the panel is not already open.
- Click Top plane, Front plane or Right plane.
- The view turns square to the plane and the sketch opens. Draw with Line, Circle, Rect and the other tools on the Sketch tab.
Step by Step: Sketch on a Face of the Part
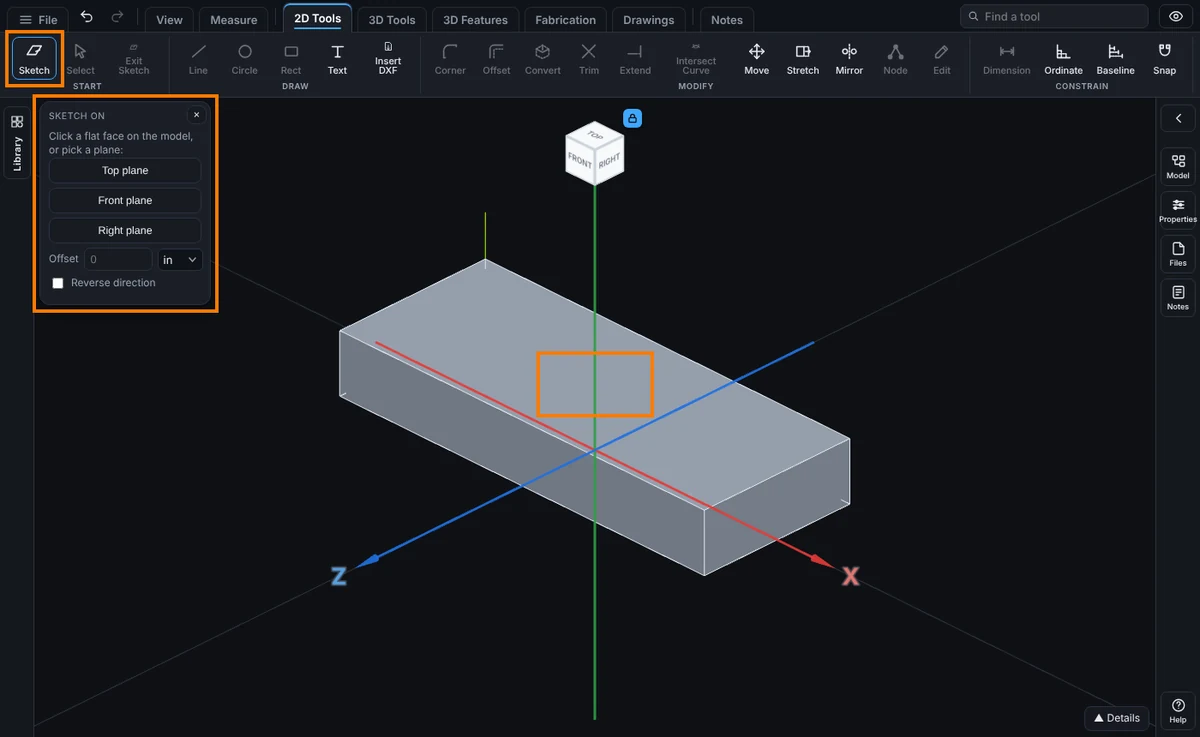
- With a part already made, click the Sketch tab, then Sketch (only if the Sketch on panel is not already open). The panel says "Click a flat face on the model, or pick a plane:".
- Click a flat face of the model, such as the top of a block.
- The view turns square to the face and the sketch opens on it, ready to draw.
When the outline is drawn, make a feature from it (see Extrude and Cut), or click Exit Sketch to keep it for later.
How to Start
Click Sketch on the Sketch tab (or press the tool's key while modeling): the Face tool opens with a "Sketch on" panel offering Top plane, Front plane, Right plane, or click a flat face on the model itself. On a brand-new part with nothing drawn yet, only the three planes are offered, since there is no face yet to click.
The three planes run through the model's origin, named the usual way for a Y-up model: Top is flat with its normal pointing straight up, Front faces you, and Right faces to the right.
Offset Planes
Type a distance in the Offset box before picking a plane or face to sketch on a plane parallel to it instead, at that distance along its normal: up for Top, toward you for Front, right for Right, or straight out of the part for a face. A negative number, or the Reverse direction toggle, goes the other way. Type any unit to override your display unit, like 10mm or 1/4 in.
What You See
Once a plane or face is picked, the sketch opens with that plane's grid aligned to the screen, and the Sketch tab's line, circle, rectangle, and other tools become available (see Line, Circle, Rectangle, Arc, and Construction for every shape on their flyouts). The Model tree shows an entry for the open sketch, which stays there (used or not used yet) until it is cut, extruded, or discarded.
Common Mistakes and Messages
- "This face is not flat, so it cannot carry a sketch." You clicked a curved face, such as the inside of a hole. Click a flat face, or pick a plane and use Offset to move it where you need it.
- "Could not read this face as a plane." The face could not be read as flat. Pick another face or one of the three planes.
- I cannot click a face on a new part. A new part has no faces yet. Pick Top, Front or Right first and make the first feature.
- The Offset went the wrong way. Type a minus number, or tick Reverse direction, to go the other way.
- The Sketch on panel closed. It closes once a plane or face is picked. Click Sketch again to open it.
Tips
- A sketch on a face needs that face to be flat; a curved face cannot carry a sketch.
- An offset plane created this way is reused: sketching on the same offset again reopens the same plane rather than creating a new one.
- Sweep and Loft need a profile sketch and a path (or several profile sketches) each on its own plane; Exit Sketch finishes a sketch without turning it into a feature yet, so it can wait in the Model tree for Sweep or Loft to use.