Flip side to cut Walkthrough
A step by step example of Flip side to cut: a square bar turned into a round post by one cut. For everything the option can do, see Flip side to cut.
Before You Start
- Modeling comes with the Pro plans.
- The examples use inches. Use any unit you like, and type it after the number.
Make a Square Bar
- Open a sketch on the Top plane and draw a rectangle 3 in by 3 in with the Center Rectangle tool.
- On the Features tab, click Extrude, set Depth to
2 inand click Extrude.
Cut Away the Outside
- Click Sketch, then click the top face of the bar. Draw a circle 2 in across, centred on the face.
- On the Features tab, click Cut. Set Depth to
2 in. - Tick Flip side to cut.
- Click Cut. The four corners of the bar are removed, and a round post is left.
- The Model tree reads Cut circle d 2 in, 2 in, outside removed.
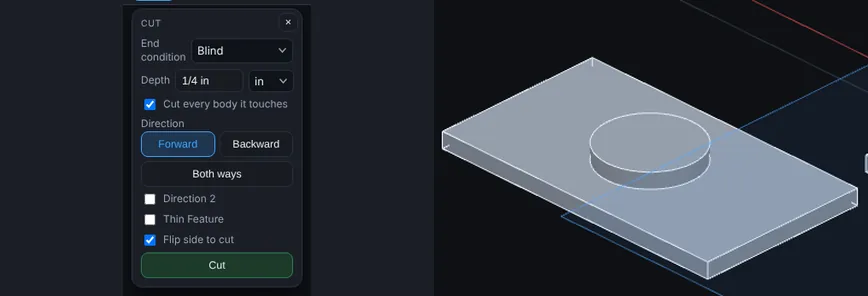
Try It the Other Way
- Right-click the step in the Model tree and choose Edit Feature.
- Untick Flip side to cut and press Enter. The step becomes a plain cut: the round hole goes through the bar and the corners stay.
- Tick it again to bring the round post back.
Tips
- Set the depth at least as deep as the part, or the cut leaves material underneath.
- Press Esc, or click the X, to close the Edit Feature editor without a change.