Extrude and Cut
Extrude and Cut are both on the Features tab. Both work from a closed sketch profile open on a plane. Extrude adds material by pushing the profile out to a depth; Cut removes material where the profile passes through the part.
What you get: a new solid (or new material joined to the part) for Extrude, or a hole or pocket for Cut, as one step in the Model tree that you can undo, edit or delete.
Step by Step: Extrude a Block
- Open a sketch on the Top plane. On a new part the Sketch on panel is already open: click Top plane. Click the Sketch tab, then Sketch, only if the panel is not already open (see Planes and Faces).
- Draw a closed shape. For a rectangle, click Rect, then click Rectangle in the list that opens (a drag draws nothing until a shape is chosen). Then drag from one corner to the opposite corner and let go.
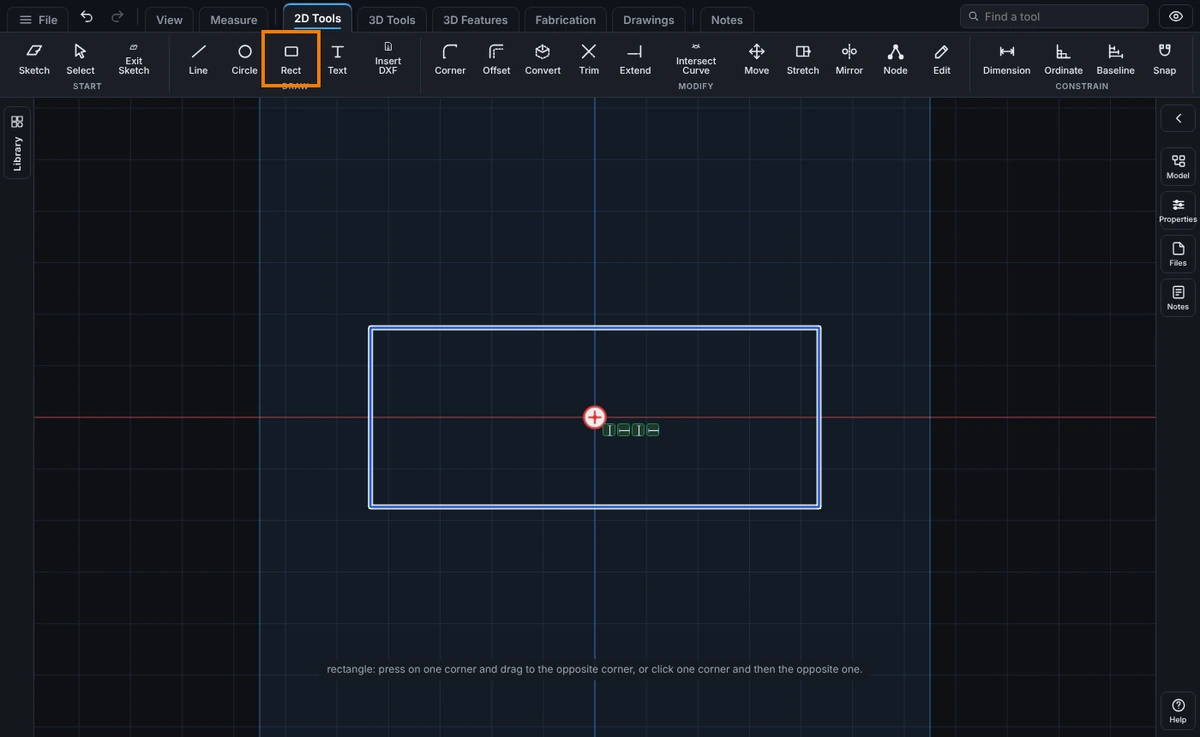
Step by Step: Set the Depth and Extrude
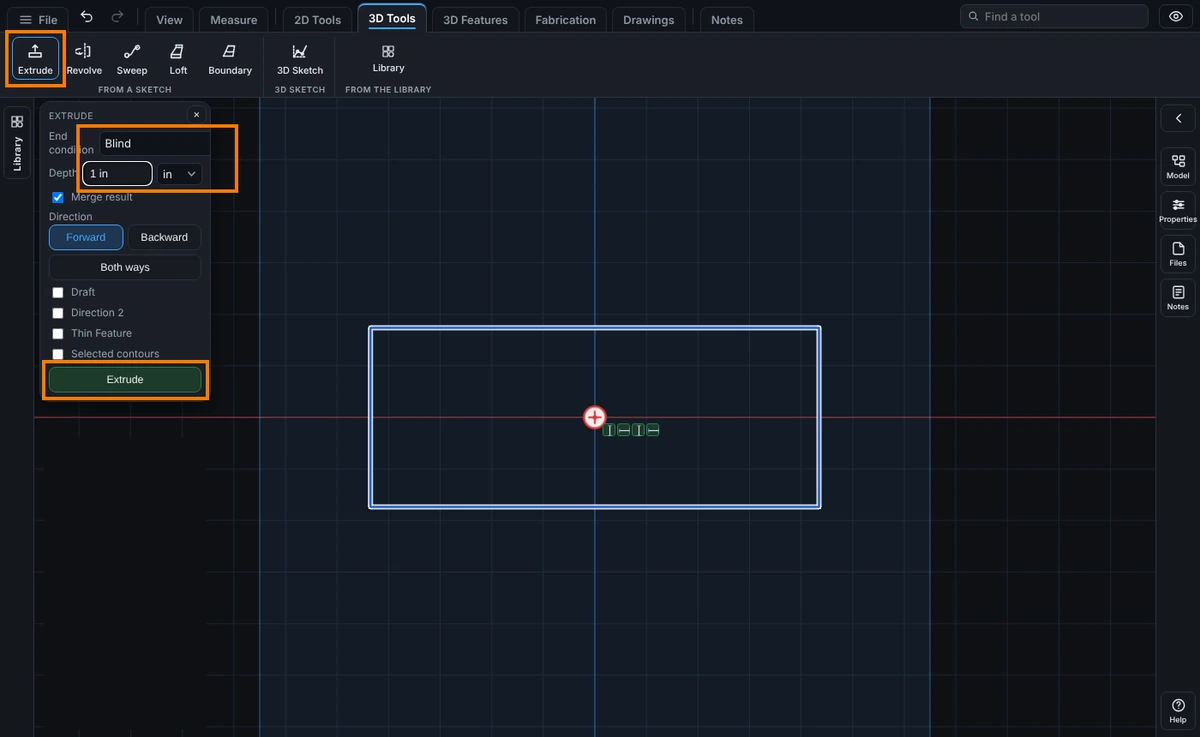
- Click the Features tab, then Extrude. The Extrude panel opens on the left.
- Leave End condition on Blind and type the Depth, like
1 inor25 mm. - Leave Direction on Forward (or choose Backward or Both ways), and tick any options you need (below).
- Press the green Extrude button at the bottom of the panel. The solid appears. On a new part a message says "That is the start of your part. Keep sketching and extruding; save it with File, Save."
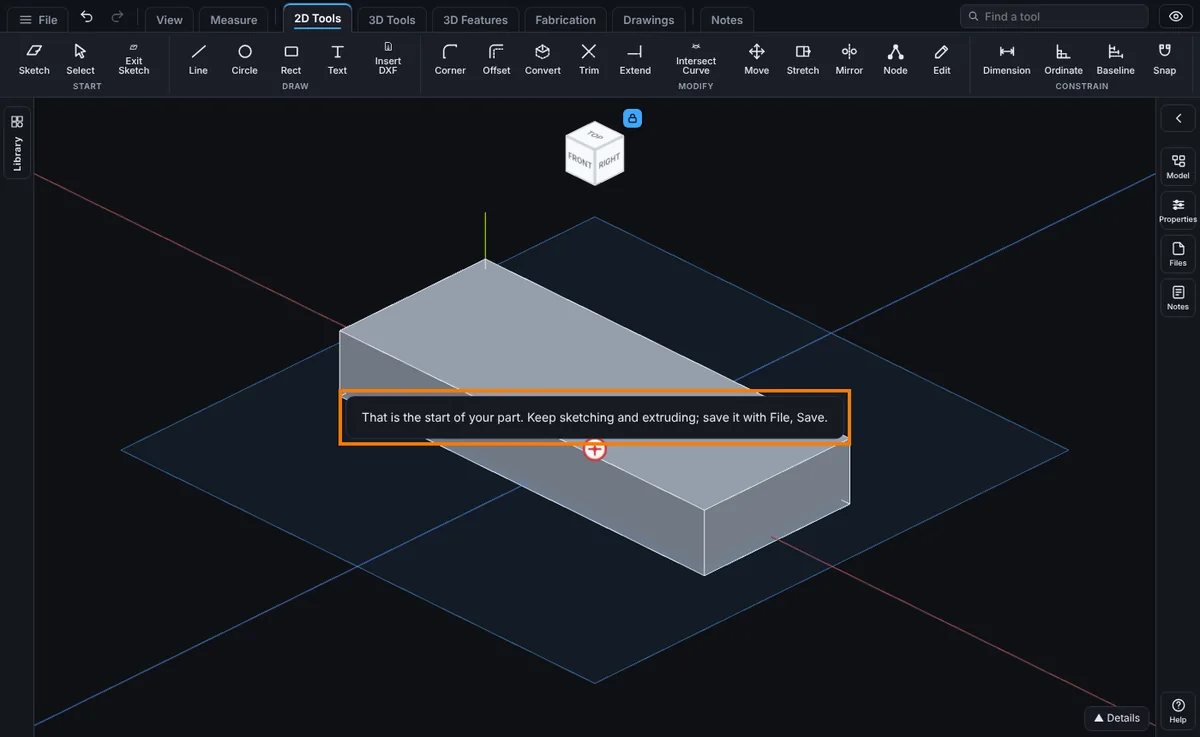
You stay in the sketch, so you can draw the next profile on the same plane. Click Exit Sketch on the Sketch tab when you are done.
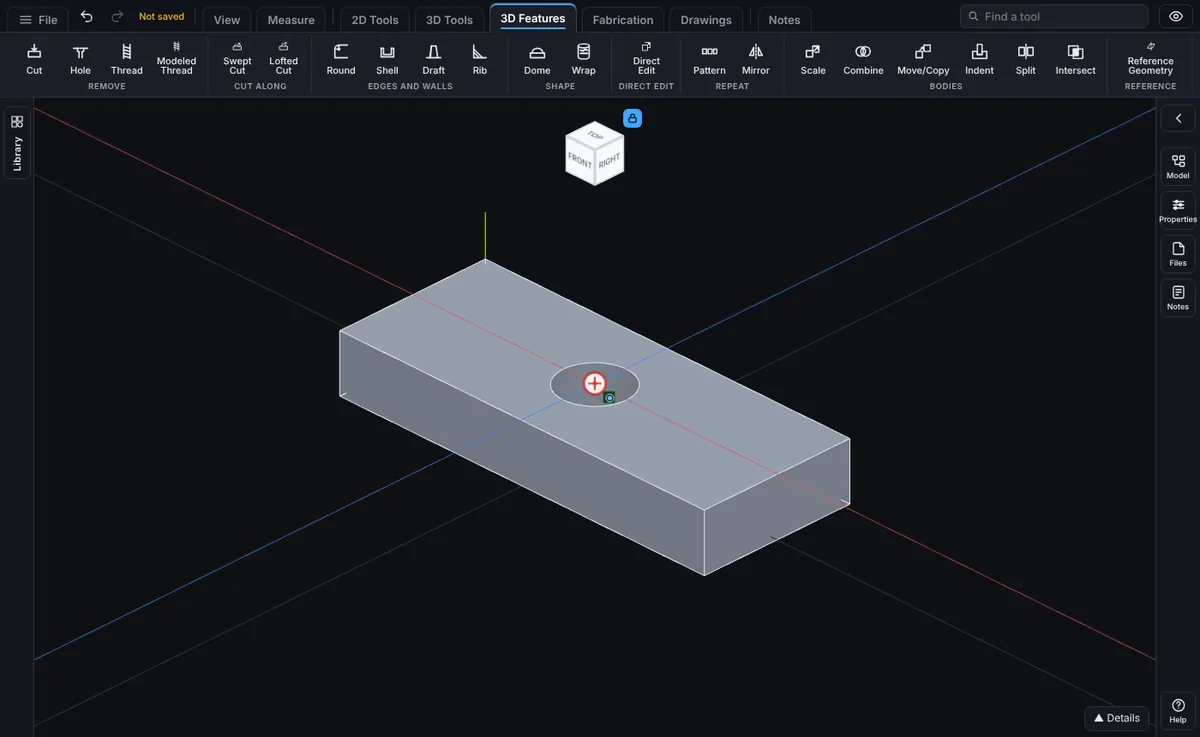
Step by Step: Cut a Hole Through It
- Click the Sketch tab, then Sketch (only if the Sketch on panel is not already open), and click the top face of the part. The sketch opens on that face.
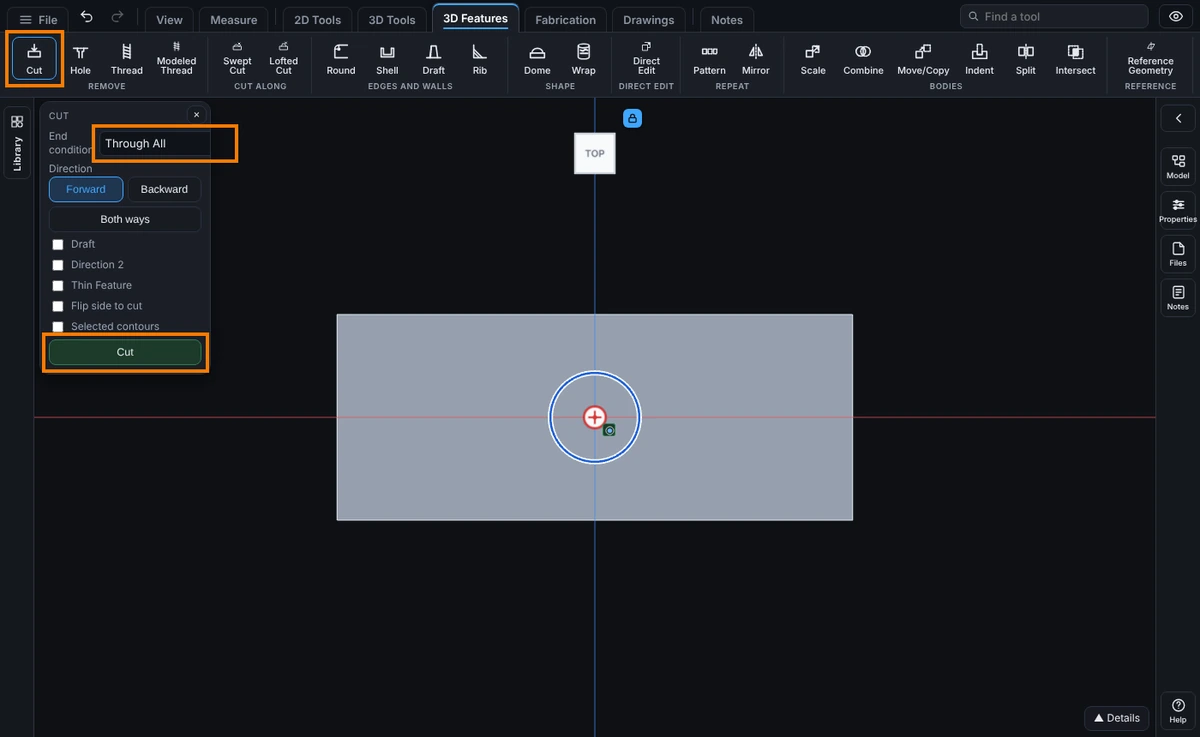
- Click Circle, then click Circle in the list that opens. Then drag from the center out to the size you want.
- Click the Features tab, then Cut. The Cut panel opens.
- Set End condition to Through All to cut all the way through, or leave Blind and type a Depth for a pocket.
- Press the green Cut button. The hole is cut and appears as a Cut step in the Model tree.
How to Start
Click Extrude to add material out of a closed profile, or Cut to remove material where the profile passes through the part.
What to Pick
- Depth (Blind only): how far the extrusion or cut goes. Type any unit to override your display unit, like
10mmor3/8 in. A formula using the names of the sketch's dimensions works too, likeD1@Sketch1 / 4; it is worked out once, when you press Extrude or Cut, and does not follow later changes (see Equations). - Direction: Forward (the default: out of the part for Extrude, into it for Cut), Backward (the opposite way from the sketch), or Both ways (splits the depth evenly on each side of the sketch plane).
- End condition: how the feature ends. Blind uses the Depth you type. Through All (Cut only) cuts all the way through the part whatever the depth. Up To Next stops on the first face the profile meets (see Up To Next). Up To Surface stops on a face you click, with an optional Offset Distance and Reverse offset (see Up To Surface). Offset From Surface is Up To Surface with an Offset Distance it asks for and Translate surface (see Offset From Surface). Up To Next and Up To Surface take no depth, and Both ways is off for them.
- Direction 2: a second direction, opposite to the first, with its own End condition: Blind with its own depth, Through All (Cut only), Up To Next or Up To Surface. The two are made as one feature. Both ways is greyed out while it is on (see Direction 2).
- Thin Feature: makes a wall of a set thickness from the profile, closed or an open chain of lines and arcs. Choose One-Direction, Mid-Plane or Two-Direction, and type the thickness (see Thin Feature).
- Flip side to cut (Cut only): removes the material outside the profile instead of inside (see Flip side to cut).
- Draft: leans the side walls by an angle as the profile is swept. Tick it and type the Draft angle, from 0.01 to 85 degrees (it starts at 2). The walls lean inward, so the outline gets smaller the further it goes; tick Draft outward to make it grow instead. It works the same way for Extrude and Cut, with Blind, Through All, Both ways, Up To Next and Up To Surface. Direction 2 has its own Draft box, angle and Draft outward, so each side can lean its own way. With Thin Feature on a closed outline the inside and outside of the wall lean together, so the wall keeps its thickness.
- Merge result (Extrude only): ticked, the new material joins whatever body it touches; unticked, it becomes a separate body, saved as its own part even where it overlaps another.
- Bodies to cut (Cut only, multibody models): with more than one body in the part, choose which bodies the cut works on, or leave Cut every body it touches ticked for all of them; the rest stay whole even where the cut sketch passes through them.
- Selected contours: work on only the regions you click. Where closed shapes in the sketch overlap or cross, or a line runs across one, each area they make is its own region. Tick the box, then move the pointer over the sketch: the region under it lights blue, and a click adds it (orange) or takes it out again. Clear picks starts over, and closing the panel or leaving the sketch drops the picks. The regions you pick are extruded or cut together, with any unpicked region inside them left as a hole, and a picked region inside a hole made as its own piece. Each piece that does not touch another becomes its own step. Selected contours does not go with Thin Feature.
What You See in the Model Tree
Each Extrude or Cut appears as its own step, named for what it does (for example "Extrude" or "Cut"), in build order. The sketch it used is consumed by the feature and nests under it; right-click the step to Edit Feature (reopen its depth, end condition and options) or Edit Sketch (change the profile itself).
Common Mistakes and Messages
- "Sketch at least one closed profile first. Construction lines do not cut." There is no closed shape in the sketch. Draw a rectangle, a circle or joined lines that make a loop.
- "The lines and arcs do not close into an outline yet. Join the ends (snap to points) so every corner meets exactly two pieces." The outline has a gap or an extra piece. Drag the loose end onto the point it should meet, or delete the extra line.
- "Set a positive depth, or choose Through All." The Depth box is empty, zero or negative. Type a number more than 0 and pick the side with Direction.
- "Click the face to end on first." Up To Surface needs a face. Press the Face button in the panel and click the face to stop on.
- "Tick at least one body under Bodies to cut, or tick Cut every body it touches." With several bodies, the cut needs at least one body to work on.
- "That cut would remove every body, leaving nothing. Make it smaller, or start over from File, New." The profile covers the whole part. Draw a smaller shape.
- Nothing happens when I press Extrude. A sketch must be open. Click Sketch on the Sketch tab and open one (or right-click a step in the Model tree and choose Edit Sketch), then press Extrude.
- The block went the wrong way. Undo, then choose Backward under Direction and press Extrude again.
Tips
- An extrusion needs a height: a typed depth, or an end condition that finds one for you, Up To Next or Up To Surface.
- The profile must be a closed shape (a rectangle, a circle, joined lines forming a loop) to extrude or cut, unless Thin Feature is ticked: then an open chain of lines and arcs makes a wall.
- A negative or zero typed depth is rejected; type a positive number and choose Direction if you need the opposite side.
- A step made with Selected contours remembers the regions you picked. When its sketch changes (Edit Sketch, or a rebuild after the part changed), each picked region must still be there with the same area and size, and the picks must still make one piece. If not, the step is not changed: it says why (in History, or in a message when you update it from Edit Sketch). Delete the step and make it again with new picks.
- A 40 mm tall boss drafted 2 degrees inward is about 1.4 mm smaller on each side at its top than at the sketch.
- Draft is refused in plain words when it cannot work: "Type a draft angle from 0.01 to 85 degrees, like 2 or 5."; "Draft cannot be used with Flip side to cut."; a Thin Feature made from an open line; and "The draft closes the profile up before the end..." when the walls would meet (or a hole would run into the outline) before the depth is reached. Use a smaller angle, a smaller depth, or Draft outward.
- To taper faces of a part that is already built, use Draft instead.