Line, Circle, Rectangle, Arc, and Construction Geometry
All on the Sketch tab, once a sketch is open.
What you get: lines, circles and rectangles on your sketch, each with a size you typed, ready to join into a closed outline that Extrude or Cut uses as a profile.
Step by Step: Draw a Chain of Lines
- Open a sketch on a plane or a face (see Planes and Faces).
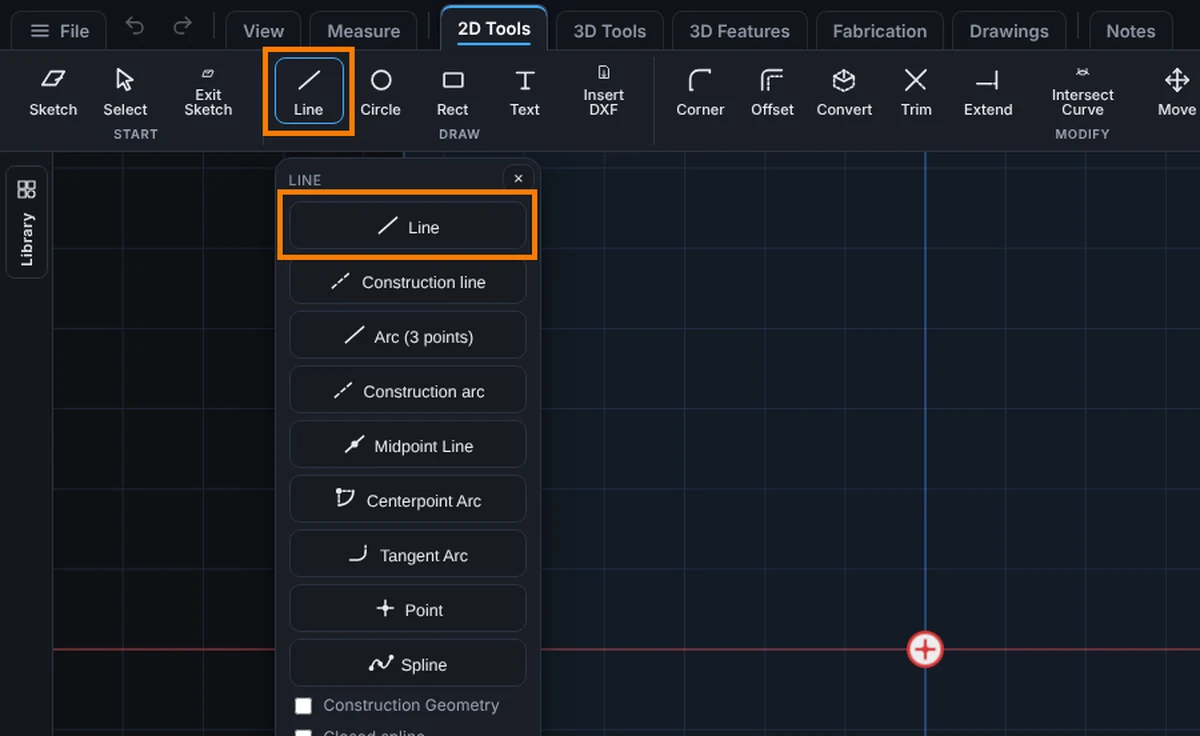
- On the Sketch tab, click Line. The Line list opens; click Line at the top of it.
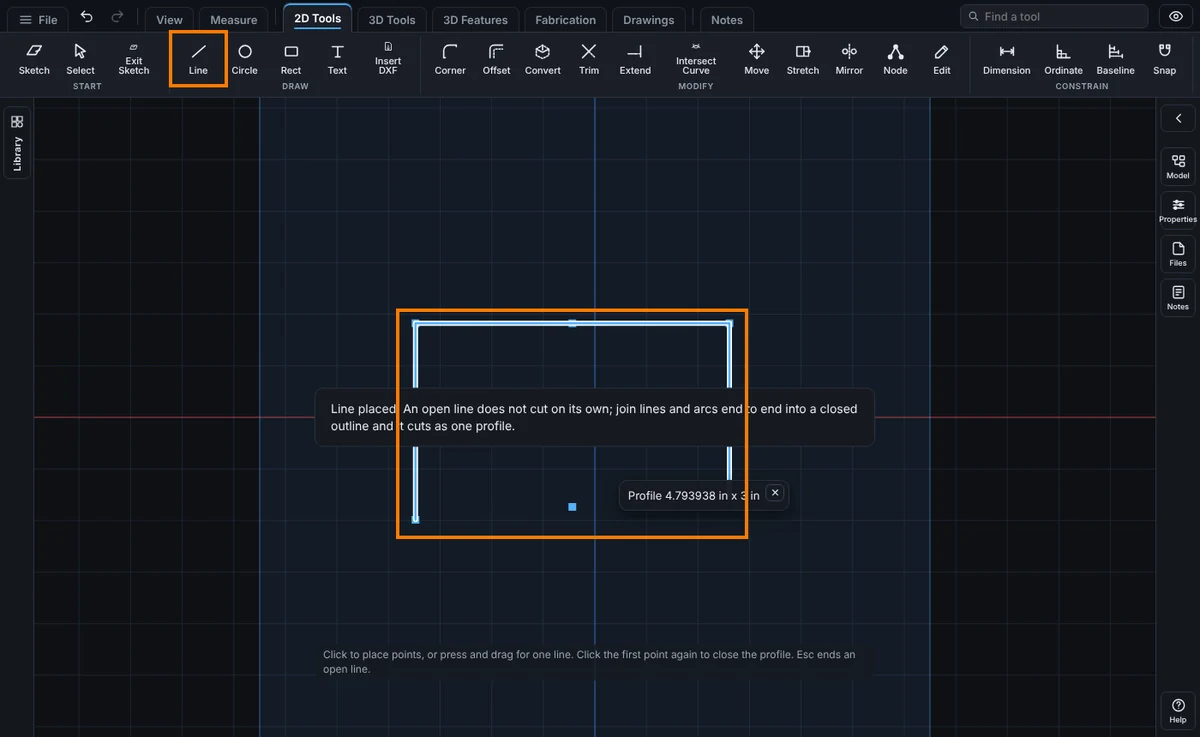
- Click where the line starts, then click each corner in turn. Each click ends one line and starts the next.
- Double-click the last point to end an open chain, or click the first point again to close the outline.
Step by Step: Draw a Circle
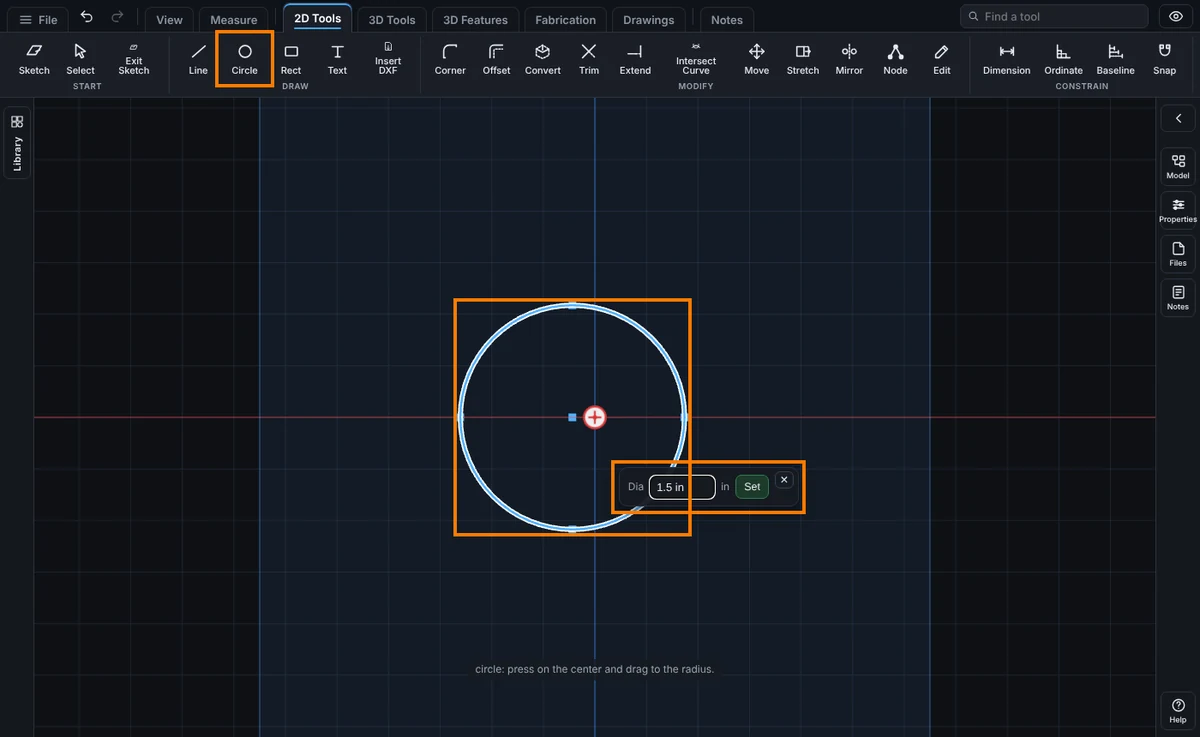
- Click Circle, then Circle at the top of its list.
- Press on the center and drag out to the size you want, then let go.
- The size box opens with the Dia (diameter). Type the size, such as 1.5 in, and press Enter or click Set.
Step by Step: Draw a Rectangle
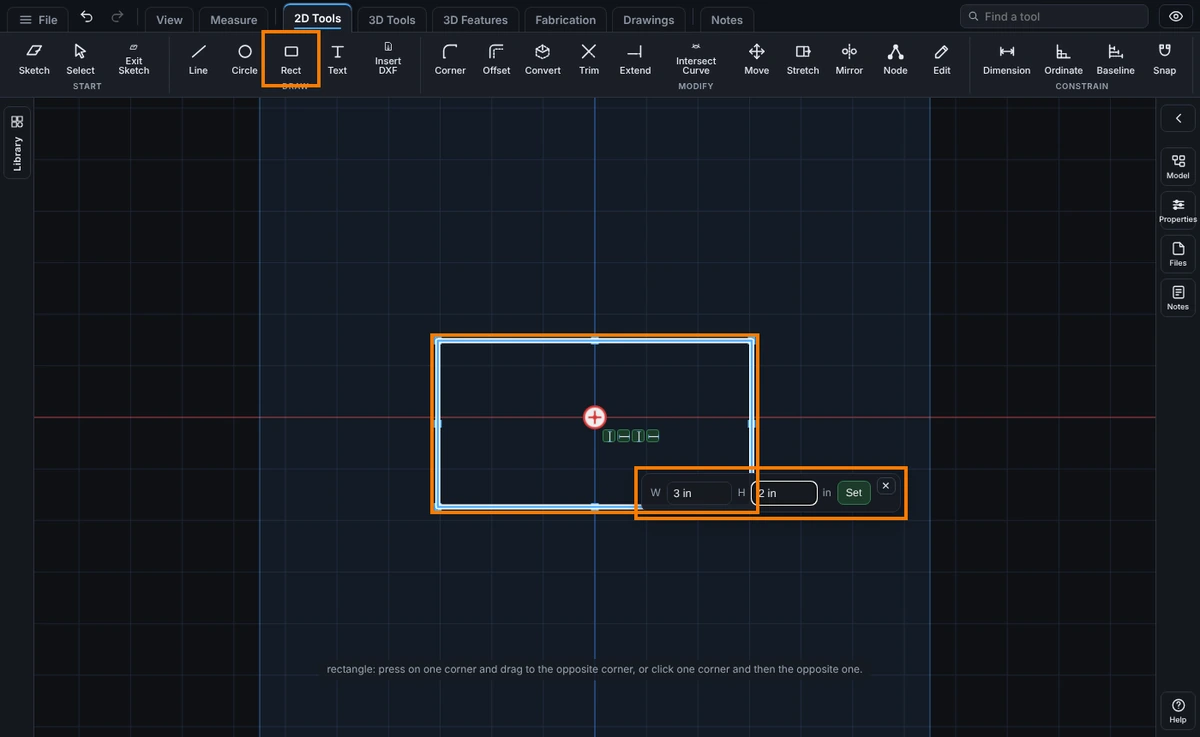
- Click Rect, then Rectangle at the top of its list.
- Press on one corner and drag to the opposite corner, or click one corner and then the opposite one.
- The size box opens with W (across the screen) and H (up the screen). Type each size, such as 3 in and 2 in, and press Enter or click Set.
Line
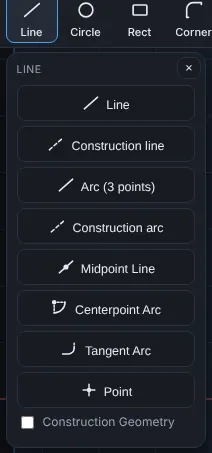
Click Line, then click each point of the line or chain; double-click, or click the tool again, to finish an open chain. The flyout under Line also offers:
- Construction line: drawn dashed, orange; used for layout and relations (an axis to revolve or pattern around, a reference for a relation) rather than for a cut or an extrusion profile
- Arc (3 points): click one end, the other end, then a point the arc passes through; hold Ctrl to lock the chord angle. Arcs do not close a profile for cutting or extruding on their own; use them for layout and dimensions, or combine with lines into a closed chain.
- Construction arc: the same 3-point arc, drawn as construction geometry
- Midpoint Line: click the middle, then one end
- Centerpoint Arc: click the center, the start, then swing round to the end
- Tangent Arc: an arc that leaves the end of a line or an arc smoothly
- Point: a construction marker to snap, dimension and relate to
- Spline: a smooth curve through the points you click, open or closed
Circle
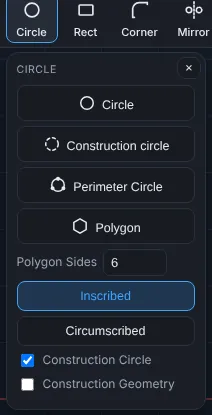
Click Circle, then click a center and drag to size it (or click again to set the radius). The flyout also offers:
- Construction circle, drawn dashed for layout and relations rather than a solid profile
- Perimeter Circle: click three points on the circle
- Polygon: a regular shape with 3 to 40 sides, inscribed or circumscribed
- Ellipse: the center, the end of the major axis, then the minor radius (or type both radii)
- Partial Ellipse: an ellipse, then the start and the end of the arc
- Parabola: the focus, the apex, then the two ends
Rectangle
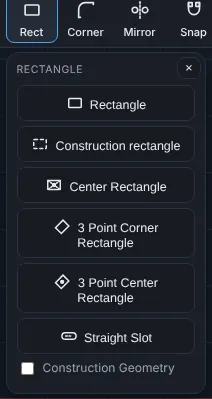
Click Rect, then draw the rectangle either way:
- Drag: press on one corner, drag to the opposite corner and let go.
- Two clicks: click one corner, move the mouse (the rectangle follows it) and click the opposite corner. A press that is let go within 7 pixels of where it started counts as a click, the same as for Line.
Either way you see the same live preview, the corners snap the same, and the rectangle is placed and selected with its size box open for W (across the screen) and H (up the screen). Esc after the first corner cancels, and one Undo takes the rectangle back. A second click level or upright with the first draws nothing; click again where the box has some size. The flyout also offers:
- Construction rectangle
- Center Rectangle: press on the center and drag to a corner, or click the center and click a corner
- 3 Point Corner Rectangle: two corners for the first side at any angle, then the width
- 3 Point Center Rectangle: the center, the middle of one side, then the width
- Straight Slot: the centers of the two round ends, then the width
- Arc Slot: the center of the arc, where the slot starts and ends, then the width
- Parallelogram: three corners, the fourth is worked out
More Shapes at a Glance
Each of these is on a flyout: click the tool's icon on the Sketch tab, then the shape. The prompt at the bottom of the view names the next click. Esc cancels a shape you are in the middle of, and the tool stays armed so you can draw the next one. Click Select to stop. Tick Construction Geometry at the bottom of the flyout to draw any of them dashed. Every shape here is undone in one step.
| Shape | Flyout | Clicks |
|---|---|---|
| Midpoint Line | Line | Middle, then one end |
| Centerpoint Arc | Line | Center, start, then swing to the end |
| Tangent Arc | Line | End of a line or arc, then the new end |
| Point | Line | One click |
| Perimeter Circle | Circle | Three points on the circle |
| Polygon | Circle | Center, then a corner or a side's middle |
| Center Rectangle | Rect | Center, then a corner |
| 3 Point Corner Rectangle | Rect | Two corners, then the width |
| 3 Point Center Rectangle | Rect | Center, a side's middle, then the width |
| Straight Slot | Rect | Two round end centers, then the width |
| Arc Slot | Rect | Center, start, swing to the end, then the width |
Pressing Help while one of these is armed opens its page.
Construction Geometry
Anything marked construction (a dashed orange line, circle, arc, or rectangle) helps you build and constrain the sketch but is never itself cut or extruded, the usual idea of a construction entity in CAD.
Trim and Extend
Trim is on the Sketch tab beside Corner, and Extend is in Advanced on the same tab. They cut a piece back to where another piece crosses it, or run an end on to the next piece, so you do not have to delete and redraw.
- Power Trim: press and drag across pieces to cut them away at their crossings
- Trim to Closest: click a piece to remove it up to the nearest crossings, or all of it when nothing crosses it
- Extend: click near the end of a line or an arc to run it on to the next piece it meets
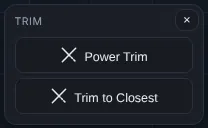
Click Trim to open the flyout and pick a mode, or click Extend to start at once. Esc ends the tool. Each one is undone in one step, new ends are tied to the piece that cut them, and pressing Help while one is armed opens its page.
Offset, Convert, Fillet and Chamfer
Offset, Convert and Corner are on the Sketch tab beside Trim. They copy, bring in and finish the pieces you already have.
- Offset Entities: copy a line, arc, circle or whole connected outline a set distance away
- Convert Entities: click an edge or a face of the part to bring its edges into the sketch
- Sketch Fillet: round a corner with an arc of the radius you type
- Sketch Chamfer: cut a corner with a straight line, by equal distance, two distances or a distance and an angle
Click Corner to open Sketch Fillet and Sketch Chamfer. Esc ends the tool. Each one is undone in one step, and pressing Help while one is armed opens its page.
Dimensions
Dimension is on the Sketch tab beside Node. It sizes a piece and keeps the size true.
- Smart Dimension: the length of a line, and the distance between two points, along the line, or across or up the screen only
- Radius and Diameter: size a circle by either one, and switch between them
- Angle Dimensions: the angle between two lines, the angle an arc sweeps, and the angle at a point between two others
- Reference Dimensions: a dimension that only shows a size, in grey and brackets, and controls nothing
- Equations: every dimension has a name, and a dimension can follow a formula of the others. A step by step example is in the Equations Walkthrough
Click Dimension, click what you want to size, type the number and press Enter. Click a number on the sketch to change it. Each one is undone in one step, and pressing Help while Dimension is armed opens its page.
Sizing and Snapping
Double-click any drawn piece to open its size box, focused and ready to type a new value; see Relations for what "fully defined" and the colors mean, and Dimensions and Units for sizes and units. Snap settings (grid, endpoint, midpoint, angle, and others) live under Snap on the Sketch tab; see Sketch Snaps in that flyout for the full list and the snap angle.
Common Mistakes and Messages
- "Line placed. An open line does not cut on its own; join lines and arcs end to end into a closed outline and it cuts as one profile." The chain you ended does not close. Draw on from its last end back to its first point, so the outline closes.
- "Profile closed. Sketch another, or set a depth and Cut or Extrude." Good news: you clicked the first point again, so the Line chain closed into a profile. Draw the next shape, or go on to Extrude or Cut.
- "Closed outline: ... Cut or Extrude uses it as one profile." Good news: the last line or arc closed the outline. It is ready for Extrude or Cut.
- "Click to place points, or press and drag for one line. Click the first point again to close the profile. Esc ends an open line." This prompt at the bottom of the view says Line is still armed. Click Select, or press Esc, to stop drawing.
- The rectangle did not appear. The second click was level or upright with the first, so the box had no size. Click again where the box has some width and height.
- A circle or rectangle is the wrong size. Double-click it to open its size box, type the size and press Enter.