Up To Next Walkthrough
A step by step example of Up To Next: two plates with a gap between them, and a block that fills the gap without a single measurement. For everything the end condition can do, see Up To Next.
Before You Start
- Modeling comes with the Pro plans.
- The examples use inches. Use any unit you like, and type it after the number.
Make Two Plates
- Open a sketch on the Top plane and draw a rectangle 4 in by 3 in with the Center Rectangle tool.
- On the Features tab, click Extrude, set Depth to
1/2 inand click Extrude. This is the lower plate. - Click Sketch. In the Sketch on panel, type
2 inin the Offset box, then click Top (see Reference Planes). The sketch opens on a plane 2 in above the first plate. Draw the same rectangle. - Click Extrude, set Depth to
1/2 in, untick Merge result and click Extrude. This is the upper plate, its own body. - The Model tree lists two bodies, with a gap of 1 1/2 in between them.
Fill the Gap
- Open a sketch on the top face of the lower plate. Draw a rectangle 2 in by 1 in inside the plate.
- Click Extrude.
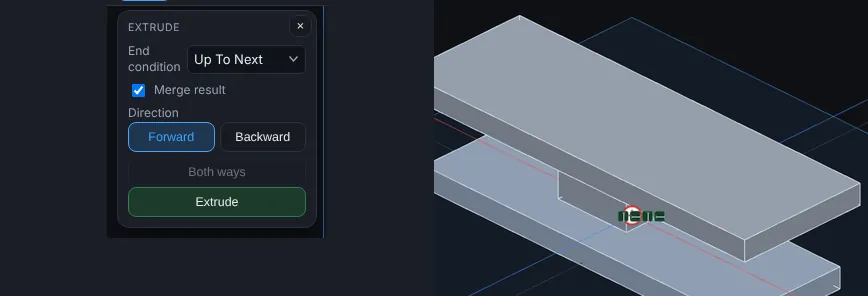
- In End condition, choose Up To Next. The Depth box is gone, and Both ways is greyed out.
- Leave Merge result ticked and click Extrude.
- The block grows from the lower plate and stops on the underside of the upper plate. The two plates are now one body.
- In the Model tree, the step reads up to next.
When Nothing Is in the Way
- Open another sketch on the top face of the lower plate and draw a rectangle that sticks out past the edge of the upper plate, so part of it has nothing above it.
- Click Extrude and choose Up To Next, then click Extrude.
- The feature is refused: Up To Next: part of the profile has no face to stop at in this direction. Choose Backward, change the profile, or pick a face with Up To Surface. Nothing is added.
- Move the rectangle so it is all under the upper plate, and try again.
Read the Step
- In the Model tree, find the new step. It reads up to next.
- Its depth is the distance the engine measured, 1 1/2 in. You never typed it.
Options
- End condition: Up To Next.
- Direction: Forward or Backward.
- Merge result: joined or separate.
Tips and What to Expect
- The step stores no depth of its own. Each rebuild finds the first face again.
- Cut works the same way, and only stops on the bodies it works on.