Pattern
Repeats sketch pieces or a feature in a row, a grid, or around an axis: linear and circular patterns in one tool.
What you get: copies of a hole, a post or any other step, set out at the spacing and count you typed, made as one Pattern step in the Model tree, and a message such as Pattern of step 2: 1 copy. with the new volume.
How to Start It
Click Pattern. First choose what to repeat: click pieces in an open sketch (a hole, a circle, a shape; each click adds one), or pick a feature (an extrude, cut, or hole step) from the Feature list. Nothing is chosen for you.
What to Pick
- In a row (linear) or Round an axis (circular)
- At sketch points or Fill a region: a copy at every point of a sketch, or a closed outline filled with copies on a grid. See Pattern at Sketch Points and Fill Pattern
- From a table: each copy placed by a typed row of X, Y and Turn, any row turned off. See Pattern from a Table
In a row:
- Two independent Direction sections. Each direction's box can be clicked to pick a line of the sketch or an edge of the part to follow (with a sketch open), or, with no sketch open, cycles through the model's X/Y/Z axes
- ⇄ reverses that direction
- Spacing: distance from one copy to the next
- Count: how many along that direction, counting the original; leaving a direction's count at 1 leaves that direction off
- Bidirectional: copies run both ways from the original instead of only forward, with Count each way in place of a single count
- Click a dashed preview copy to skip it individually; click a red (skipped) copy to bring it back
Round an axis: with pieces of an open sketch chosen, the copies turn about a point of the sketch instead, with a different set of boxes: see Circular Sketch Pattern. With a feature chosen (or nothing chosen), the boxes below apply.
- Axis: X, Y, or Z through the origin, or any axis you choose: a Reference axis from the list (made with Reference Geometry), Pick an edge or round face (click a straight edge of the part, or a cylinder face, and the copies turn about that edge or about the round face's axis), then check the line under the buttons that says what it is turning about. The Model tree and History then read, for example, "Pattern of step 2, 4 about Axis1", "about Edge" or "about the axis of a round face"
- Angle: 360 spreads the copies evenly all the way round; a smaller angle puts the last copy at that angle instead
- Count: how many, counting the original
Step by Step: In a Row
- Make the feature to repeat first, such as a Hole step, and close the sketch.
- On the Features tab, click Pattern.
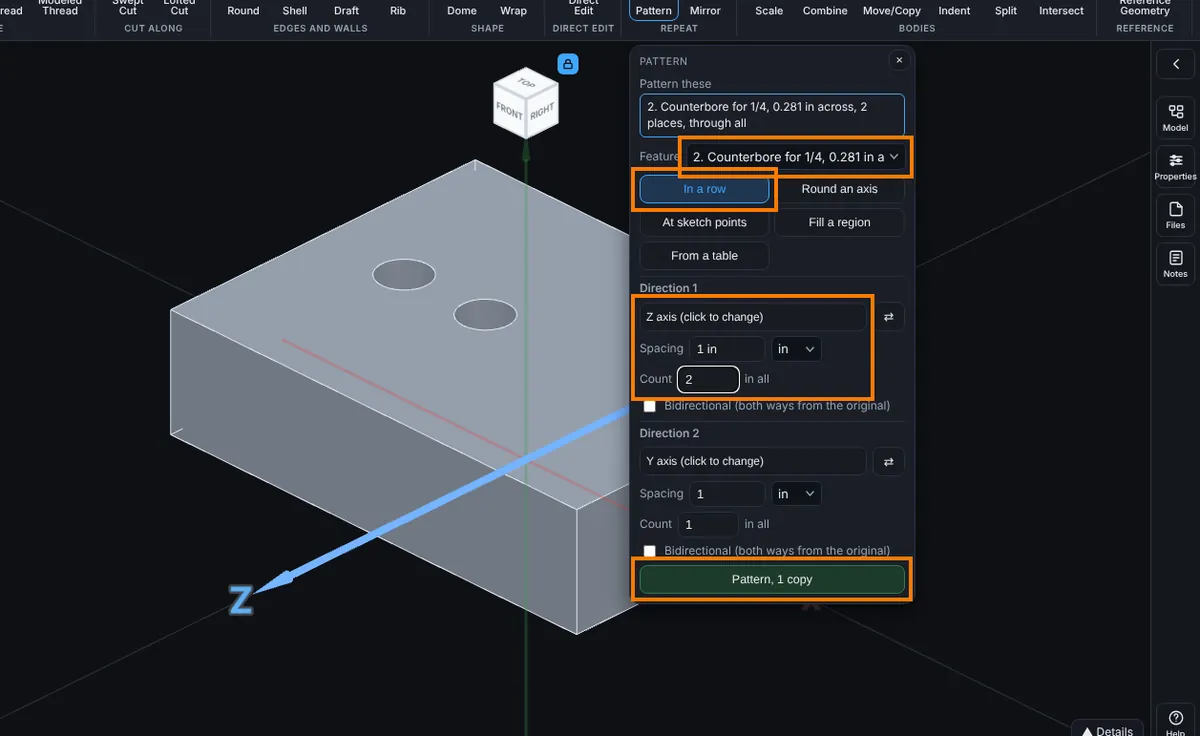
- In Feature, choose the step to repeat (here 2. Counterbore for 1/4...).
- Click In a row.
- Click the Direction 1 box until it names the way the copies run (it goes X axis, Y axis, Z axis), or click ⇄ to run the other way.
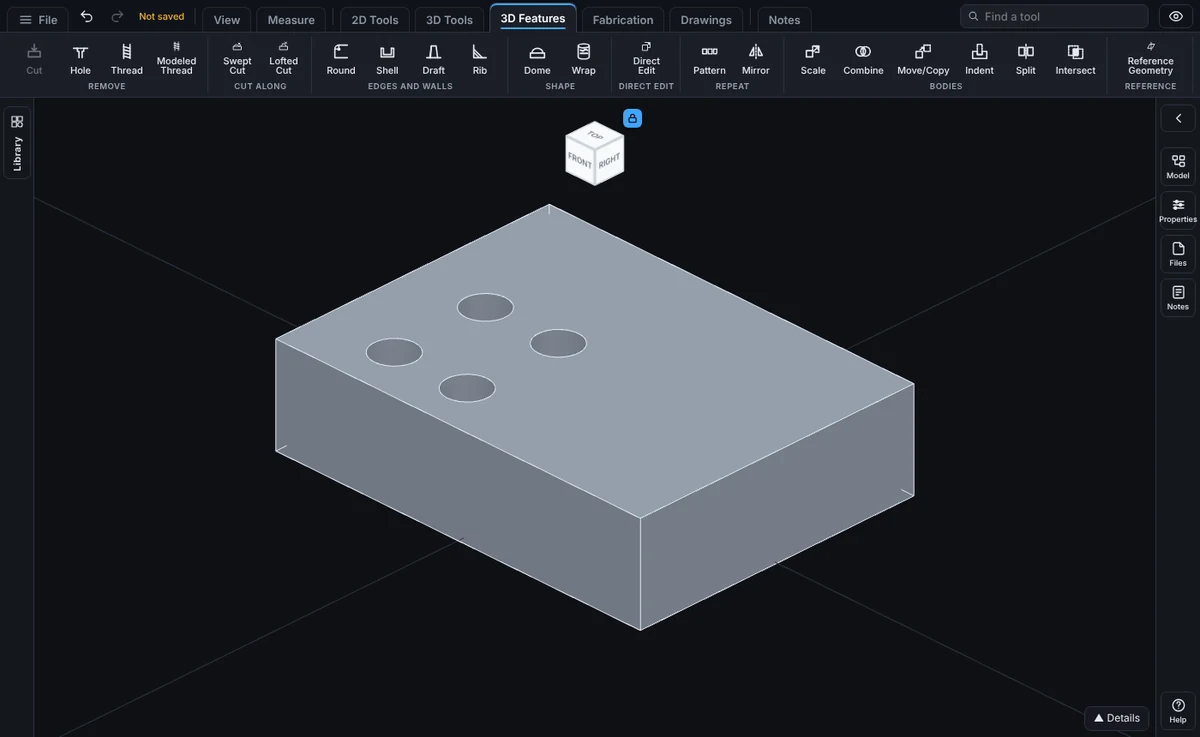
- Type the Spacing (1 in here) and the Count, how many in all, counting the original (2 here). A dashed preview shows every copy.
- Click the button at the bottom. It reads Pattern, 1 copy (or the number of copies).
Step by Step: Round an Axis
- Make the axis first if you need one: on the Features tab, click Advanced, then Reference Geometry, choose Axis, Two points, click two corners and press OK. Axis1 appears in the Model tree. Or skip this and use X, Y or Z, or pick an edge of the part.
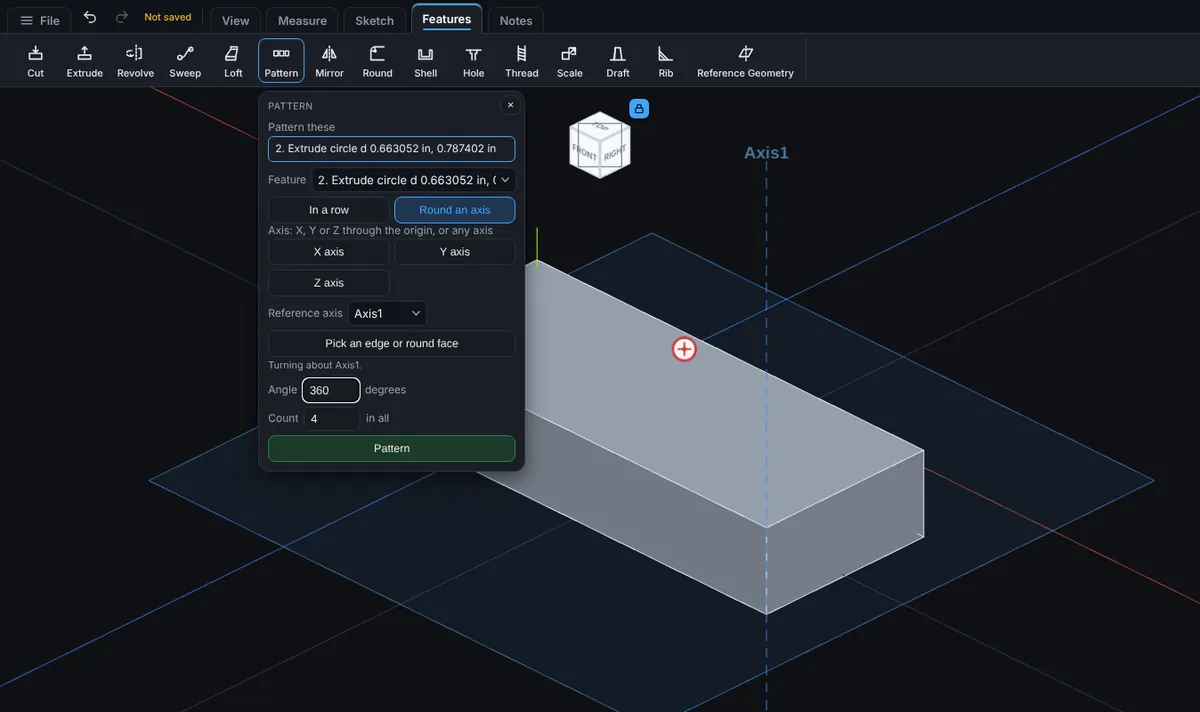
- Click Pattern. In Feature, choose the step to repeat (here an extruded post).
- Click Round an axis.
- Choose the axis: X axis, Y axis or Z axis, a name from Reference axis, or click Pick an edge or round face and then click a straight edge or a round face of the part. The line under the buttons says what the copies will turn about.
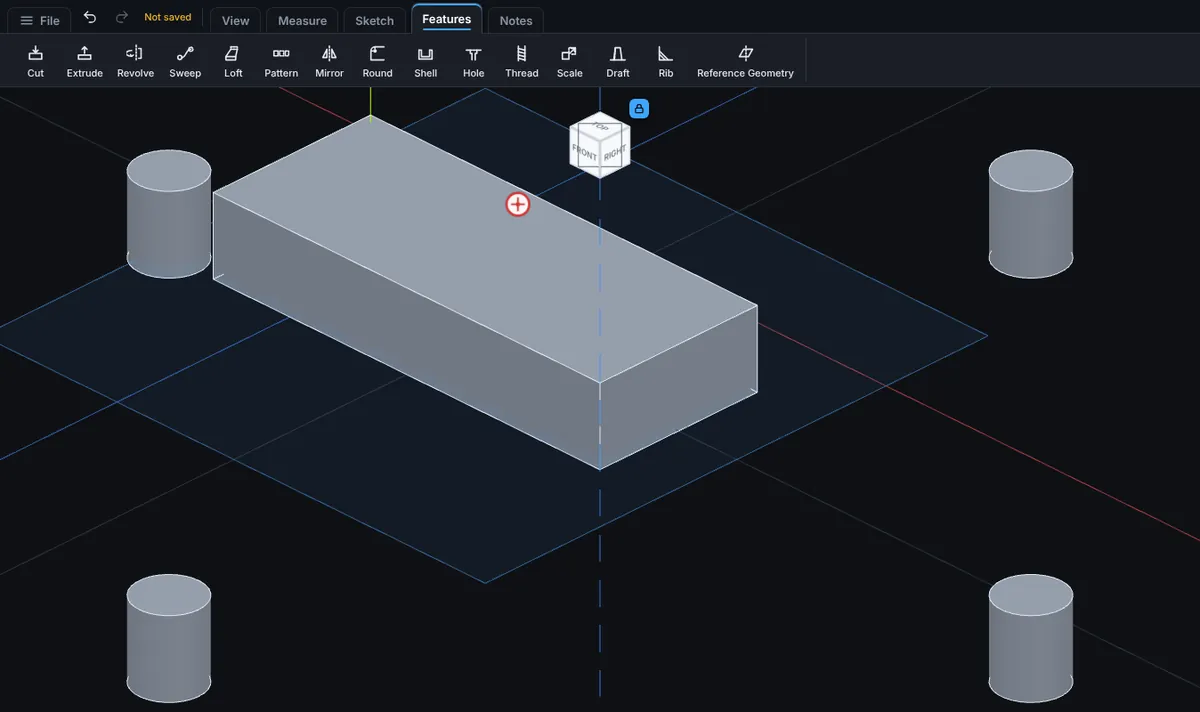
- Type Angle (360 spreads the copies all the way round) and Count (how many in all, counting the original). A dashed preview shows every copy.
- Press Pattern. The Model tree reads, for example, Pattern of step 2, 4 about Axis1.
Steps That End Up To Next, Up To Surface or Flip
A feature whose end is found from the part can be patterned. Each copy is built again from its own place: an Up To Next copy stops on the first face it meets from there, an Up To Surface copy ends on the face that was picked, and a Flip side to cut copy removes what is outside its own outline. A copy that finds no end is refused by its number (Copy 3 of 4 cannot be made. and the reason) and the whole step is left out.
A viewer from 6.333.0 to 6.340.0 refuses a Pattern of a step that ends Up To or is flipped, and stops opening the model at that step. Open such models in this version.
What You See
A dashed preview shows every copy before you apply. The step appears in the Model tree as Pattern, with the source feature or sketch pieces it repeats.
Common Mistakes and Messages
- "Pick what to pattern first: click pieces in the sketch, or choose a feature." Nothing is chosen to repeat. Choose a step in Feature, or click pieces in an open sketch.
- "Type a count of 2 or more, or turn on a second direction or Bidirectional." The Count is 1, so there would be no copy. Raise the Count.
- "Type a spacing more than 0 for each direction in use." The Spacing box is empty or zero. Type a distance, such as 1 in.
- "That pattern makes no copies: raise a count, or skip fewer." Every copy is skipped (red). Click the red copies to bring them back.
- "Pick the axis first: a reference axis, a straight edge, or a round face." With Round an axis and Pick an edge or round face, no edge or face is clicked yet. Click one on the part.
- "Type an angle more than 0 and at most 360 degrees." Fix the Angle box for Round an axis.