Reference Geometry Walkthrough
A step by step example: a plane at 30 degrees along the edge of a plate, a sketch on that plane, a mid plane through the plate, an axis, and then planes and axes made before any solid exists. For everything the tool can do, see Reference Geometry.
Before You Start
- Modeling comes with the Pro plans.
- The examples use inches. Use any unit you like, and type it after the number.
- Make a plate first: sketch a rectangle 8 in by 3 in on the Top plane and extrude it 3/4 in. (The last section shows how to make planes and axes with no solid at all.)
A Plane at an Angle
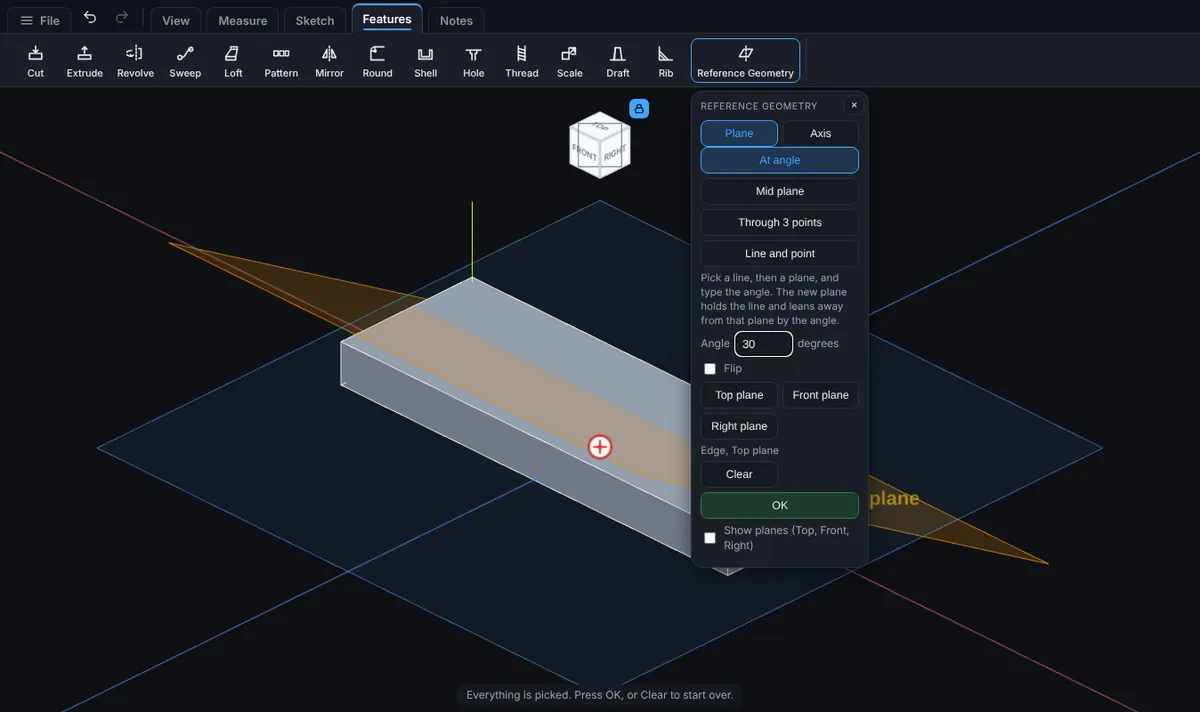
- On the Features tab, click Advanced, then Reference Geometry. Choose Plane, then At angle.
- Click the long top front edge of the plate. That is the line the new plane will hold.
- Click Top plane in the panel. Type
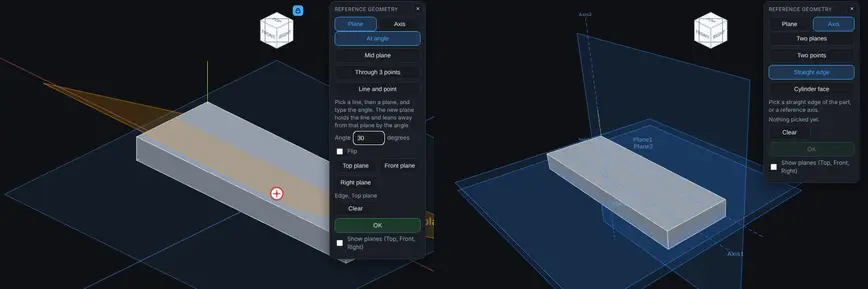
30in the Angle box. - The new plane is shown in orange, leaning 30 degrees up from the Top plane along the edge. Tick Flip to lean it the other way.
- Press OK. The Model tree gets Plane1, described as at 30 degrees to the Top plane through the edge.
Sketch on the New Plane
- Click the blue plane in the view, or right-click Plane1 in the Model tree and choose Sketch on Plane1.
- A sketch opens on the plane, square to it. Draw a circle and extrude it to see a boss that leans with the plane.
A Mid Plane
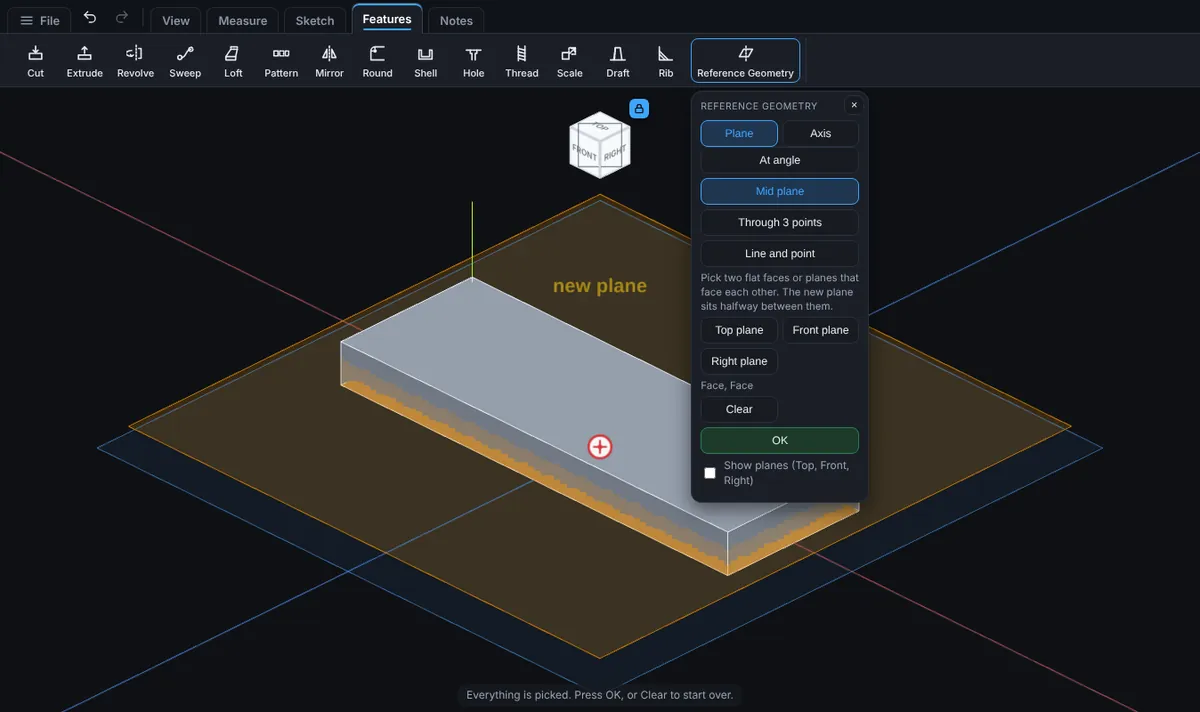
- Open Reference Geometry again and choose Plane, Mid plane.
- Click the top face of the plate, then turn the view and click the bottom face.
- The new plane sits halfway through the plate, 3/8 in from each face. Press OK for Plane2.
- Two faces that are not parallel are refused with a plain message, and nothing is made.
A Plane Through Three Points
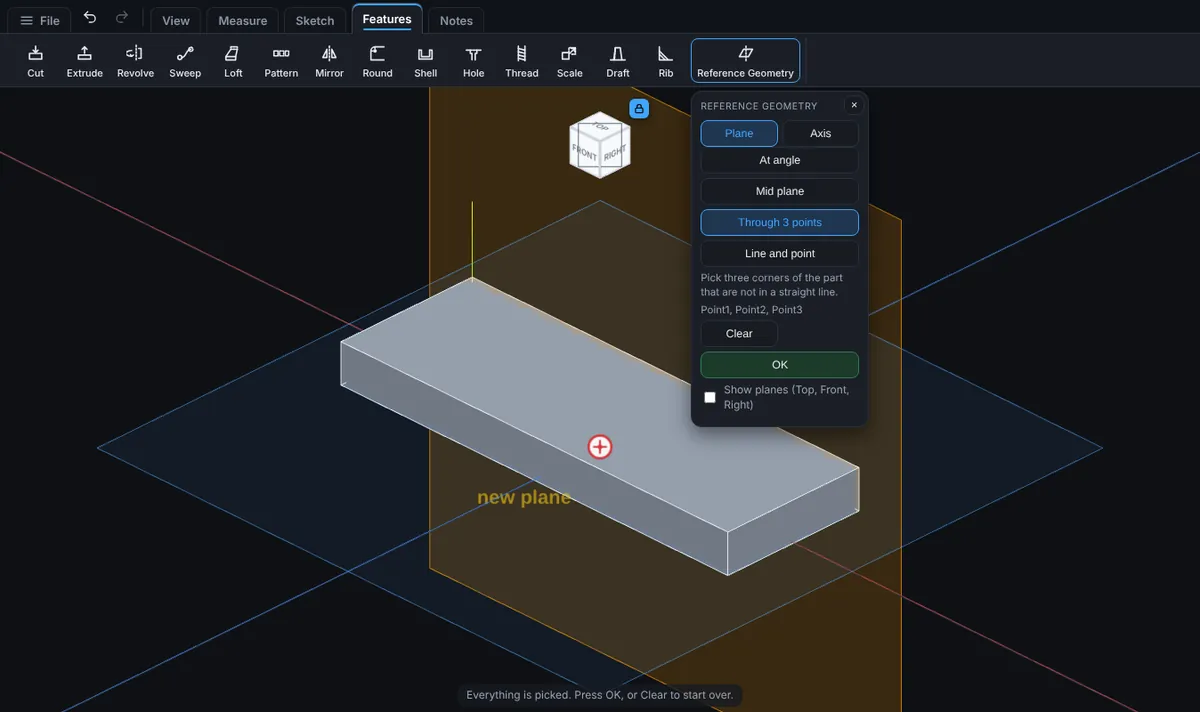
- Choose Plane, then Through 3 points.
- Click three corners of the plate that are not in a straight line, for example the two lower front corners and the upper right front corner.
- The new plane is shown in orange through the three corners. Press OK. Three points in a straight line are refused with a plain message.
A Plane Parallel Through a Point
- Choose Plane, then Parallel through point.
- Click the top face of the plate, then click a corner on the bottom of the plate (or a sketch point, or Origin).
- The new plane is shown in orange, parallel to the top face and passing through that corner. Press OK for the next plane. A point that is already on the first plane is refused with a plain message.
A Plane Square to a Curve
- Choose Plane, then Square to curve.
- Click a straight edge of the plate. The new plane stands square to the edge at its start. Press OK, or pick a corner on the edge first to put the plane there.
- With a sketch open, click a sketch arc or circle instead. The plane is square to the tangent at the arc's start (or where you clicked on a circle), so the curve runs straight through it. Pick a point on the curve to move the plane along it.
- A point that is not on the curve, or past its end, is refused with a plain message. Flip turns the plane round.
An Axis
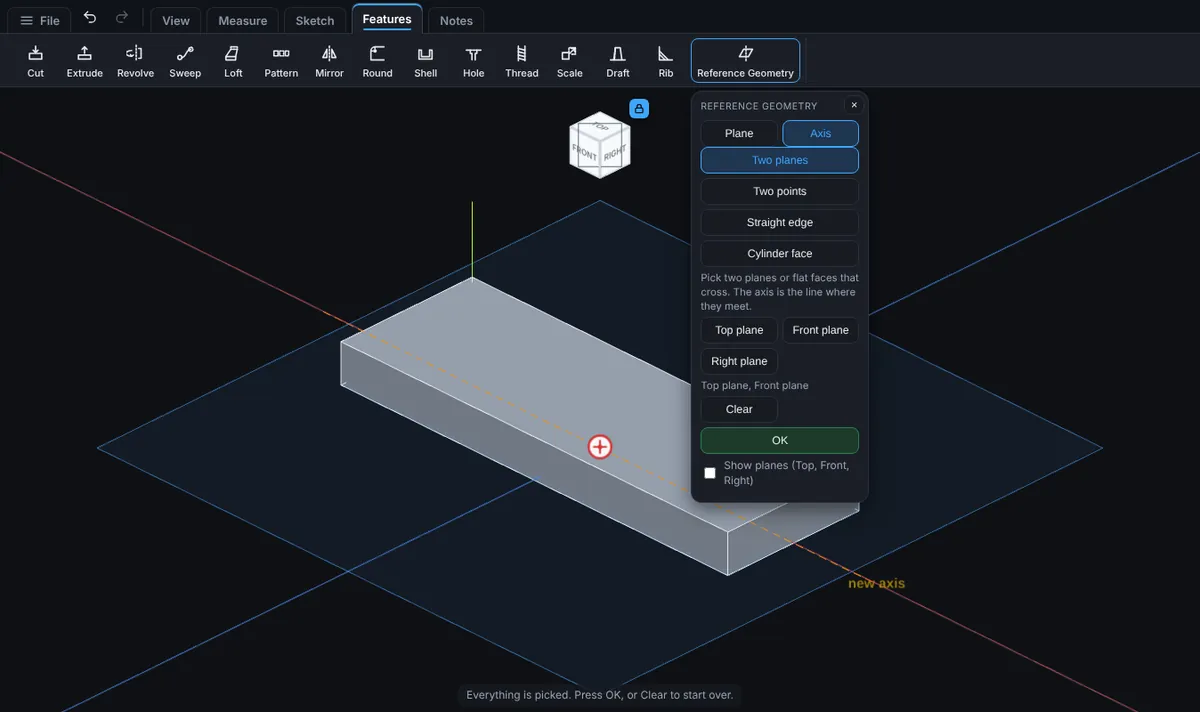
- Choose Axis, then Two planes, and click Top plane and Front plane in the panel. The axis is the line where they meet.
- Or choose Line or edge and click any straight edge or sketch line, or Round face and click a cylinder or a cone to get the line down its middle.
- Press OK. The Model tree gets Axis1.
Planes and Axes With No Solid
- Start a new part with nothing in it. Click Reference Geometry, choose Plane, then At angle.
- Click X axis in the panel for the line, then Top plane for the plane, and type
30in the Angle box. The new plane leans 30 degrees up from Top about the X axis. - Press OK. Plane1 appears in the Model tree with no solid in the part. Right-click it and choose Sketch on Plane1 to start drawing on it.
- To use your own sketch: open a sketch on Top, draw three points, then click Reference Geometry, Plane, Through 3 points and click the three points. The plane is made right through them, wherever they sit in 3D.
- A line and a point work the same way (Line and point: click a sketch line, then a sketch point), and Two points or Line or edge make an axis from sketch points or a sketch line.
- Click Origin to use the origin as a point.
Show, Hide and Undo
- Click the eye beside a plane or axis in the Model tree to hide it or show it again. Hiding does not rebuild the part.
- Show planes in the panel draws the Top, Front and Right planes faintly. It is off until you tick it, and the viewer remembers your choice.
- Undo takes away a plane or axis you just made, like any step.