Measuring
On the Measure tab of the ribbon, a left-hand rail of tools measures the model without changing it.
How to Start
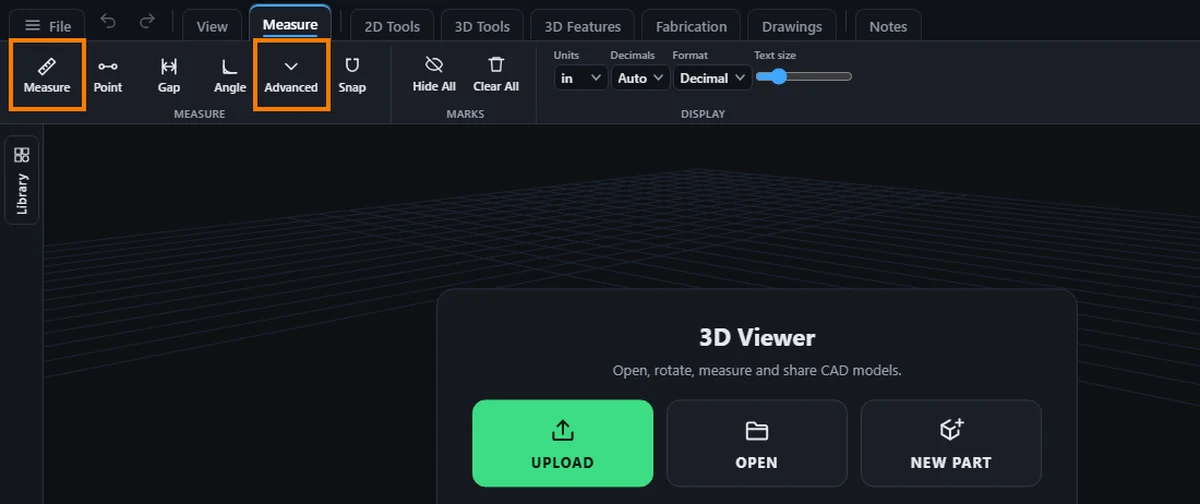
Open the Measure tab, click Measure (the first tool), then click the model. Or click another tool first. Switching to another ribbon tab, or opening Notes, disarms whichever measuring tool was left on, so a click elsewhere is never mistaken for a measurement.
Measure: One Tool for Most Jobs
Measure is the first tool on the tab. Click it, then tap what you want to know about and it picks the measurement: an edge gives its length, a round hole or edge gives its diameter (and radius), and a flat face gives its area.
Step by Step
- Open a part, click the Measure tab, then click Measure, the first tool. It lights up.
- Tap an edge, a round hole, or the middle of a flat face on the part. The number shows on the part and in the readout. Inside a sketch, tap a sketch line for its length, a sketch circle for its diameter or a sketch arc for its radius.
- To keep it, use the pin offered next to the number (see Kept Measurements).
- For a distance between two spots use Point; for the distance between two faces or edges use Gap; for the angle between two faces use Angle. They need two taps, so they stay on the tab.
- For the diameter of a round hole use Hole Size, and for the whole part's weight, center of mass and moments of inertia use Mass Properties. Both are on the tab.
- For anything else click Advanced, at the end of the tool column. It shows Edge, Area, Vol and Mass: the same measurements one at a time, and the whole part's volume and weight. The button then reads Fewer; click it again to tuck them away.
Common Mistakes and Messages
- I tapped a face and got a length, not an area. You tapped close to its edge. Tap the middle of the face; on a small face the middle part is what gives the area, and only a tap right at the edge gives the length.
- On an STL, OBJ, 3MF or glTF file, a tap near the edge of a small face gives a length, or the area is not what I expected. These files have no list of faces, so Measure sizes the face under your tap from the smooth patch of triangles around it. A tap gives the edge length only when it lands within a fifth of that size from the edge (and never more than 4% of the model), so the middle of a small face gives its area. The area shown is the flat patch under the tap, so on a rounded surface it is one flat strip, not the whole curve. If a small flat face still gives a length, tap closer to its middle. A mesh of over 200,000 triangles uses the plain 4% rule until its first area measurement.
- I want the length of a round edge, not its diameter. Open Advanced and use Edge.
- Edge, Area, Vol or Mass is not on the tab. They are in Advanced. Or type the name in Find a tool, which opens the right button for you.
- Vol, Mass or Mass Properties say they need a 3D model. A flat drawing has no volume. Open a part.
The Tools
- Measure: one tool that picks from what you tap: edge length, hole diameter or face area
- Point: distance from one point to another
- Gap: distance between two edges or faces
- Edge (in Advanced): the length of a single edge
- Hole Size: a hole's diameter
- Angle: the angle between two picks
- Area (in Advanced): the area of a face or a picked region
- Vol (in Advanced): the model's total volume
- Mass (in Advanced): the model's weight, worked out from its volume and its assigned material (see Materials and Weight); Volume and Mass are hidden for a flat DXF drawing, since neither means anything for a 2D shape
- Mass Properties: the window with the center of mass (with a marker in the view) and moments of inertia
Snap
Snap toggles whether a measuring pick snaps to corners, edges, and other exact points on the model rather than landing wherever the cursor happens to be, for an accurate pick without needing pixel-perfect aim.
Results
A measurement stays on the model as a mark: a dimension line, a callout, or both, depending on the tool. Marks can be hidden all at once with Hide All (see Marks) or removed individually. See Kept Measurements.