Shell
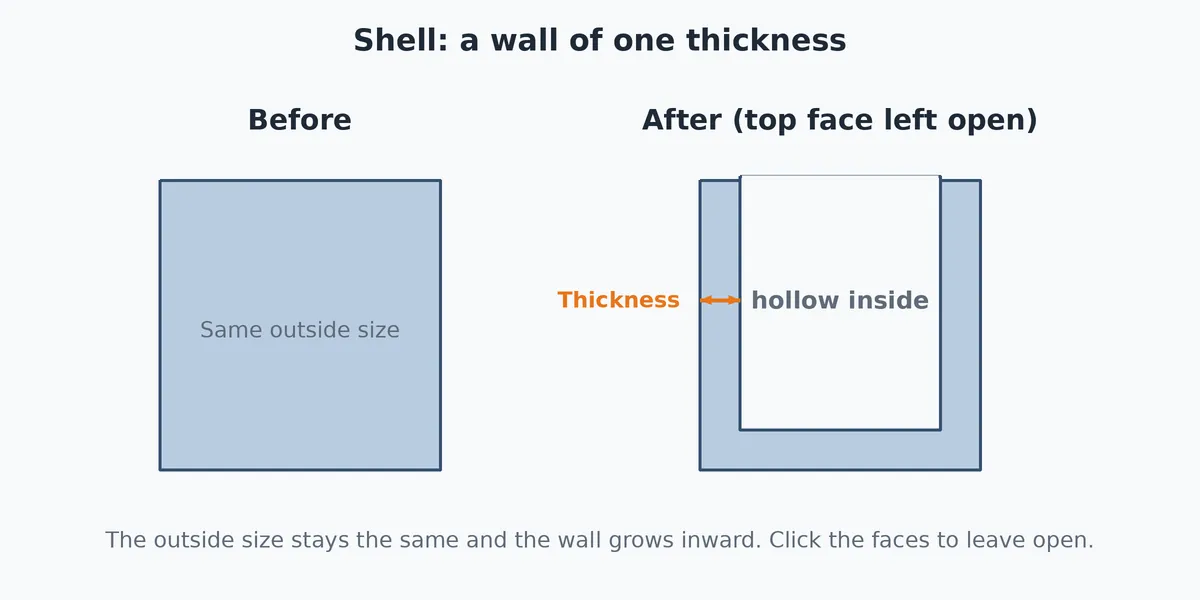
Shell hollows a solid out and leaves a wall of the thickness you choose. You pick the faces to leave open, and the rest of the outside stays closed. With no faces picked the part becomes a closed hollow.
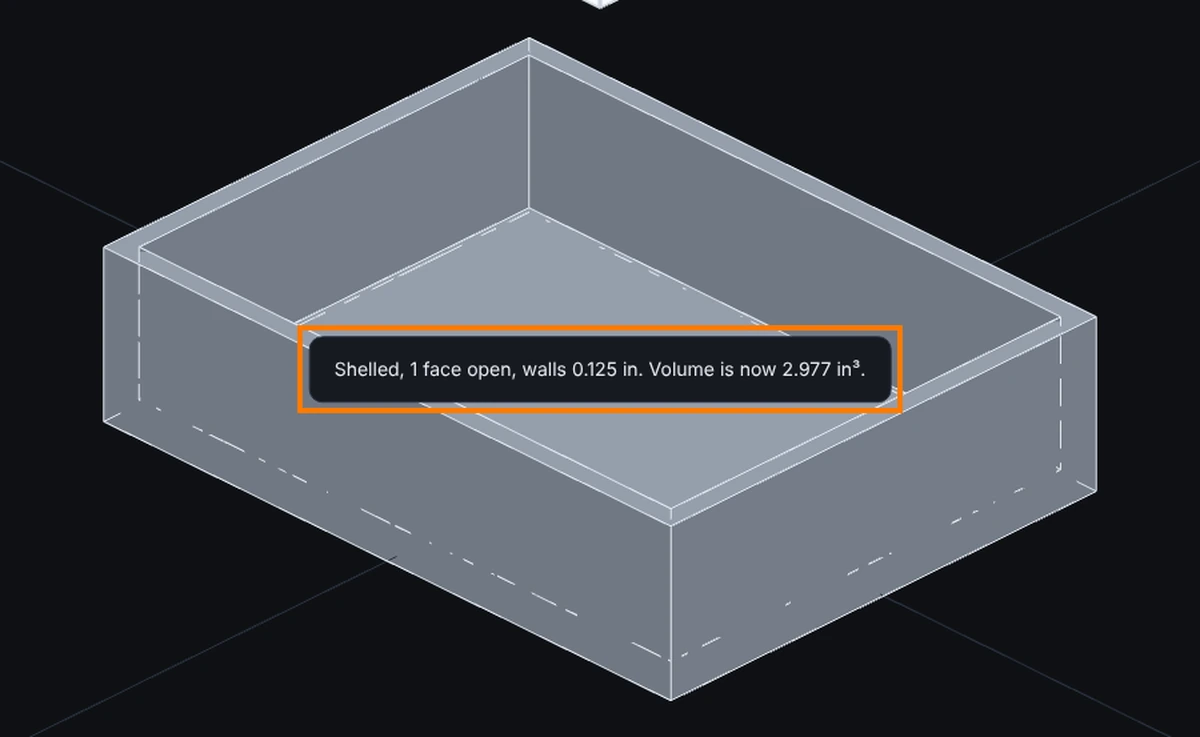
What you get: the solid hollowed out to an even wall of the thickness you typed, with the faces you clicked left open, and a message such as Shelled, 1 face open, walls 0.125 in. with the new volume.
When to Use It
- Turn a solid block into an open-topped box, tray or enclosure
- Make a lighter part with an even wall
- Make a closed hollow part, such as a sealed housing
- Grow a wall outside a part so the inside keeps its size
Step by Step
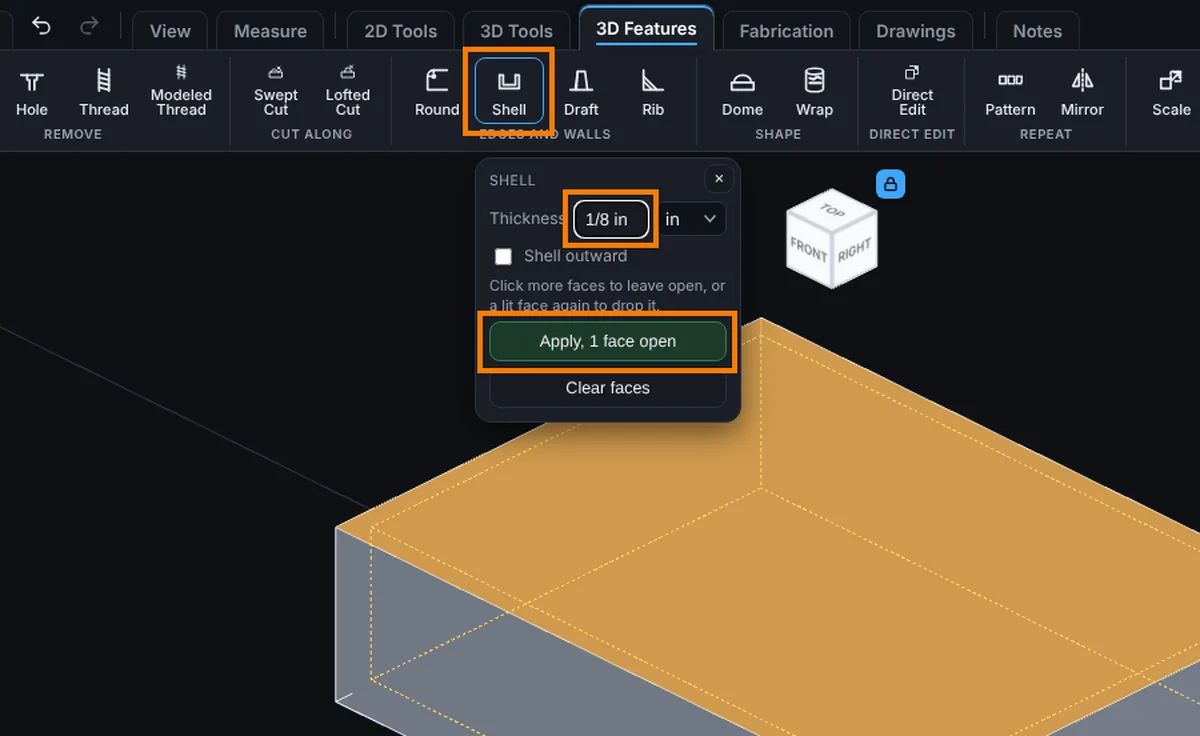
- Click Shell on the Features tab. It is ready for face clicks straight away.
- Click each face to leave open. A picked face is lit orange. Click a lit face again to drop it. To start over click Clear faces.
- Type the wall Thickness. It starts at 1/8 in (3 mm in a metric display). Type any unit to override, such as
3mmor1/8 in. - Tick Shell outward if you want the wall to grow outside the part instead of inside.
- If you picked no face and the part has more than one body, pick the Body to hollow.
- Watch the dashed preview and the volume it would leave. The part is not changed until you apply.
- Click Apply. The button reads Apply, 1 face open (or the number of faces) or Apply, closed hollow when no face is picked.
Options
- Faces to leave open: any number. They become openings in the wall. Flat and curved faces both work.
- Thickness: the wall thickness, more than 0.
- Shell outward: ticked, the walls grow outside the original surface, so the part gets bigger and the inside keeps the original size. The outside corners come out rounded. Unticked, the walls grow inward.
- Body to hollow: shown for a part with more than one body when no faces are picked. With faces picked, the faces say which body.
- Clear faces: drops every picked face.
Edit It Later
Right-click the step in the Model tree and choose Edit Feature. You can switch between Inward and Outward and retype the wall thickness. The faces left open stay as they were picked. To change them, delete the step and shell again.
Tips and What to Expect
- A 4 in cube shelled inward with a 1/4 in wall and one face open becomes a box with 1/4 in walls and a 3 3/4 in deep cavity.
- Shell before you round the edges that touch the opening. Round edges next to an opening can make the walls come out broken.
- The preview is the way to check a wall before you apply.
- A shell works on one body at a time. Faces picked on two bodies are refused.
- The faces you picked stay picked if a shell is refused, so you can change the thickness and apply again.
Common Mistakes and Messages
- "Type a wall thickness more than 0."
- "A shell works on one body at a time, and the faces you picked are on 2 bodies. Shell each body as its own step."
- "This part has 3 bodies. Pick a face of the one to shell, or choose the body to make hollow."
- "That shell could not be built. The wall may be thicker than the part allows..." Try a thinner wall. A part that is already thin-walled has no room for another thick wall, and a face that curves very tightly can also stop a shell.
- "Those walls came out broken, which happens when an opening runs into rounded or chamfered edges." Also click the rounded faces around the opening, or shell before rounding those edges.
- "That shell changed nothing on the part, which means the wall is too thick for it." Try a thinner wall.
- "Open the model for modeling first." Shell needs modeling to be open on a STEP part.